Hand-Forged Farm
  • About Us / Contact

Bee Transfer

30/6/2014

1 Comment

 
Picture
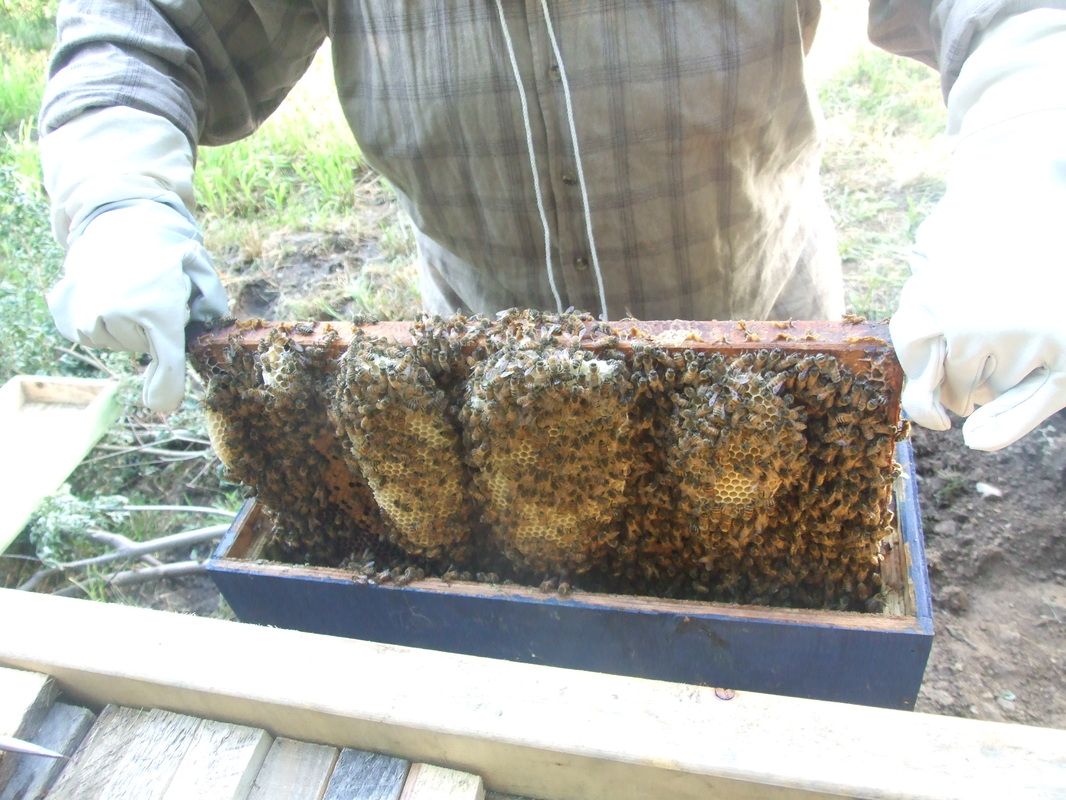
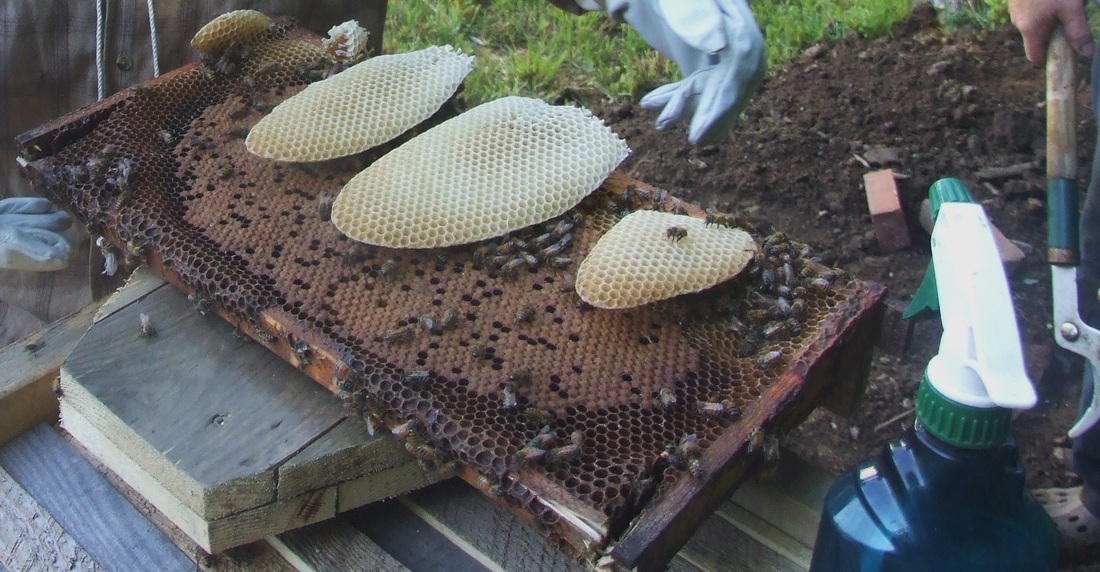
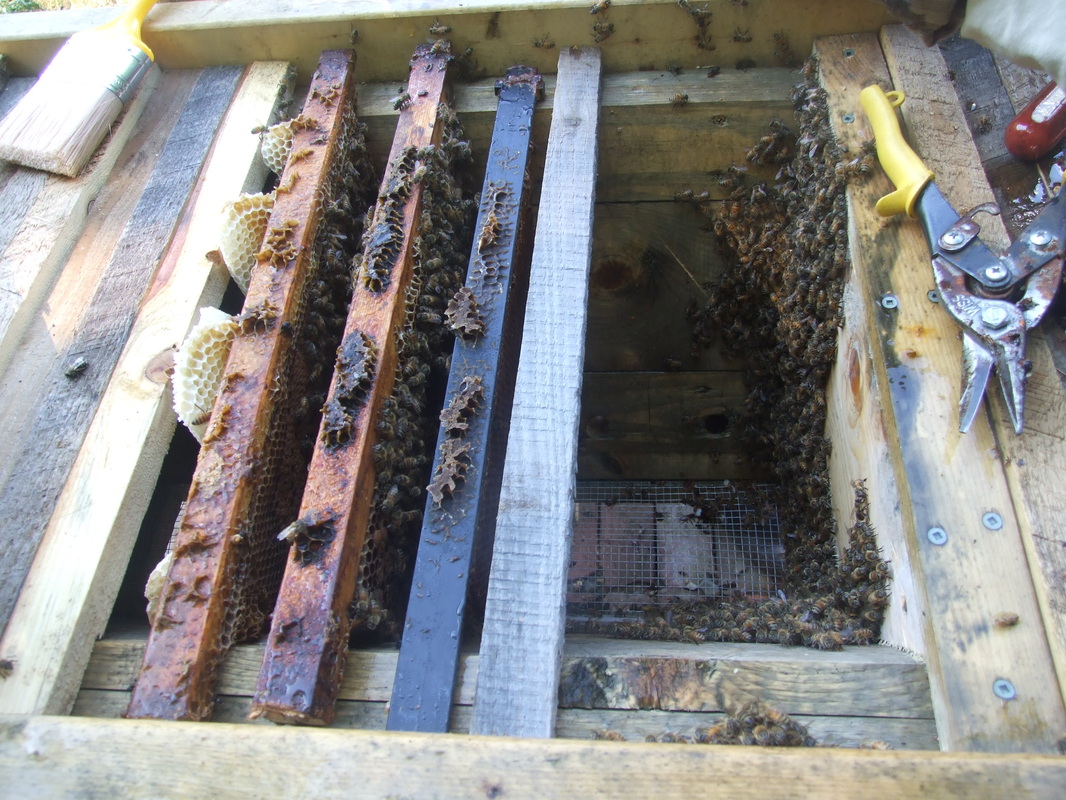
So this is what it looked like as I pulled the first frame from the nucleus hive. These bees were quickly running out of room and probably close to swarming.
Picture
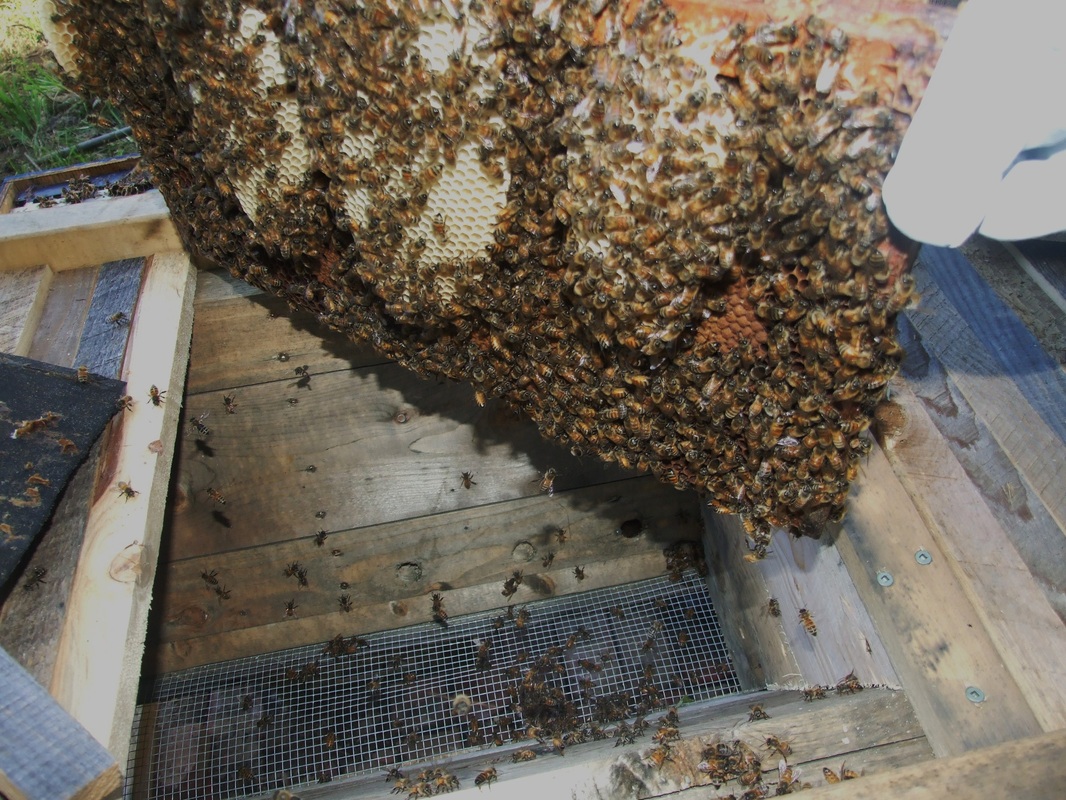
As you can see in this photo below, the bees had started to double stack comb. Building one layer of comb over another with just a bee space between.
Picture
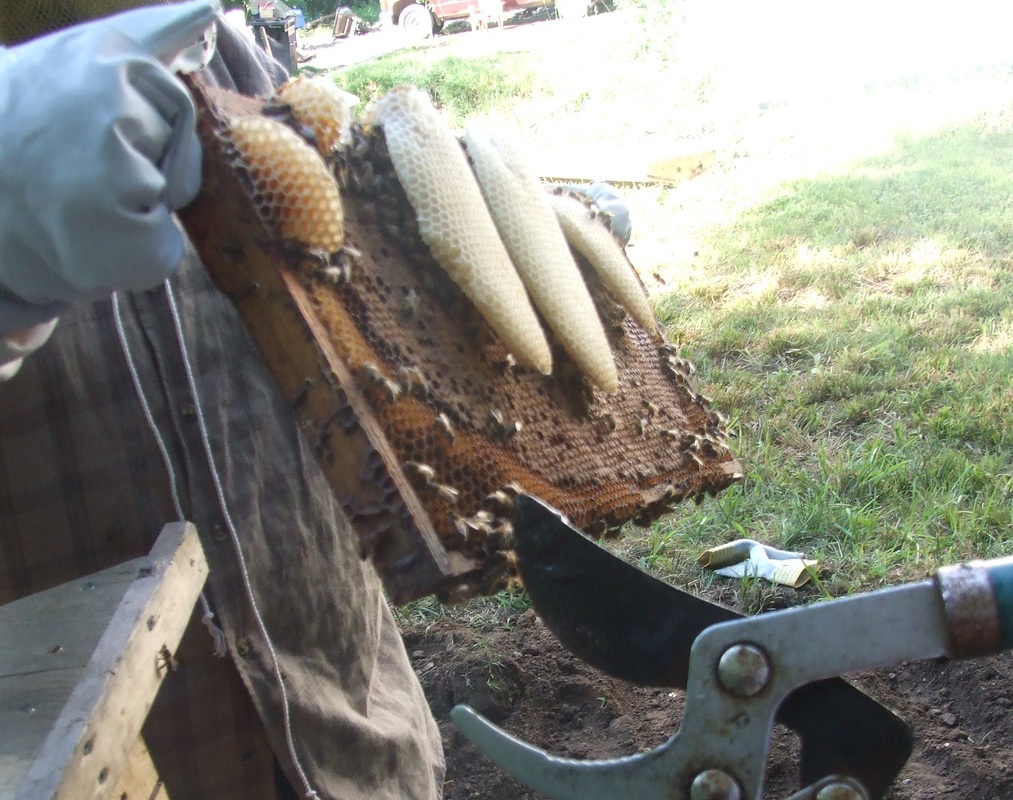
Since we are transferring Langstroth frames to top bar hives we have to modify the frames to fit. The easiest way we have found to do this is the crop and chop method.
The procedure is fairly strait forward. First remove the hive from the nuc, shake the bees off the frame into the new hive.
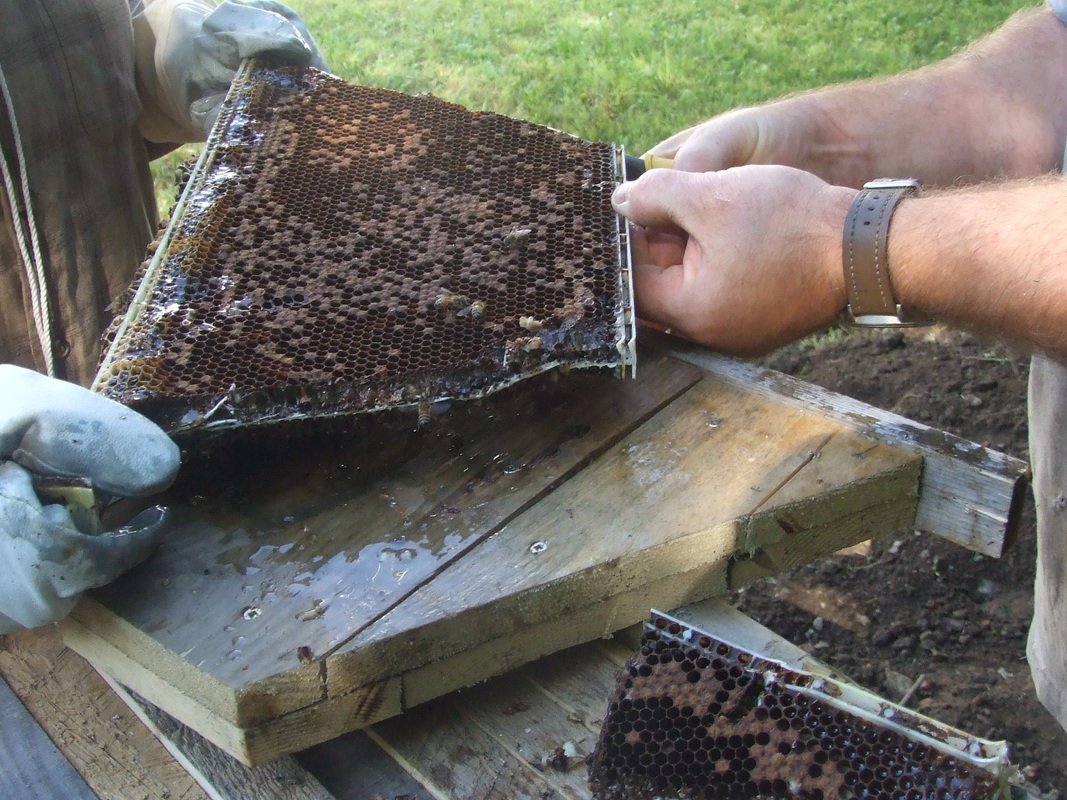
Next, cut through the wires which hold the bottom of the frame to the sides.
 We use a pair of tree pruners. Make sure you clean these well both before and after use.
Picture
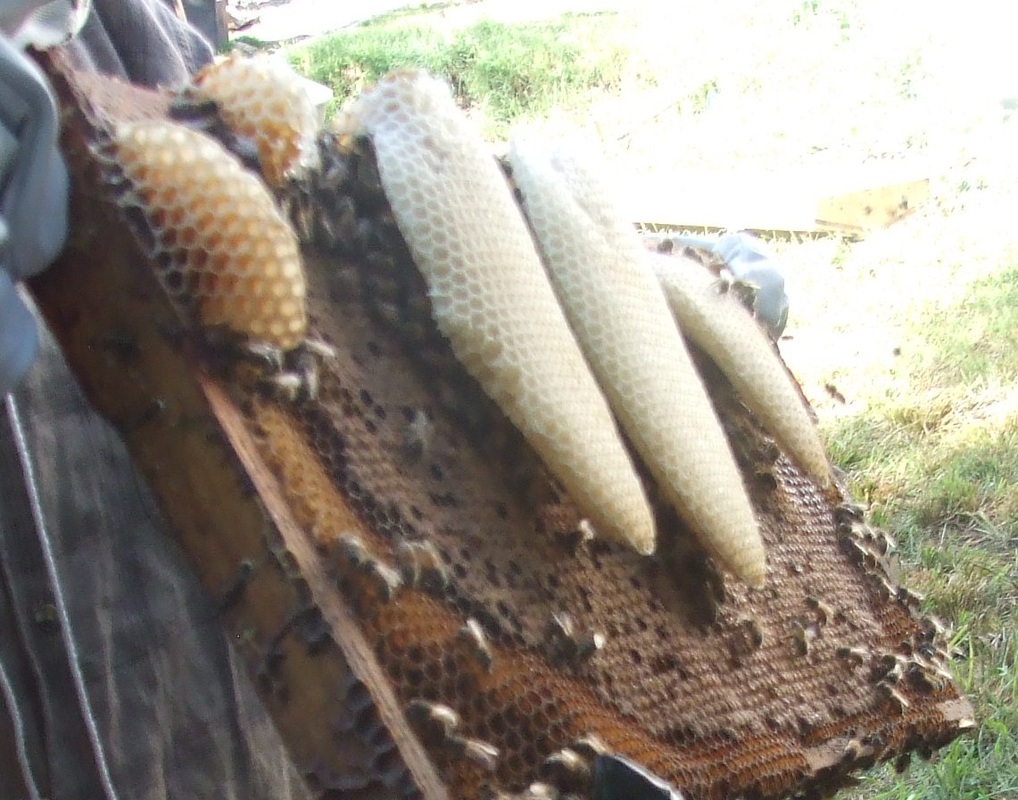
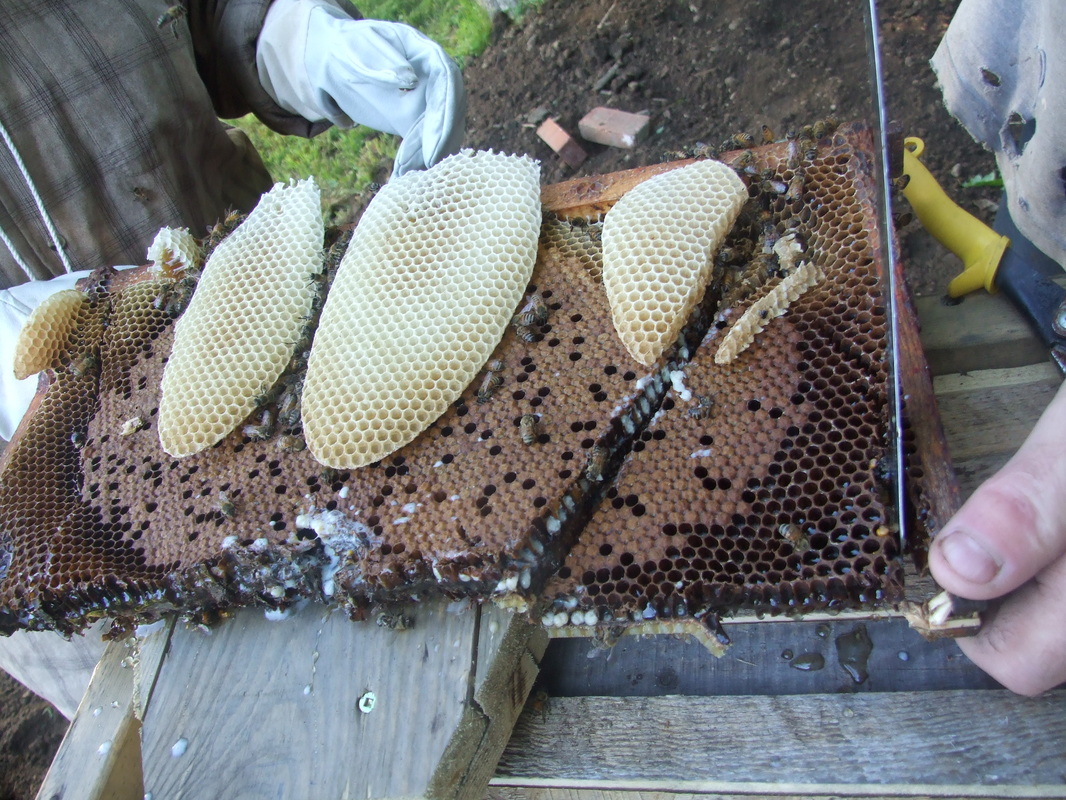
Next we lay the frame over a follower board (divider), using the follower board as a template. 
Picture
Now it is time to use a clean serrated knife to cut through the comb. We use a regular bread knife. Ideally you try to do this without damaging brood, however this nucleus was so full that we did lose some brood. The cells with the brown caps are worker brood.
Picture
Finally, you can place the converted frame into the top bar hive!
Picture

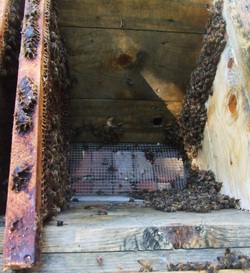
Normally, if you work calmly and carefully, this process is quick and causes minimum stress to the bees. However sometimes life throws you a curve ball. Sometimes this curve ball is in the form of a nasty plastic frame. Yes plastic. I, who abhor plastic had not one but two plastic nuc frames. Why are these so bad? Because they are SOLID plastic; meaning you cannot quickly cut through wax and a couple of wires but have to hack through plastic. Sigh
Picture
It took a while, but we managed to get it done. All four frames in the hive...
Picture
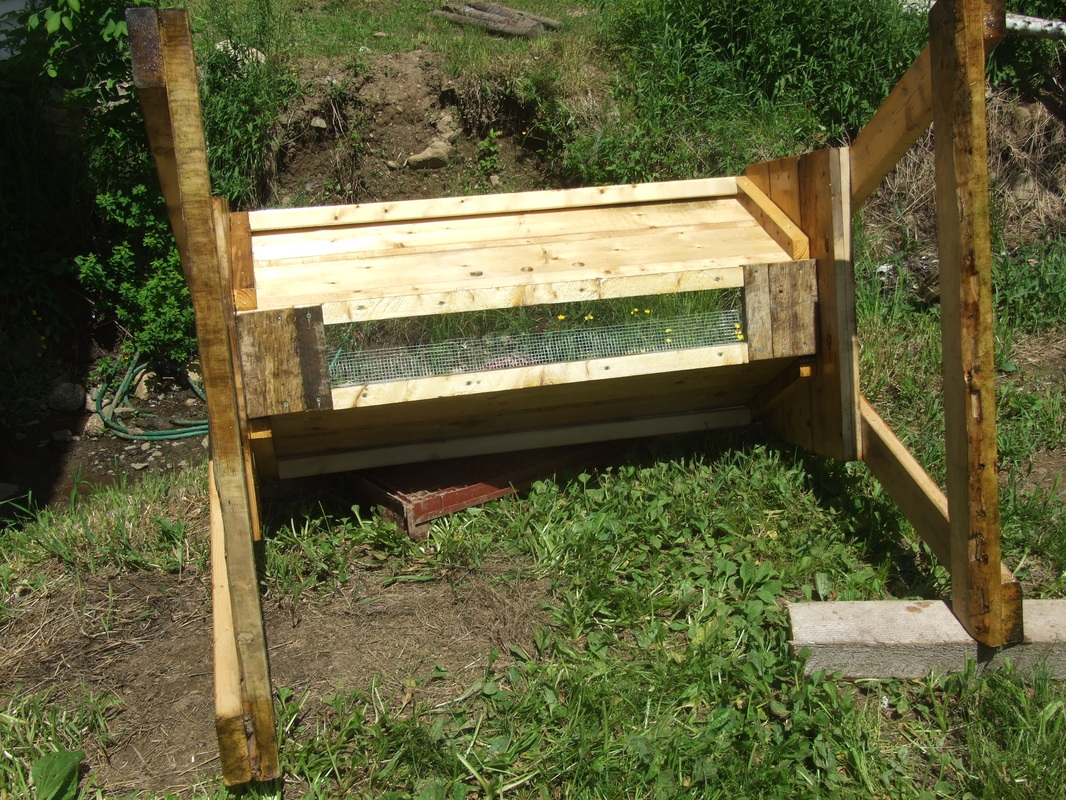
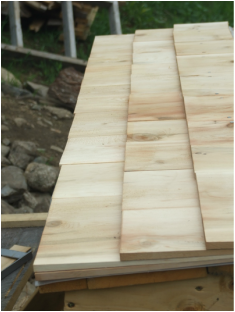
The only thing left to do is space out the bars add some additional top bars which have been primed with bees wax. Carefully brush any wayward bees out of the way.
Picture
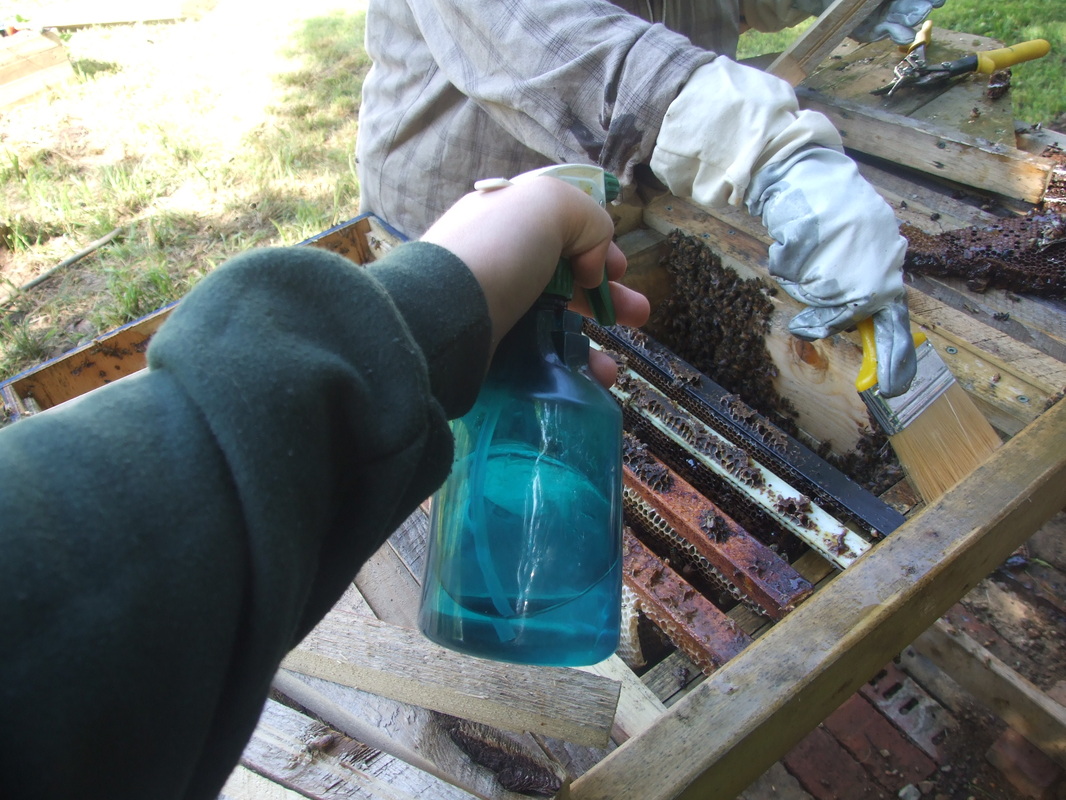
The spray bottle holds water with a few drops of peppermint essential oil. We don't use a smoker when working with the bees.
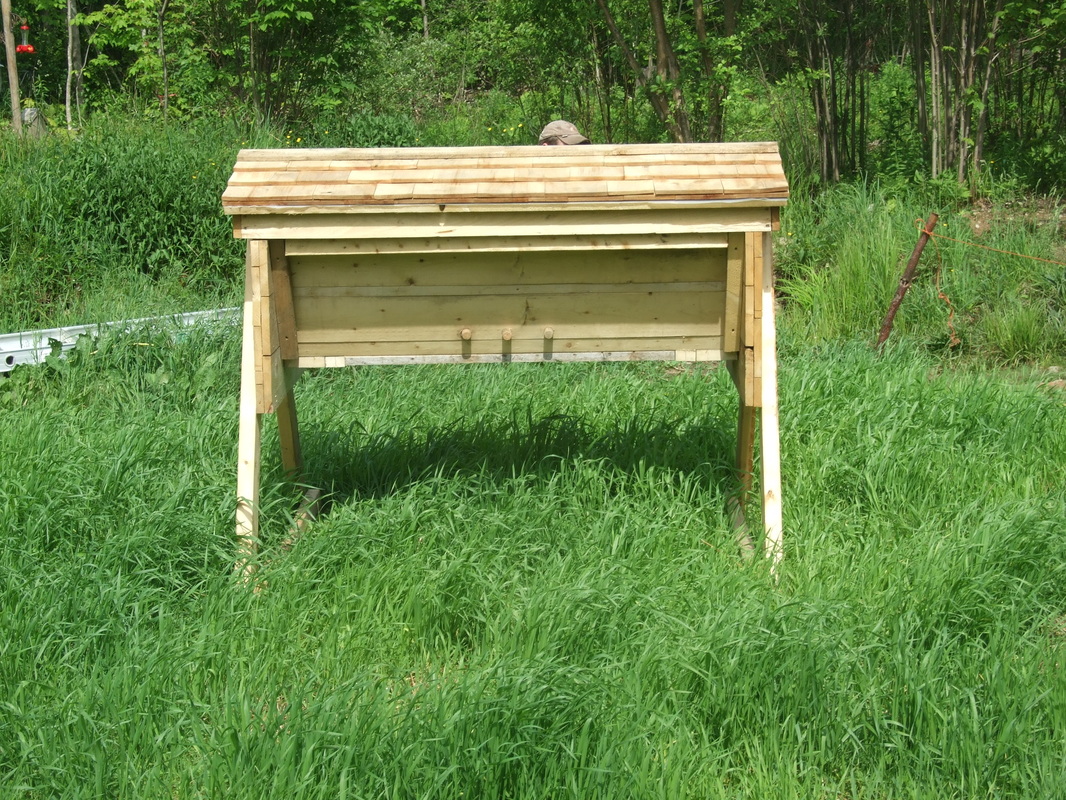
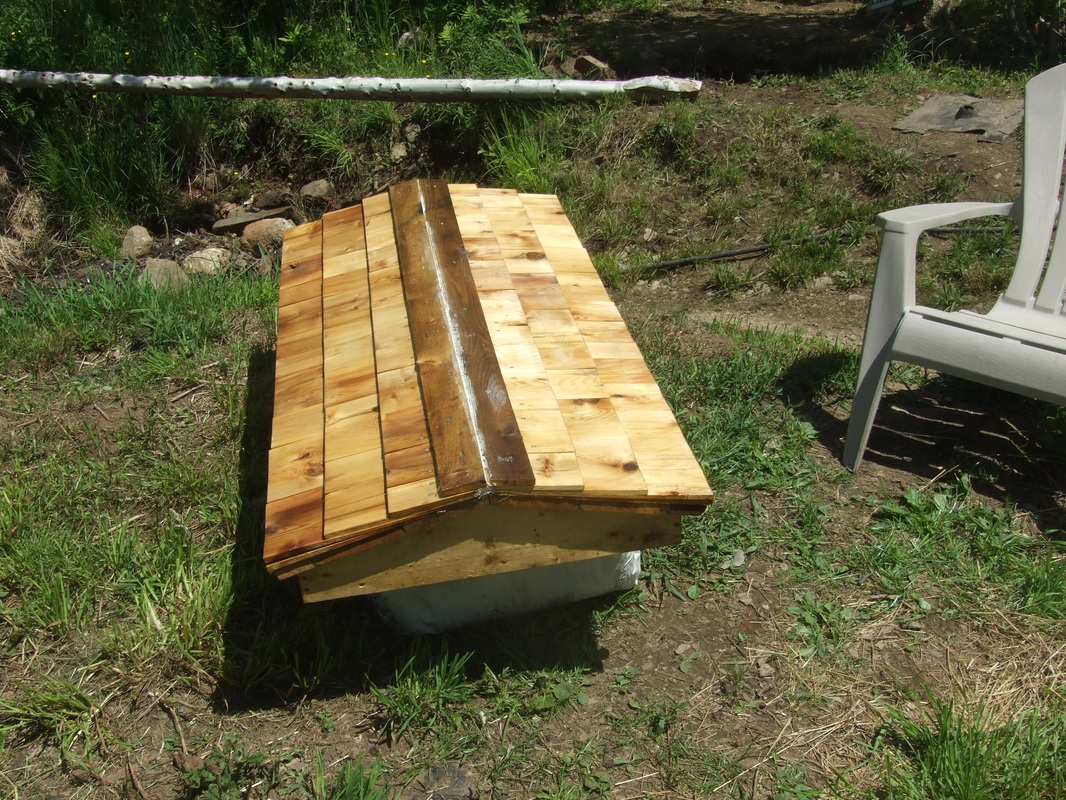
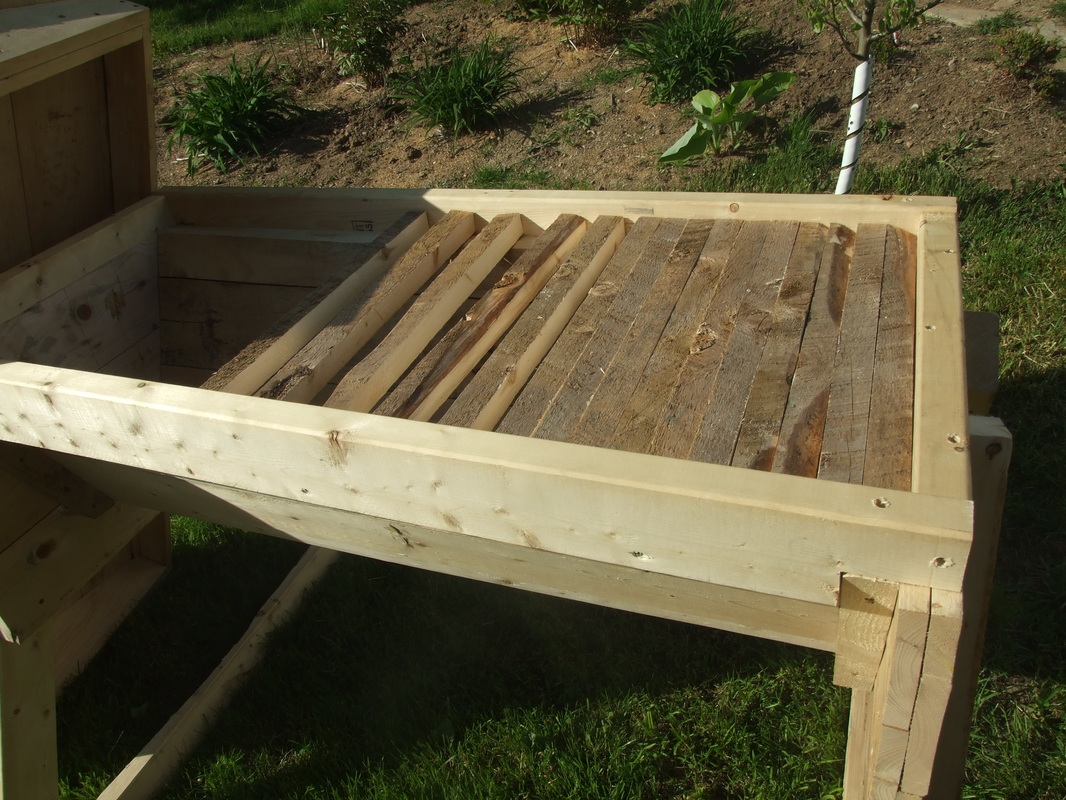
The final step is to place the lid on the hive and let the bees do their thing. Isn't it pretty?
Picture
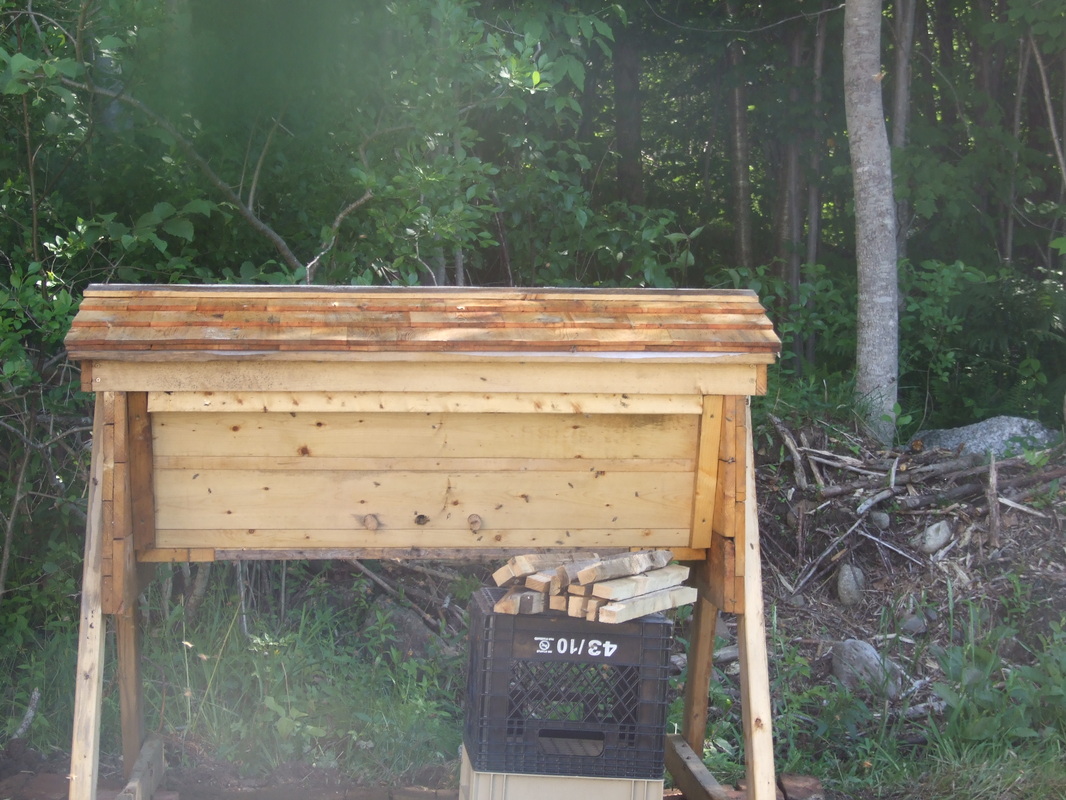
I will let the hive be for about a week, then open it to check how they are adapting. Usually they do fine. Overall, I am very pleased with this group. They are a robust and docile group. They should give us a nice little bit of honey in mid August and then we will let them be until next spring. I don't take honey from the bees in the fall. There is no sense taking honey from them and then feeding them in the winter. I will post about the bee work as it comes up so you can follow the hive through the year. Thanks to Reiley for standing his ground and taking the pictures and to Gary for helping cut the frames, without gloves!
Have a great day everyone.
1 Comment

Plans and Progress

28/6/2014

0 Comments

 
We have been going through some old photos, looking at greenhouses we built in the past and trying to decide which way we want to proceed. There is the tried and true hoop house version:
Picture
Yes, that is a very young Mr.Reiley there. Either 6 or 7 years old. Or we could go with the beautiful post and beam that the boys built out of wood salvaged from an old barn:
Picture
While I am a fan of the latter, I am not sure how viable this is as the incarnation above took Gary, Jason and Graham almost two months to build. We are limited on manpower these days. We will continue to mull the ideas.

On the finished project side, the first raised bed is done and planted.
Picture
Yay! This bed is on the NE side of the house. That is the area we have been putting in swales and drainage to try and dry up the area and slow down the water flow. The potential site for the micro hydro project is also on that side.

The bees are in!!  I brought them home in that downpour on Thursday, and we added them  to the top bar hive today. We did get some pics so I will write up a post on Wednesday.
The work has also started on moving the Basement door to the side of the house and filling in "the Pit".
Picture
Attractive no? Anyway, the plan is to install weeping tile accross the back of the house, fill in "the pit" and install a new direct entry basement door on the side of the house.  The window just above the current basement door is going to be removed and we have a lovely set of french patio doors to go into that wall. The newly level ground will be our main outdoor eating, BBQ and hangout space.
Today the guys installed level markers and began knocking down the pile of earth on the right hand side of the picture:
Picture
So now you know what we have been up to this week. In addition to all the regular chores, feeding animals, weeding the garden etc.  There is just never enough time!
I hope to have the final pasture pig post on Monday. This one will cover feeding of both meat pigs and breeding stock. It May not appear until Tuesday. We will see how Gary is feeling, while I know some about pigs, he is the expert in that field around here. Actually I would say he is the expert in that field anywhere. See you soon. Have a great day every one!
0 Comments

Clearing the Way

24/6/2014

0 Comments

 
The past few weeks the guys have been working on widening out the path that we have started to give us access to the back of the property. Last fall the path
was cleared to just past the pig's shelter. Now that good weather is finally
here we are getting ready to shift things around and open up more areas to the
pigs.
Picture
As I mentioned before, the front half of this property was harvested about 8 -
10 years ago, this has left us with essentially coppiced maple, ash and beech.  Unfortunately, the silveculture was not maintained and the understory grew out of control with alders. this has left underdeveloped weak coppices that have grown laterally in search of light.
We have spent a lot of time this spring going through the front ten acres of this property selecting which trees to leave and which will need to be thinned. The plan has always been to use the front 10 acres for gardens, pasture and housing. The back 10 acres will be left as a managed woodlot for fuel and lumber for building projects around the farm.
We have to build the road stable enough to be able to drive the truck back to the barn area for unloading hay and such. After the barns we just need it developed enough to haul wood out. Gary and Reiley have plans to build a "woods buggy",
I am going on the long term horse or oxen route. Our son Jason is an experienced horse logger. I grew up with horses so I feel comfortable with this route.
Picture
So starting next week, we will open up the pigs area and allow them to do
what pigs do. They are great for clearing out underbrush, removing small stumps, dis-lodging medium to large rocks and adding fertility.. So we will expand the pig yard and move up the lower edge of the fence. We will leave the area that is now the lower edge of the pig yard, where they share a fence line with the  goats, to sit fallow for a couple of weeks. Then we will move the goat yard up  to allow them to have the space vacated by the pigs.
Eventually most of the area that is now the goat yard will be garden space.
(When I say eventually, I mean next year). Gary has already started moving some of the larger rock to make terraces for the garden.
Picture
So, that is the focus of work for the next few days. Looks like we are in for a deluge tomorrow so I will probably be bringing home a bee nuc. We will keep our fingers crossed! Have a great day everyone!
0 Comments

New Beehive is Finished

23/6/2014

0 Comments

 
Picture
TA DA!
We finally finished the new top bar hive. As per the
construction plans, I coated it with a mix of beeswax and raw linseed oil.

We used Philip  Chandler's top bar hive plans. They are available for free here.
I also highly recommend his bee keeping book the Barefoot Beekeeper. The forum on his site is a treasure trove of information.
Picture
Picture
All that said, we did alter the plans somewhat. The plans advise the use of
1X12" or 1X6" boards to construct the hive. Being from the UK, Mr. Chandler has access to finished boards that are a full inch thick; here in Canada we don't.
We could have purchased true 1" rough lumber from our neighbour but I would have then had to sand the interior surfaces smooth or risk the bees attaching comb to the side walls which is a real pain in the but to deal with. We decided to go with finished 1X6" and Gary doubled the wood and created an overlap at the same time to make the finished hive more water tight. (Did I mention how smart my guy is?) Given the winter we just had I see this as a prudent alteration. We did use the mesh bottom for the hive. I really wanted to keep this feature as it is
quite helpful in keeping the mite population in check. Referring back to the
winter Gary constructed the hive so that we can easily add a board when we close up the hive for winter. We decided on the cedar shingled roof, I just love how it looks. Gary added vapour barrier to keep things dry and warmer through the cold months.
Picture
The inside dimensions are true to the plans. We did use rough lumber for
the top bars as this is easier for the bees to attach their comb to. I applied
wax to the bottom edges of the top bars just to help the bees build a solid
attachment to the bars.
 
We did go with the 48" hive. This allows me the capacity to separate  nucs next year and increase our capacity. It also allows flexibility to capture a swarm if the opportunity arises. It is also easier to insulate the hive for winter as the dividers are placed centrally and the ends of the hive can be insulated.
 
Picture
So everything is ready, I am just waiting for the call to pick up my nucs. Hopefully next week. I have baited the hive with lemongrass essential oil, just on the off chance that a natural swarm happens before I pick  up my nuc. If I can find a willing helper to man the camera when  Reiley and I convert the Langstroth nuc
to the top bar. There may be some bribery involved.
 
If you have ever thought about keeping bees may I just urge you to step in
now. Our bees are in danger. We have completely ignored their health over the
past twenty years. Colony collapse is wiping them out at an alarming rate. Mono
cropping, pesticides and taking too much honey are leaving the bees exposed.
Pesticide resistance is creeping up in the mite population. Without the bees we
are in serious trouble. Please consider keeping a hive of bees, they are
fascinating creatures and incredible workers. They will repay you a thousand
times over.
0 Comments

Pasture Pigs...part 2 Housing

17/6/2014

0 Comments

 
Picture
You don't necessarily need to spend a fortune to raise pigs on pasture. While the ideal is a barn with access to pasture. It is possible to raise feeder pigs on pasture without a barn.

Before we talk about housing the pastured pig, please allow me to once again dispell the myth that you can turn a couple of pigs out into a field and expect that they will grow big and strong and then you can kill them for meat in 4 - 6 months.
This is not true. Your pigs will starve or at least fail to gain. Pigs cannot feed themselves on pasture alone. They need feed, specifically protein. Fully grown pigs on a maintenance diet can maintain on pasture with little supplemental feeding . Growing pigs cannot. Before commercial feeds were available, farmers supplemented their feeder pigs diets with turnips, potatoes, sugar beets etc. They also turned them into the grain fields after the harvest. Feeder pigs were born in late winter, raised through the summer and slaughtered in the late fall. The pigs were selected to grow on this routine. Todays pigs are not. Please see pasture pigs part 1 for an explannation.

If you are considering raising feeders on pasture you will need to provide a shelter, minimum of 4 X 8 feet for two pigs . For summer this should face east / north east or where it will catch the prevailing winds, providing this is not south. If there is no natural shade available you need to double the size of the shelter. The structure itself needs to be solid. Pigs will chew wood. Do not go out and
build or buy something that looks like a cover shoot from better farms and
gardens.  DO NOT use pressure treated wood.
The shelter should  be heavy enough that it can be moved when necessary, but bear in mind that if they set their mind to it, two feeder pigs approaching kill weight can move damn near anything they set their mind to.  The shelter must be water tight and draft free. It also needs good ventilation. It does not need to have cathedral ceilings. Especially if you will not be in and out of the shelter on a daily basis. Our shelters are four feet high. Patches and KW have dug out the interior of their shelters during the winter both excavated below ground level. As most pigs will do this to some extent drainage should be considered when deciding where to place the shelter.

Ideally there should be access to a wet area where they can wallow, but they need dry bedding and cannot have their feet wet all the time. Pigs lose a lot of body heat through their feet, like us if their feet are cold, they are cold. If a pig is constantly cold, they will burn calories at a higher rate and will not gain weight. 
Bedding can take many forms, shavings, sawdust, straw and sand to name a
few. We bed our pigs with a good layer of sawdust in the pen and then they are
given hay, mostly hay that the goats have picked through, but some fresh in
addition. This is adequate bedding, especially for feeder pigs. Our sow does get
a bale of fresh hay a few days before farrowing so she can build her 'nest'. No
matter what you choose as bedding it must be dry, free from mold and cleaned of foreign material such as sharp sticks and nails. ( Check your sawdust. It
happens).

Your pigs must have access to clean water.  Water intake can be better regulated if you wet feed your pigs. Wet feeding is what we recommend. It allows you to know that they are getting water, they digest the feed better and it is easier to combine feeds if you choose to do so. ( I will elaborate on this more in the next post on feed). Supplying pigs with water from a bucket, barrel or trough is unreliable as they are apt to  turn it over looking for bugs and worms or just use it as a toy when bored. They will move what ever you think they can't.

 Despite their press pigs are clean animals, they will not manure where they sleep. If housed inside a pig will choose a corner of the pen, usually in a drafty or dead air spot, to use for manure and they will keep the rest clean. Pasture pigs will go outside, please consider runoff when choosing your site.Do not put your pigs on the best pasture you have. They will tear it up. If you
have some lovely alfalfa pasture, you can turn them out for a couple of hours
and they will graze a bit. Watch them!  It will not take long for them to decide
that they could find some good stuff under that green. Also, do not turn them
onto any good pasture in the spring or after a long wet period. If the ground is
easy to turn over they will. Please keep in mind pigs like to play with trees.
Our beef calf likes to hang out by the pig yard when KW is out as KW will pull
trees over and Ivan eats the leaves off if they come across the fence.

With regard to fencing, two strand electric fence will keep them in. It is what we use it is what we have always used. If you purchase weaner pigs that were raised in a barn or pens with solid fencing you will need to train them regarding electric fencing. This is easily done with a training pen. The easiest way is to put a visible barrier on the outside of the electric fence. Pigs are curious animals they will touch the electric fence. What you don't want is them sticking  their head through the fence while checking out their new environment and get shocked. If there is no solid barrier they can jump ahead and go right through the fence. Once a pig figures out they can do something they will do it again. This training period does not take long. A few zaps from the fence and they will stay away from it. You must check your fence regularly. If it is grounding out you will have problems. Pigs are very intelligent animals. Ours know if we turn the fencer off for maintenance. They will learn the sound of the fencer and will test it. You also need to check the level of the fencing. If the pigs are rooting they will pile dirt up against the fence. Electric fencing is most effective if it is at eye level for the pig when their head is down.

Pigs can be put out with other animals, providing the pasture is big enough. If you utilize rotational grazing be sure your fencing is adequate. The pig will remember where the fence was yesterday. It usually will not cross. We always recommend setting up rotational grazing via a corridor. Have the animals exit the barn via the same door everyday and fence off the corridor. This is the least disruptive way for all. We have used this system effectively to graze pasture and allow access to garden leftovers at the end of season It requires a little more planning at the beginning but makes for faster turn around in day to day operations.
Picture
KW in the treed area of his pasture. Note: the three strands of wire are due to both his size and the fact that this fence separates the pig pasture from the goat pasture. The bottom strand is to deter the baby goats from entering the pigs area.

Picture
Patches and KW hanging out in the shade. If you look in the background you can see the permanent fencing around the pasture huts. These are in place so that we can isolate Patches and KW at feeding and when she has piglets.
 They are doing a very effective job of removing the stumps and small trees in this area.

0 Comments

Busy Week

13/6/2014

0 Comments

 
Wow Friday already, this week has been a rollercoaster to say the least. Long story short, Matt and Sheena are staying with us for a while after their rental fell through. So we have been trying to find room for their stuff, getting their pets settled while trying to keep our pets from freeking out. ......Everybody breathe...
I had forgotten how much space Matt takes up!  Ever wonder what a size 16EEE work boot looks like? Here ya go...   (That's my very cute size 8 sandal next to Matt's boot.)
Picture
Despite the chaos, we have managed to get some things done this week.  The roof is now on the beehive; just a little trimming to do.
Picture
The last of the steel is also on the house roof:
Picture
With enough steel left over to give Killwilly a new roof, and a very handsome top for Reliey's woodworking project birdhouse.
Picture
Miss Avril's babies are growing like weeds, we have decided to sell both the doeling and the buckling as we have decided to start breeding Alpines. There is more information about the babies here. As I posted on the facebook page, Patches is bred and she is due to farrow September 1. We already have a waiting list so if you think you are interested please email me!
Picture
Despite my best attempts at total neglect, the gardens are growing. The tomatoes are blossoming, the sweet peppers are up and thinned, the gooseberry hedge is planted, and the elderberry are producing blossoms!
Picture
Finally, on a purely asthetic note, the perennials I brought with me last fall benefited from the deep snow cover last winter and are making me smile everytime I look at the front yard. The stone path is Gary's doing and will one day circle the house.  We have a new front door, it is on the to do list this summer, just keeps getting bumped.
Picture
Thanks to everyone who emailed about the pig post, there will be a part 2 this Monday dealing with housing and pasture habitat. please feel free to use the comments option on the blog. Share what you're thinking or ask questions. (I promise we don't bite)  Take care everyone I'll see you tomorrow!
0 Comments

Pasture Raised Pigs - part 1

9/6/2014

0 Comments

 
Hi everybody.  We receive a lot of calls and emails about pigs. People
looking for pigs and people with questions about pigs. The questions run the
gamete from which breed is best to how long will it take to grow them out.
Unfortunately, as with most things agricultural related the answer is .... it
depends. Why are you considering keeping pigs?  How do they fit into your
overall plans? (we are big on integrated systems here).

So, once  you have a solid idea of why you want pigs then we can talk about selecting a  breed. If you want to raise a pig just for meat, have a barn and are just  interested in feeding the crap out a pig and raising your own meat, then there  is nothing wrong with the modern commercial white pig. In fact there are many  good things going for them. They grow like crazy, they are easily able to
achieve 600 - 900 grams/day. Like all breeds an F1 cross will grow faster than a
purebred of any breed. Hybrid vigor is on your side. However, any animal that is
fed hard,  will add on layers of fat. White pigs tend to add fat higher on the
carcass, so in the roasts area. If you are going to put them in a pasture they
need shade or a reliable mud patch as they are more active than most heritage
breeds and will burn and suffer from heat exhaustion. White pigs will mind
insect bites / stings more than a heritage pig as they do not have the fat layer
or the hair that heritage breeds have.

There has, in the past ten years been a resurgence in the heritage breed pigs. The  most common breeds found in the maritimes  are the Berkshire, the Tamworth and the Duroc. There are advantages to each. 

The most common is the Berkshire, they are  known for their rich flavour. They are the best at laying on inter muscular fat,  also known as marbling. However, they also have a tendency to lay on excessive back fat, as much as two inches. This is highly individual and has a lot to do with how and what they are fed and their weight at slaughter. They are great for in the pasture, but they can sunburn and can suffer from heat stroke. Despite what you may have heard, they will not graze grass. They will tear it up, they  are looking for roots and bugs They will uproot trees. Our current boar, has a fascination for rocks and has upturned granite boulders. The Berks tend to average 600- 650 grams of gain /day. They have only average litters, 6 - 10  piglets, but are are generally good mothers. Despite rumours to the contrary,  Berkshires, and all heritage breeds for that matter, are not immune to or  resistant to any of the "modern" diseases.

The Tamworth are your four legged tractors. They are built for digging. They are a  long narrow pig,  hardier than the Berk, and more self reliant but tend
to be a little more skittish than the other breeds. As they were originally bred
to be a bacon pig, they are long and lean with very little back fat and
marbling. Like all heritage breeds their meat tends to be darker and more
reddish than the white pig. They are slightly slower growing than the Berk, but
will put on much more fat than the Berk if pushed. Bigger litters than the
Berkshire, but tend to be much more aggressive, especially a sow with a litter.
In Gary's humble opinion, they are the prettiest of the heritage breeds. They
have a tough hide and coarse hair.

Finally the Duroc. Not as common as the other two breeds, they are not a true heritage  breed. The Duroc that we know today is a modern pig and the first to be  considered a "commercial' heritage breed pig. It originated in the U.S. and is
to be considered a terminal breed. They make an excellent boar to cross as their
genetics bring accelerated growth, while maintaining a relatively lean meat.
They tend to be a general purpose pig having both the length for the bacon and
the large shoulders and rumps for roasts and hams. They also tend to be poor
mothers, have average size litters and are the most aggressive of the heritage
breeds. They are less likely to tear up ground than the Berk or Tam, however
pigs are smart, they get bored and in the end, all pigs will root.

So, as I said choosing a breed depends upon why you want to keep pigs in the first place. It  makes a significant  difference to your bottom line when you work with the characteristics of any given breed. As with all generalities, the above information pertains to the predominant characteristics of each breed. There will be individual variances, so it is always advisable to meet with the breeder of and get a feel for the genetics and environment of your prospective purchase.
0 Comments

June 6

6/6/2014

0 Comments

 
Hey everybody,  no post today as I'm catching up on some work that needs to be done for the launch of Hand - Forged Herbals.  However I will be back on Monday with the first in a series of posts about raising pasture pigs in Nova Scotia.  I will be posting updates on our facebook page over the weekend so keep an eye out for those. Have a good weekend everyone!
0 Comments

Rabbits on Your Homestead

5/6/2014

0 Comments

 
Hey everybody, today I want to talk about why I believe rabbits, specifically meat rabbits, should be a part of your homestead. We have raised rabbits off and on for about 15 years, and Gary raised rabbits all through high school. I like them for the homestead for three main reasons: feed conversion rate, production rate, and ease of keep.
Firstly conversion, apart from geese, rabbits are the best feed converters I know of. Most meat breeds will reach 'fryer' weight, approximately 5 - 6 pounds live weight at 8 - 10 weeks. Sometimes even less if you utelize hybrid vigor or have exceptional does. If you want to look at something larger, a roaster, then you will have to be slightly more selective in your breed choice. With regard to breed choice, there is no right answer. It will come down to determining which breed works for your particular setup and goals. With 43 recognised meat breeds you will have lots to choose from.  We have always used New Zealand and Californians. We did try a few Flemmish Giant does a couple of years ago, Reiley's request, but they have such a large frame to grow we found that although the were meeting the weight milestones the dress out weight was less for comparably sized rabbits of the Californian New Zealand cross.

Second is production rate. We all know rabbits are easy to breed. Some of the small dwarf breeds are actually harder to breed, but if you are raising animals for meat you probably wont be dealing with these breeds. Conception is only half the equation however, you need to get that animal weaned. In commercial farming, when we talk about production levels such as a sow's production, we only count animals raised to weaning age. Rabbits will produce lots of babies, they are also verry effective at raising their young to weaning age at that is money in the bank, or food in the freezer. An average meat breed buck and two does are able to produce 200 - 300 pounds of meat per year, and this can be done in a very small footprint.

Rabbits require very little land base. This makes them suitable for all homesteads, even urban ones. They are what we have always called "easy keepers". The American Rabbit Breders Association recommends a minimum of 6 square feet for a 10 - 12 pound doe with kits. All Rabbit cages should have enough room for the rabbits to sit up comfortably, and if the cages are wire floors all rabbits need a board to sit on and rest their feet. A nest box for a doe is ideal, however given a few good handfuls of hay she will make her own nest  and raise her kits just fine. I have seen some does who actually preferred to nest in hay and completely ignored the nest box. So I removed it and there was never an issue.

In our climate, your rabbits will need to be in a building during the winter. If you try to keep them in small hutches that are exposed to our winters you will find that they lose condition and you will need to feed much more just to maintain condition, and substantially more if you are expecting them to produce and raise kits during the winter. You should also make sure that there is good ventillation in the building for the summer months.

Once you have your housing in place, caring for the rabbits requires little time and effort. You will discover that they are remarkable little beasties. They are social, rarely mean, and all together pleasant to work with.
Their meat is very healthy, and makes a good addition to the homestead meal plan. Their manure is a boost to the farmstead also. Low in nitrogen it can be utelized straight from the trays to the garden.

As you can tell, I really think rabbits are a positive addition to your homestead. For those of you who like to tell me  that you could never eat a cute little baby bunny, let me just say that you will not be eating a cute little baby bunny. The same way you don't eat a cutle little fluffy chick, or a cute little baby piglet. You will be eating a grown up rabbit. As with all the animals we raise for food, you make sure it has a comfortable life and a quick painless death. We raise animals ethically and with compassion. There is nothing wrong with that.
Picture
0 Comments

Babies!!

4/6/2014

0 Comments

 
Yes we have babies! Miss Avril delivered twins earlier today. One doeling one buckling. Yes, just twins. She had better milk her little backside off. She put on a good 40 pounds and delivered 10 pounds of baby!
Picture
The doeling is the light caramel one, top picture, and the buckling is the darker.  I will add more pictures when they are up and about tomorrow.
I am freshly back from the judging 101 course yesterday. It was an exceptional program and a great group of ladies. Hopefully I will get the opportunity to do some judging this year and continue to improve my skills.
Enjoy the baby pictures, I am taking care of some family issues today but will be back tomorrow with a full post. i want to talk about rabbits, and why they should be a part of every homestead. See you then.
0 Comments
<<Previous
    Picture
    A  4-H Family
    Lives Here

    Receive inspiration and information for your homestead several times a week

    * indicates required

    Author

    Hi! I'm Shelli Killen,
    a homesteading, homeschooling, wife and mother of five. 

    I am a student  herbalist with a passion for learning and a  habit of bringing home strays.

    I love music, and the power of creating things with my hands.
     
    I tend to do best when life around me is organized chaos
    .

    RSS Feed

    Categories

    All
    Bees
    Canning
    Chickens
    Economy
    Gardening Vegetables
    Goats
    Herbs
    Hobby Farming
    Homesteading
    Homesteading Skills
    House Management
    Lifestyle Planning
    Pigs
    Self Reilance
    Self Sufficiency

    Archives

    December 2014
    November 2014
    October 2014
    September 2014
    August 2014
    July 2014
    June 2014
    May 2014

Powered by Create your own unique website with customizable templates.