Hand-Forged Farm
  • About Us / Contact

How to Tuesday: Dealing With a Sick Goat

4/11/2014

1 Comment

 
 So I had a plan for today, the guys were going to trim the goat's hooves and I was going to shoot some video and go through hoof trimming on the how-to Tuesday blog post. Great plan!
Never make a cast in iron plan as a homesteader. Plans are like a poke in kidneys to mother nature, goddess of all things homesteads. This morning mother nature decided that I would not be shooting video of goat hoof trimming, instead, we have been dealing with a goat in shock with a mostly shut down rumen. As I mentioned on facebook yesterday, Miss Avril was in heat, so around four pm yesterday Reiley and I drove Miss Avril for her 'date'. By the time we arrived back home, it was pushing six pm and dark. When Avril is in heat she gets aggressive, (well let's face it she is aggressive most of the time), the best we can determine is that after we brought Avril home she either picked a fight with Pepper or Pepper was caught up in a fight between Avril and Ivan. Whatever happened, when Reiley went up to do chores this morning he found Pepper standing off in the corner in deep shock.
​

Goats in shock exhibit the same symptoms as most animals, even 2 legged ones. They appear dazed or blunted they also tremble or shiver and their temperature, especially in the extremities, is much lower than it should be. They also present with pale mucous membranes, the gums and inner eyelids, and rapid shallow respiration and rapid irregular pulse.

Pepper had all of these in spades this morning, my guess is that she was like this most of the night. We brought her into the house, wrapped her into her little coat that I had made her for pro-show, and set about assessing her and warming her. She has no obvious injuries, she is tender in a few spots but nothing major, she can walk and has no signs of internal bleeding. This is good, she needs supportive care. So strap on your boots it's going to be a LONG day. 
Picture
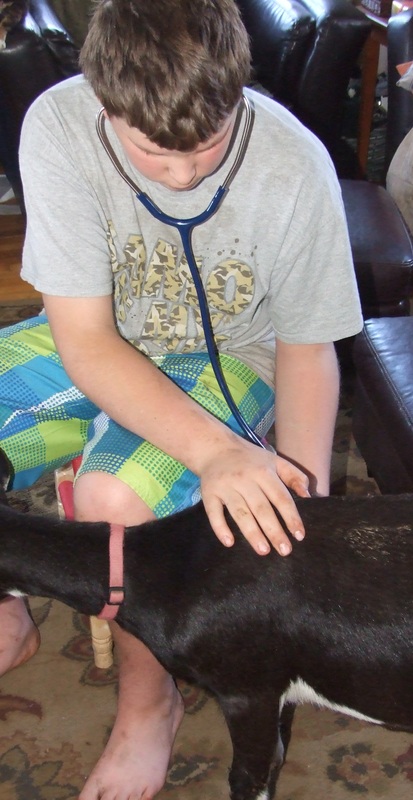
Once she was warmed and more responsive Reiley began to check her temperature, pulse, and respiration. The most critical thing to watch for in sick or injured goats, well all ruminants really, is that the gut does not shut down. If the rumen shuts down it can easily kill the animal. The easiest way to check is to listen to the gut with a stethoscope. I highly recommend having even a basic stethoscope around the homestead, it makes diagnosing things so much easier.

Unfortunately, Pepper's rumen was very quiet, you should be able to hear a goat's rumen working even without a stethoscope. Pepper's was barely audible with a stethoscope. Once the rumen starts to shut down you need to withdraw all grain and offer only good hay and water. Unfortunately, the animals have usually stopped eating and drinking by this point. The danger comes when routinely produced bacteria in the gut become trapped in the digestive system and lead to enterotoxemia. You need to get the gut functioning again.

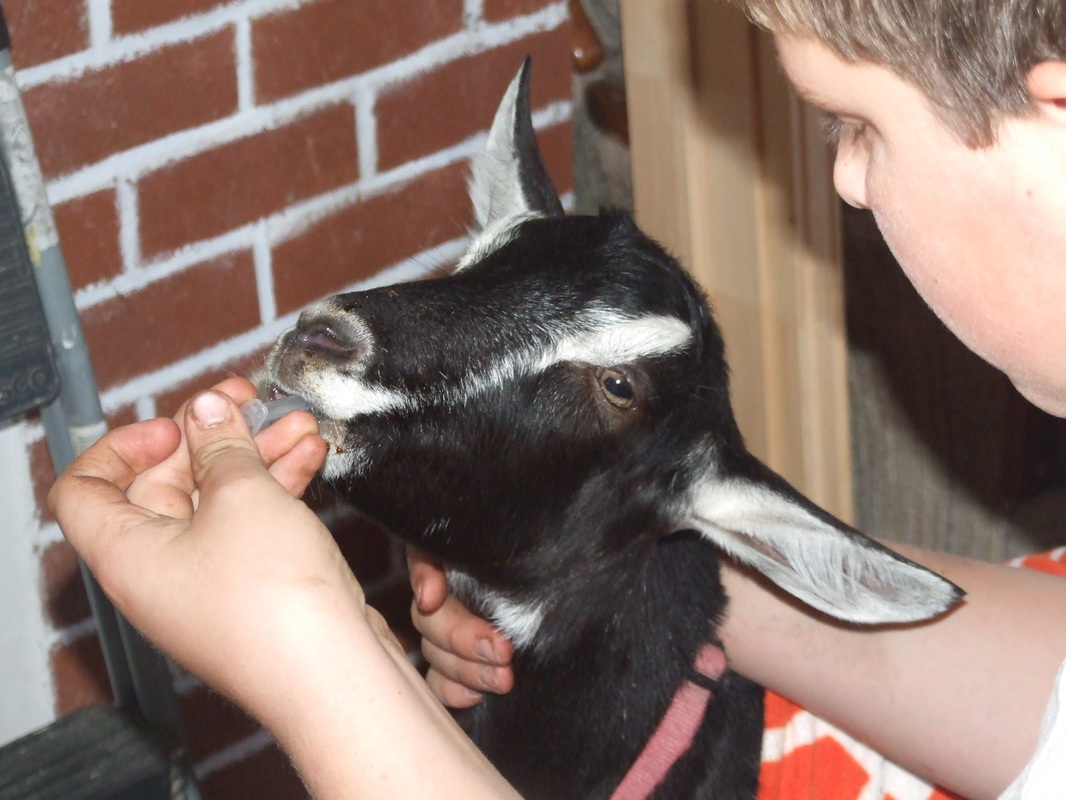
If the goat is refusing food and water but is not yet dehydrated, you can give fluids via a large syringe, I recommend having a few 60cc syringes on hand; you don't need a needle on it, just the syringe. Use the syringe to give water, if the goat is reluctant to take straight water, try putting little molasses in, the energy won't hurt them and it may encourage them to drink.

Pepper passed stool and urine within the first hour of being in the house, so we were not in any danger of severe dehydration yet. I should note that anytime you are not comfortable handling and treating a sick animal call your vet. Gary and I have over thirty years of experience working with animals and treating them. I trained as an RN and am very comfortable dealing with medications calculating dosages etc., but even we have our limits. We are comfortable stitching wounds, lancing abscesses, pulling babies and a host of other things but we know when we need to call a vet and everyone should recognize their limits and follow their gut instincts. The more experience you get the more comfortable you will be. It is better to acquire experience watching and talking with a good vet than by trial and error.
Picture
S​o we have spent the entire day coaxing fluids into Pepper. She is not well yet. We have been giving children's aspirin for inflammation and pain, she is getting fluid syringed every hour, she has not developed a fever so we are confident that we are not dealing with anything other than a bruised and sore goat. We have given her about a quarter cup of probiotic yogurt, this is helpful in keeping the gut populated with good bacteria. It really is remarkable how fragile goats are when something goes wrong. The same slow digestive system that allows them to digest sticks and bark rapidly becomes a hindrance when a problem occurs.

So, for now, she is holding her own, she is continuing to nibble hay, pass urine and stool. We will keep her in the house overnight and continue supportive care. If she is no better in the morning we will have her seen by the vet.

Ahhhhh, self-reliant homesteading at least you can't say it's boring.....

Have a great day everyone.
1 Comment

How To Tuesday: Making Fresh Chevre

16/9/2014

0 Comments

 
​Well, we are back in the kitchen today, making a fresh chevre with our goats' milk. I am not a big cheese eater, I will never be one of those people who start making amazing gourmet cheese from their kitchen. I do, however, like fresh chevre, especially as a dessert with cranberries and almond slivers or with some honey drizzled over pear slices and chevre. Yum!

So I received my goat cheese making kit from Glengarry cheese making supplies a few weeks ago.  It was a good deal, giving me a variety of cultures a lifetimes supply of rennet and molds. I was disappointed with the literature, it had been advertised as coming with recipes, however, the recipes were for what I would consider a person with basic cheese making experience. Also, there was no recipe for making a fresh chevre. So I researched and found a recipe, I tried it twice with mixed results. I have done more research and I think I  figured out where I went wrong, so through much trial and error, I am comfortable enough to share the process with you.

This is one of the things I love about this lifestyle, you are constantly learning new things. I also make sure that our kids get to see us screw things up, pick up the pieces analyze what happened and then give it another go. Too many kids these days never experience failure; they get participation medals for simply showing up, they get passed on in school all because we don't want to damage their fragile little egos by telling them they weren't quite good enough. Well, guess what, that is not how life works. We are doing our kids a huge disservice by "protecting" them. By covering them in bubble wrap we raise young adults who have no idea how to assess the risk in a situation, they never realize the thrill of figuring out a difficult problem after they spent a lot of time not figuring out the problem. They are ill-prepared to deal with the everyday failures that come about in the workplace and just living day to day life. But again, I digress. Back to cheese making.

So, as I said, I am making a fresh chevre with our goats' milk. I do not pasteurize our milk; if you wish to pasteurize your milk I will give directions for that. You can use pasteurized store-bought milk for this recipe, just make sure you purchase whole milk not 2% or skim.
 
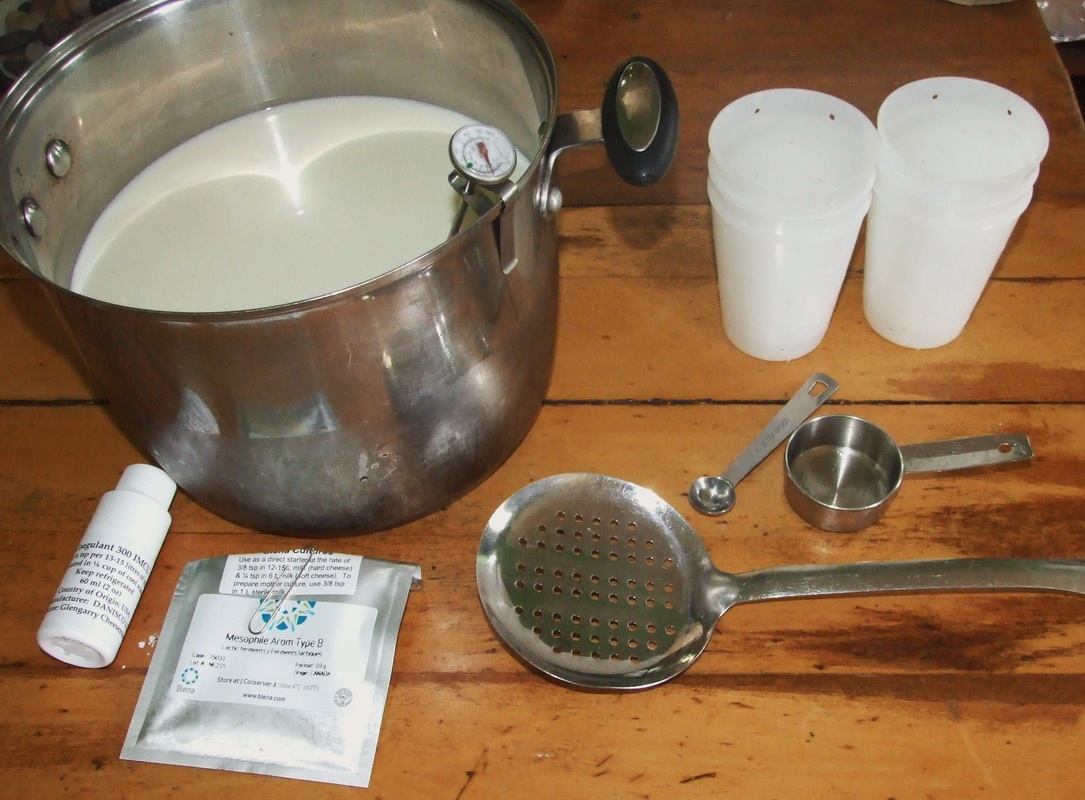
You will need:

4 litres, (1 gallon) of goats milk
calf rennet
culture, I use Mesophile Aroma Type B
a large stainless steel pot
measuring spoon (1/8th teaspoon)
1/4 cup measuring cup
large slotted spoon
thermometer
cheese molds or muslin cloth
something to catch the whey in  
Picture
​If you want to pasteurize raw milk:  heat milk in a heavy-bottomed
steel pot or double boiler until it reaches 145° F, stirring frequently to
prevent scalding. Hold the temperature at 145° F for 30 minutes. Remove from
heat and allow to cool.

A note about timing, as you will see there is a lot of waiting with cheese making, I have found that heating the milk and adding culture and then rennet just before I go to bed works the best for me. That way I am up and around the kitchen during the time the cheese is in the molds. This allows me to check the texture and remove the cheese when it is just right. (Truth be told it also keeps me from compulsively checking on the set of the cheese when ideally it should just be left alone!)

To make Chevre:

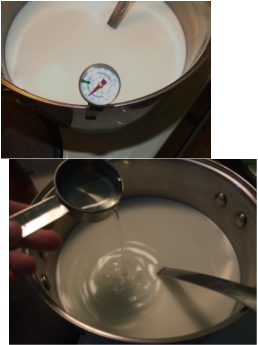
 1. Heat, or cool,  your milk to 75° F remove from heat,  then sprinkle your culture over the top of the milk. Allow it to sit for 2-3 minutes.

2. While waiting, add 1 drop of rennet to 1/4 cup of cool water. Set aside.

3.  Using a slotted spoon, gently move the milk up and down to distribute the culture evenly through the milk. Do not stir.
 
4. Pour in the water - rennet mixture. Mix the rennet through the milk as you did with the culture. Do not over mix!  
Picture
5. Place the lid on the pot and set aside. The culture mix needs to set at approximately 72° for 8 - 10 hours. The 'cheese' should be left alone at this stage, don't move it around and try not to take the lid off to check every 20 minutes as I do.

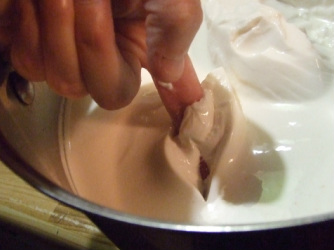
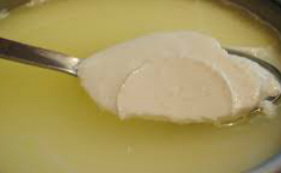
6.  After 8 - 10 hours, check for a clean break. To do this wash your hands and insert a finger into the cheese. When the tip of your finger breaks through the bottom of the solids, hook your fingertip and draw your finger out. If the solids break cleanly and don't stick to your finger the cheese is ready to drain.

   
Picture

 You can use molds or muslin cloth to drain the cheese. Regular cheesecloth is too open to work with chevre, but if it is all you have, try making 4-5 layers
Decide if you want to keep the whey if you do you need to figure out what you are going to catch it in. If you aren't going to keep it then you can just drain everything over the sink. I keep the whey and it goes to the pigs.

If you are using muslin:
            Lay the cloth inside a colander. If you are keeping the whey, set the colander over something to catch it. 
           Using your slotted spoon,  GENTLY lift the curds out of the pot and place in the colander.
          Once all of the curds are in the cloth, gather the corners of the cloth and tie together. Hang the cloth over the container for the whey or sink depending on your preference. I have found a wooden spoon under the knot in the cloth works. You can then place the spoon over a cupboard door handle, or tie some string around the knot and hang that way.

If you are using molds: 
            Place the molds on a rack over the container to catch whey.
            Gently scoop the curds from the pot and place in the molds.
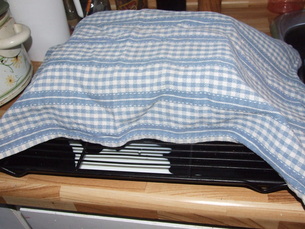
            When you have used all the curds, place the molds together on the rack and cover with a clean dish towel. 
Picture
Allow the curds to drain for 4 - 12 hours.  Four hours will give you a very soft spreadable cheese; 12 hours will give you a texture closer to cream cheese. start checking the texture at four hours and unmold when it reaches your preferred texture. After a couple of batches, you will have a good idea of the time frame for your cheese.
Picture
Once you reach your desired texture you can add herbs if you wish, either
by stirring herbs through or rolling the cheese in a herb mix. (Think cracked peppercorn).

Your cheese is now ready to eat.  It will store for a week in the fridge or can be frozen. If you are going to freeze it, add salt to taste after it is done draining.
Picture
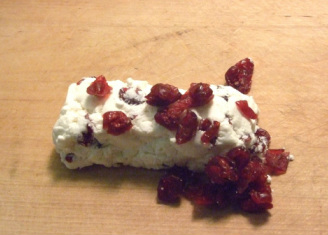
Yum! A slightly crumbly, yet still spreadable cheese. Mixed with some dried cranberries add some slivered almonds on top and you have a yummy dessert.
0 Comments

Our Plans For the Farm

10/9/2014

0 Comments

 
It occurred to me today that while I have spoken often of parts of our plan for Hand-Forged Farm I have never really laid out the entire plan for you. Today you get the full vision!

We first and foremost are a working homestead / farm. We will continue to produce fresh healthy food for ourselves and the community. The structure for the market garden is being put in place this fall, so that we will begin selling produce starting in the spring of 2015. The first greenhouse will be completed late this fall. We will be offering a limited amount of CSA memberships next year and expanding as we bring the garden to full size the following year.

The garden also serves as a valuable teaching tool for those who want to learn the skills required to produce their own food. From WOOFER,s who stay for the season, or part of the season; to workshop participants who come for a weekend to learn a specific set of skills. There a few more plans that will revolve around the garden, but those details will need to wait for now.

The barn will grow also, to start with Gary wants to run 2 sows and a boar. We are on the hunt for a Tamworth gilt, he might also consider a Duroc. The pigs will continue to feed our family and local community. We will continue to sell weaner pigs but will also be raising more of our pork for sale. Gary is finally happy with the system he has worked out for growing sprouts as fodder and is now producing well over 100 lbs a day summer and winter. The animals are all doing very well on them and we are ready to expand. Keeping more pigs will also allow more hands on experience for those who want to work with pigs.

I want to build up the goat herd to six milking does, This will provide enough milk for our family's needs and my soap making. Again, the expansion will allow for more hands on workshops and teaching opportunities.

There are no concrete plans for cattle at the moment, but I have a feeling one or more of the boys may have plans in that area. This would be at least 3 years out right now.

Herbs are also an integral part of the plans. There is going to be a large herb garden which I will use for our medicinal herbs. I plan to use our homestead as a venue for herb walks and wellness retreats and workshops. We plan to bring in other teachers and leaders to give workshops; herbal weekends are a great place to start.

A new orchard of apples, pears, peaches and cherries is going to be planted next spring. Between the garden and the orchard, we will need a few more bee hives. I am planning at least 1 workshop next year for introductory beekeeping.

We have a food forest planned for an area close to the ridge line on the property, and I am working hard to bring a permaculture design course here in late next year or early the following year. Accommodations for WOOFERs round out the plans on the drawing board for now.

Whew!  When I write it all out it sounds almost impossible; but when I look back at what we have done in the past year I know we will bring it all together. It is what we have always wanted to do. We could just build up our property and become almost self sufficient, but we have always wanted to share our knowledge as well as learn from others. For us that is the only way to really become self sufficient... by being part of a self sufficient community.

Humans were not meant to function in isolation, a strong community of people with varying skills and abilities is the basis of any healthy society. We have, for the most part, lost sight of that fact. It is our intention to work with as many like minded people as possible to change that. The oft quoted "be the change you want to see", message is alive and well here at Hand - Forged Farm, and thank you for being along for the journey.
0 Comments

A Little Barnyard DIY

16/8/2014

2 Comments

 
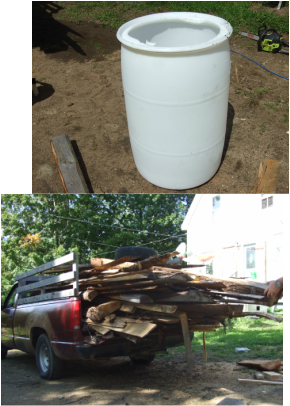
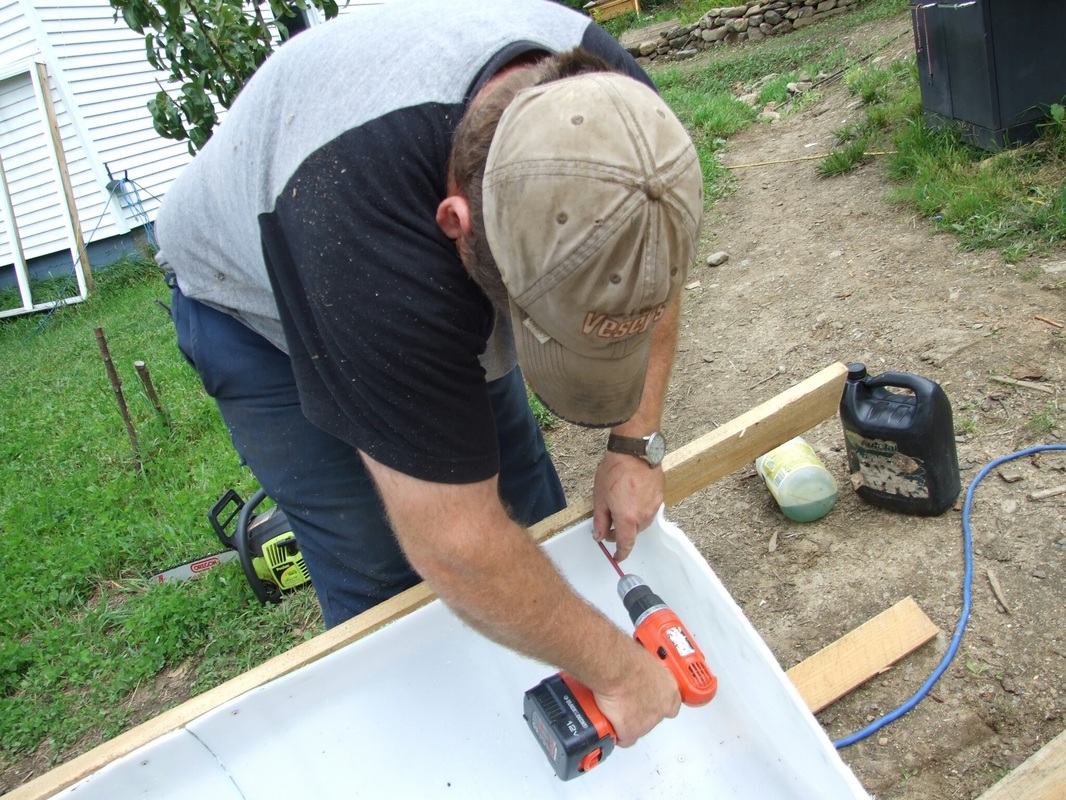
With the doelings getting bigger, and Ivan getting bigger, room at the trough has become a little sparce. In true homesteader fashion we are building a second bunk feeder for feeding hay and fodder. This one is almost like the first one the guys built last fall and it has held up really well; it is easy to clean and with the tombstones the animals don't waste food when they shake the mats of fodder.
We are using a food grade 45 gallon barrel and slab wood we get from a neighbour's sawmill.
Picture
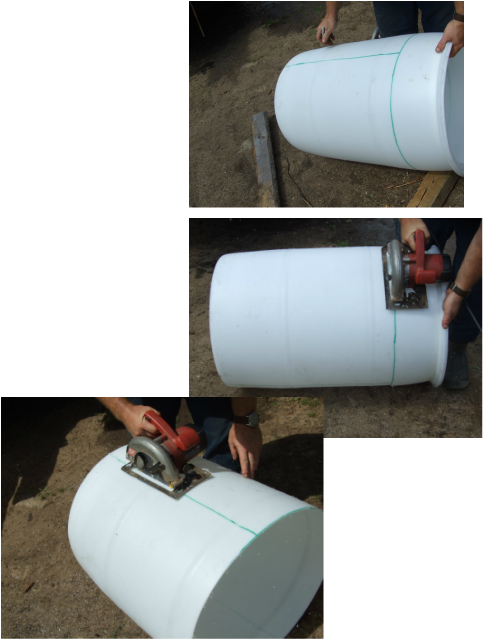
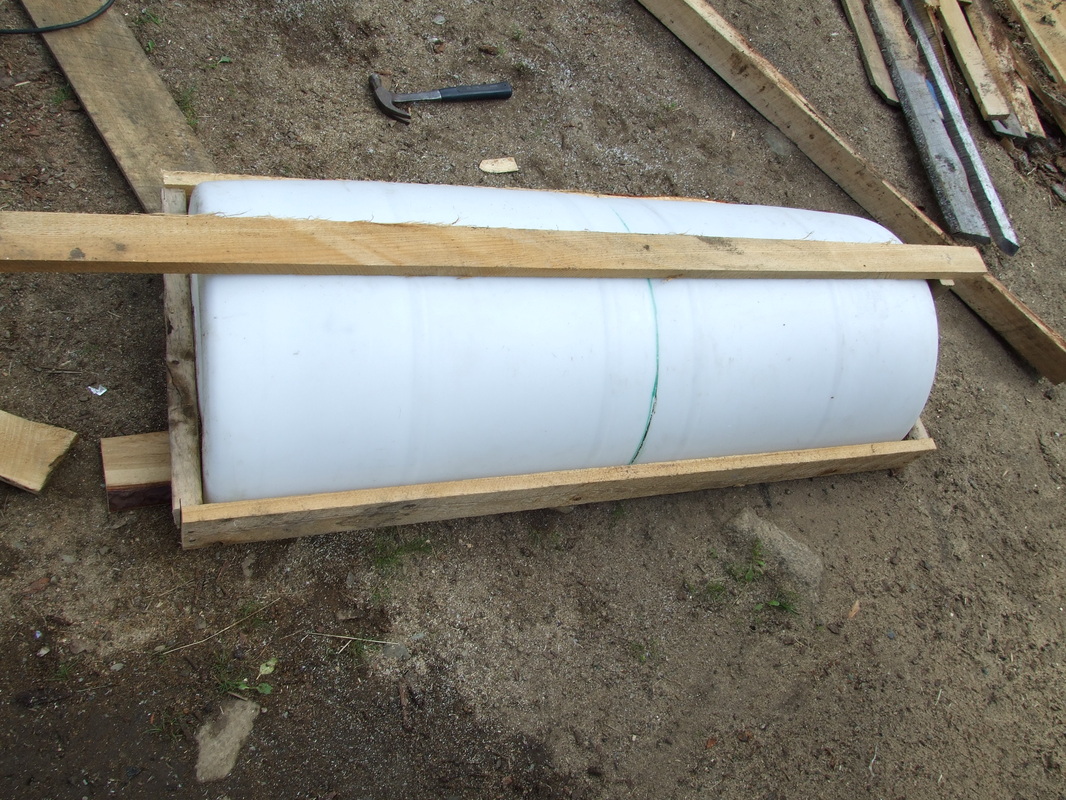
First thing to do is mark the cut lines on the barrel, you need to cut at the point where the barrel starts to narrow at the top and split it down the middle lengthways.
Picture
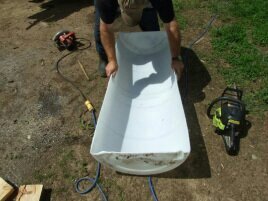
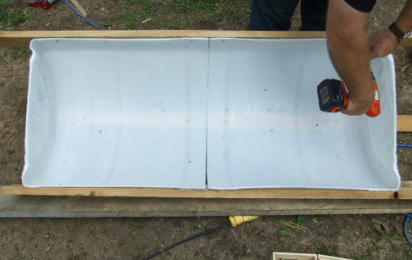
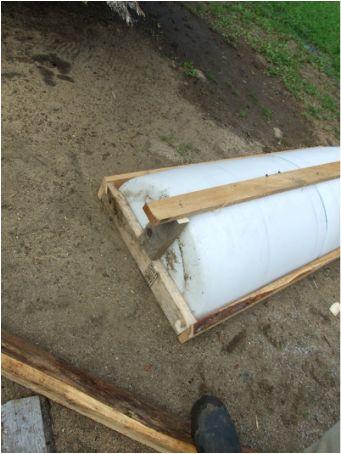
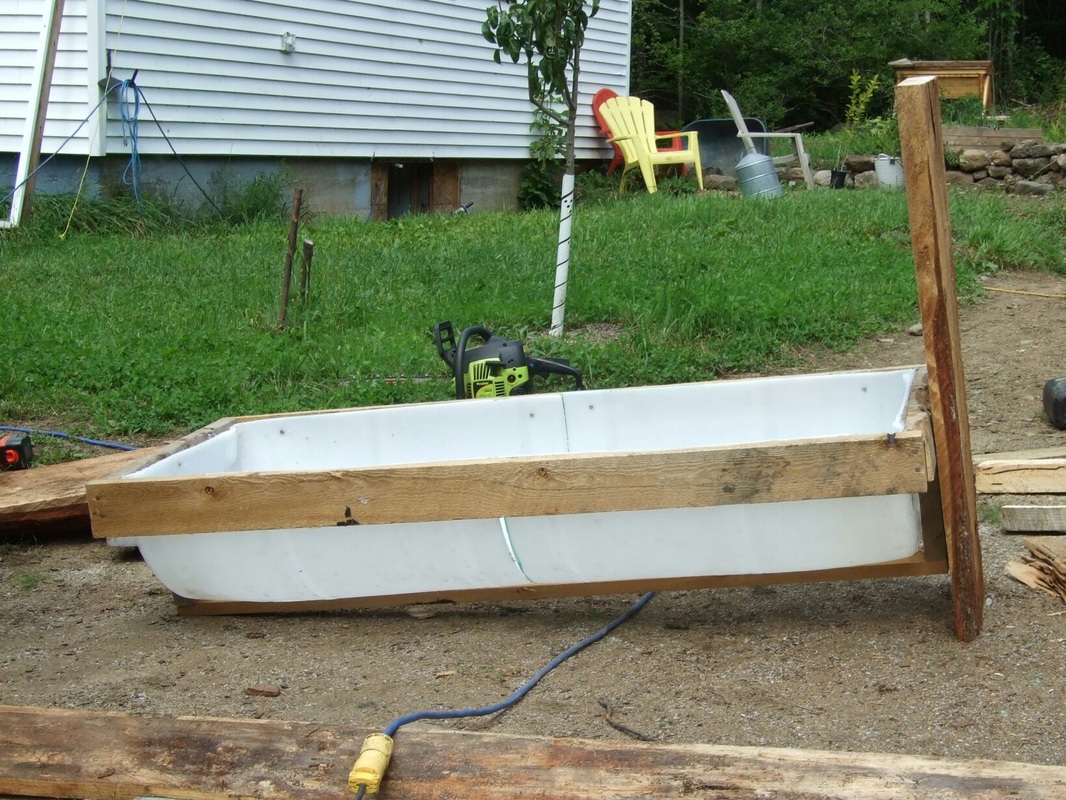
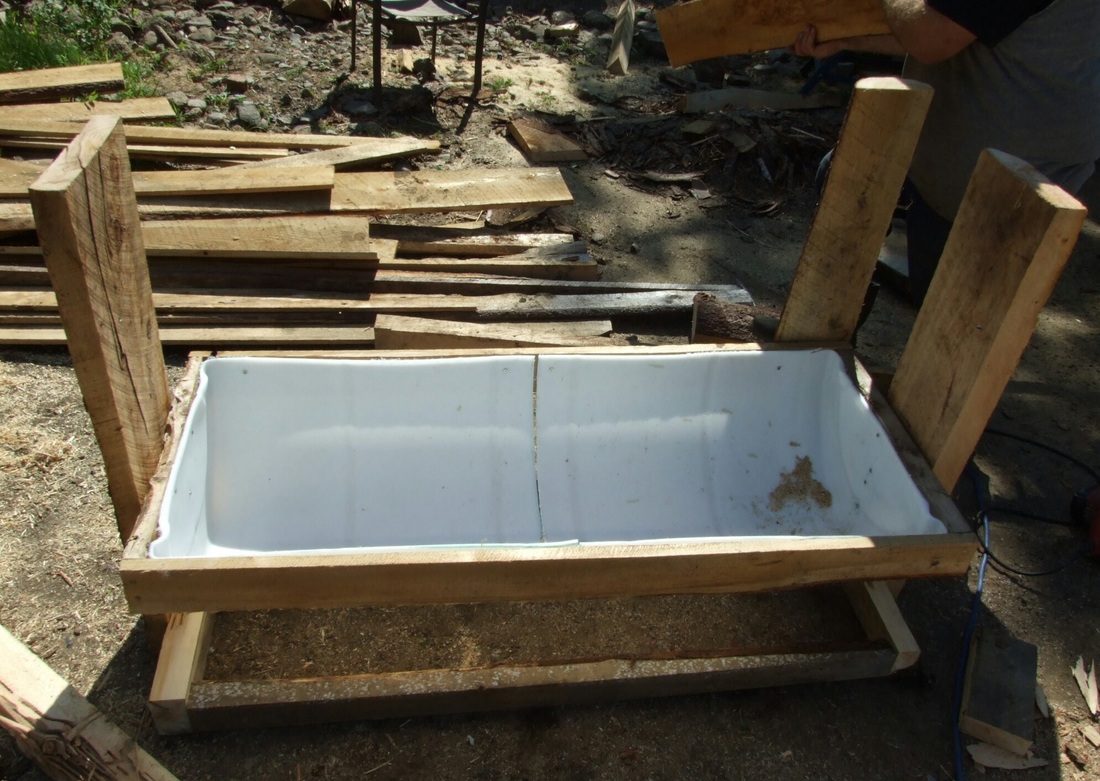
Next, line up the barrel so the bottom of the barrel forms the outside of the trough. To build the frame for the trough, screw 2X4's, or reasonable approximation, along the upper edge of each side of the barrel and one along. the bottom. These should be slightly longer that the barrel.
Picture
Picture
Picture
Picture
Picture
Attach a side slab at each end by nailing through the trough and the support pieces between bottom. and top rail. Leave enough room at the bottom to attach a frame that will support  the tombstones.
Picture
Picture
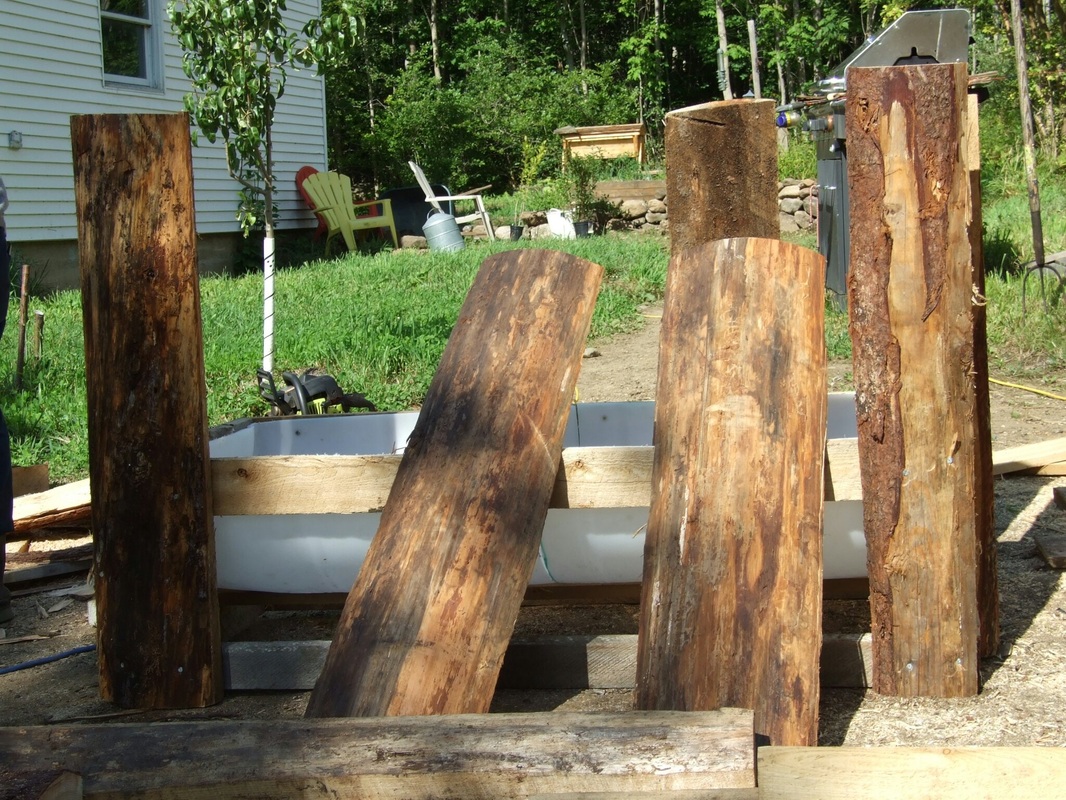
Now it is simply a matter of sorting through the slabs and choosing the pieces yu will use to make the tombstones.
Picture
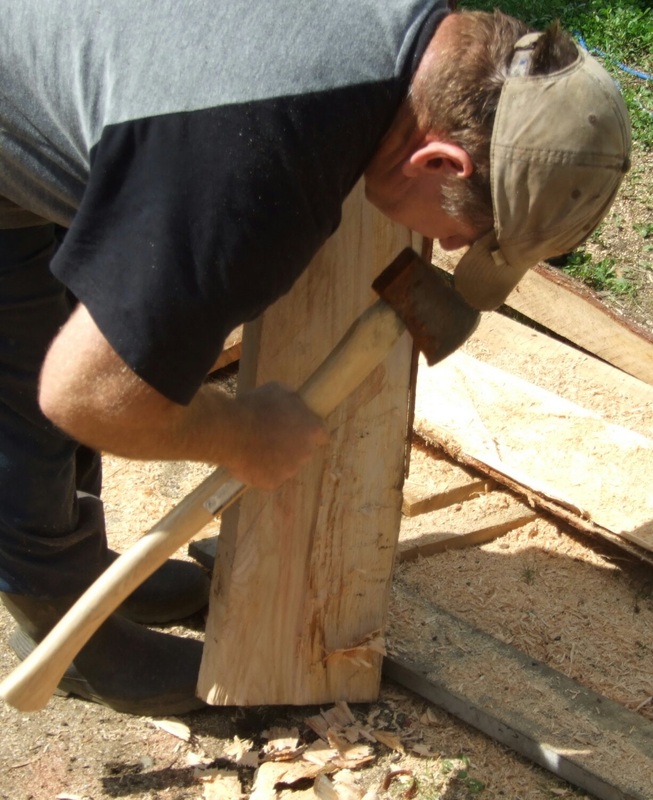
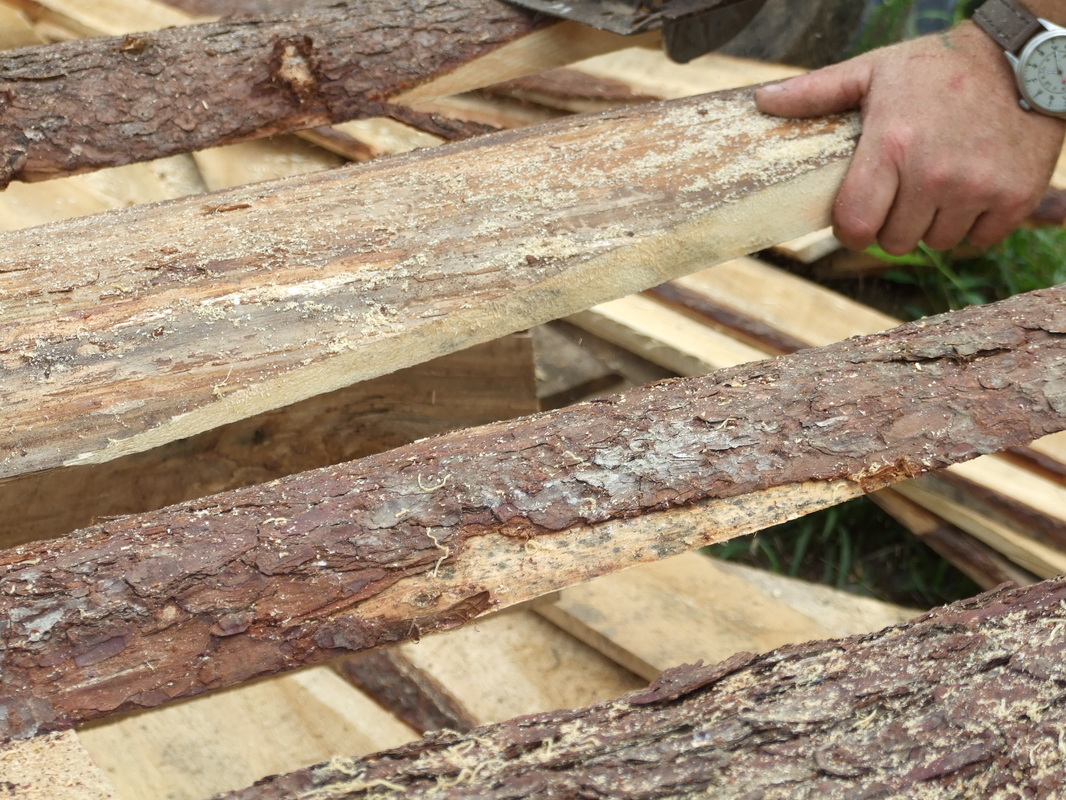
When using rough lumber some "finish" carpentry may be required!
Picture
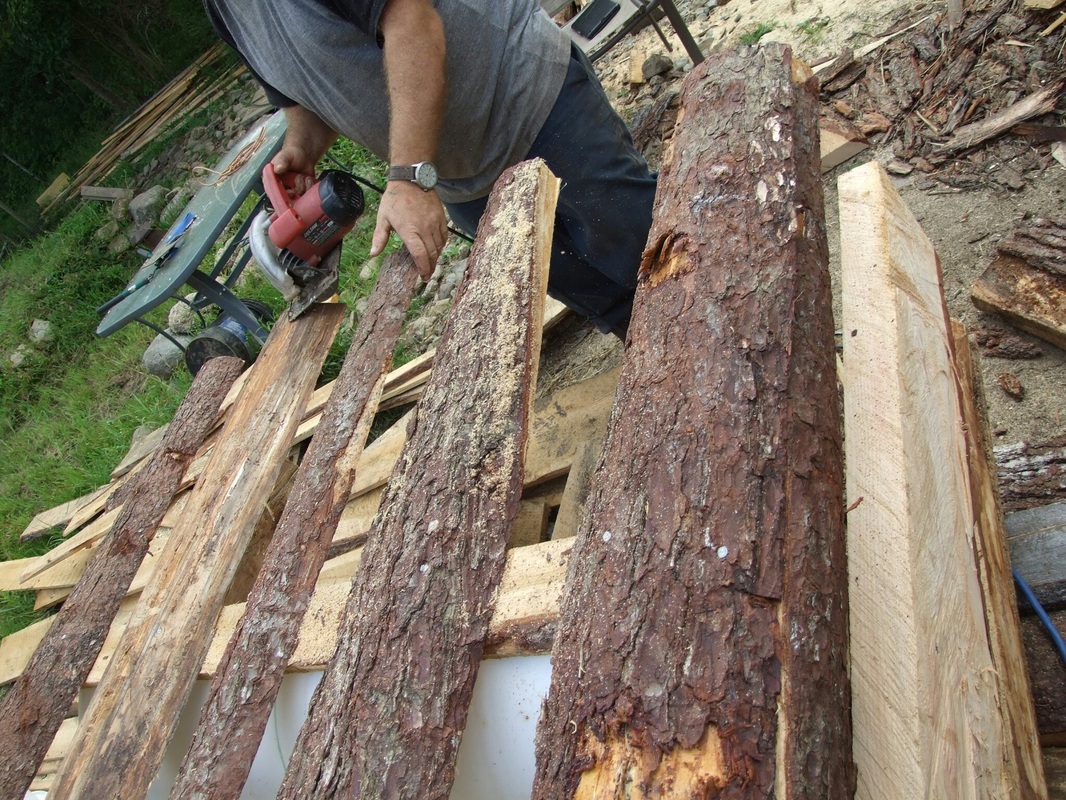
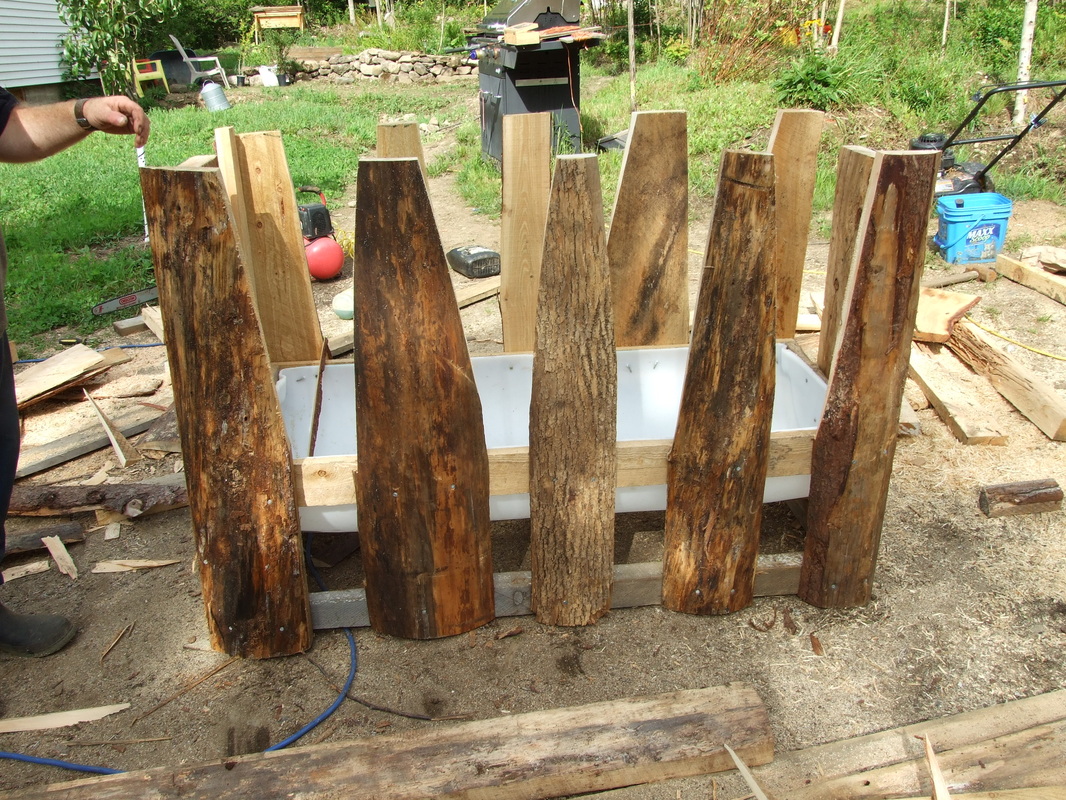
Once all of the tombstone pieces have been chosen, simply nail or screw them to the top and bottom rails. Be sure to leave enough space between the tombstones so that your animal can get it's neck between them, and trim them off so that smaller animals can get their heads over the tops.

When all the pieces are attached, it is a time to trim the sides to create the room for animals to get their heads in at the tops of the tombstones.
Picture
Picture
That's it. If you do not require tombstones you can just fill in between the top and bottom rails. So for an afternoons work and less than  $20, we have a second feeder for hay and fodder. Most importantly no more fighting at the goat / steer dinner table!
Picture
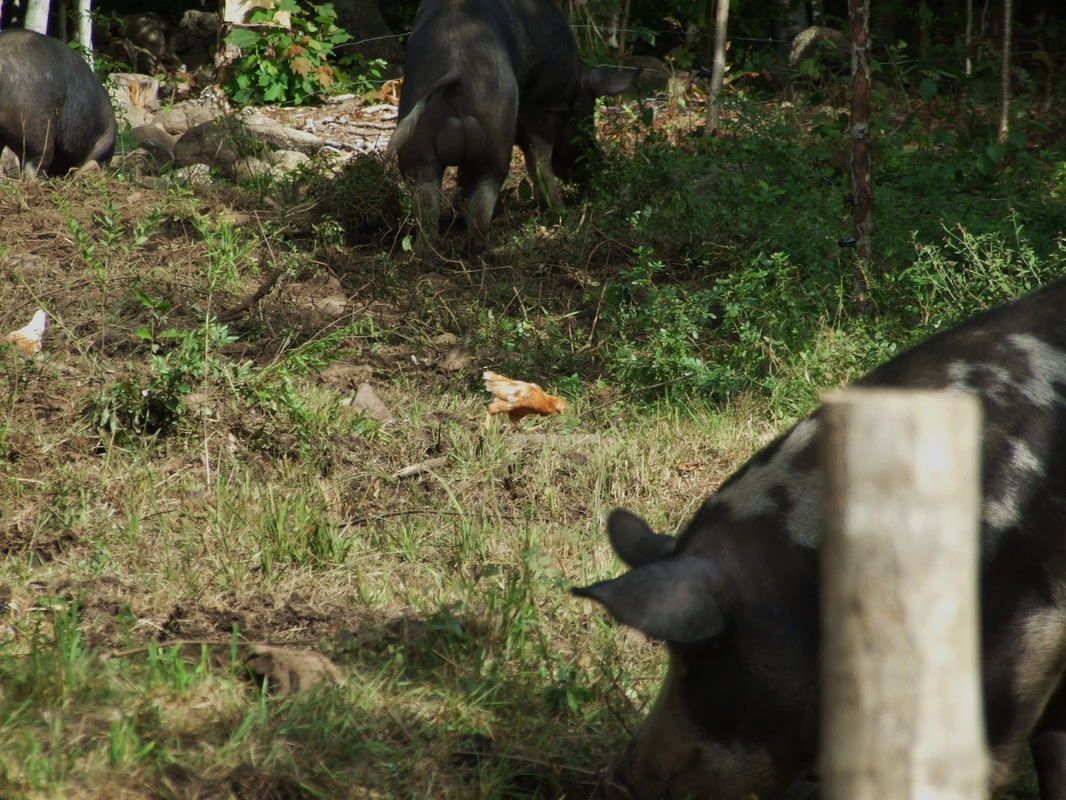
On a completely different note. Two of my laying hen chicks, who are a ripe old age of 1 month, decided that with the pigs area expanded again to work their leveling magic on the bottom part of the future access road, today would be a good time to take it upon themselves to become "free range" birds. Not too bad. They spent the entire day cleaning up the bug and worm bits the pigs left behind. Pretty smart for chickens!
Picture
Have a great day everyone! No post tomorrow but I'll be back on Monday.
2 Comments

Busy Week

13/6/2014

0 Comments

 
Wow Friday already, this week has been a rollercoaster to say the least. Long story short, Matt and Sheena are staying with us for a while after their rental fell through. So we have been trying to find room for their stuff, getting their pets settled while trying to keep our pets from freeking out. ......Everybody breathe...
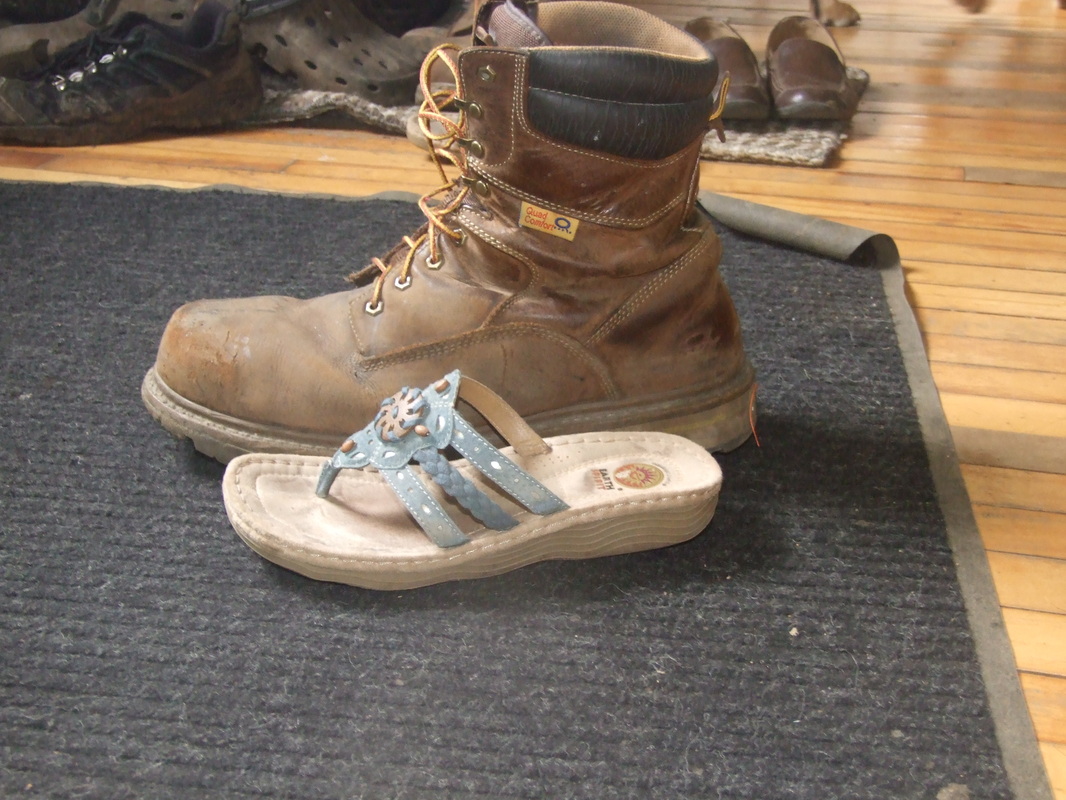
I had forgotten how much space Matt takes up!  Ever wonder what a size 16EEE work boot looks like? Here ya go...   (That's my very cute size 8 sandal next to Matt's boot.)
Picture
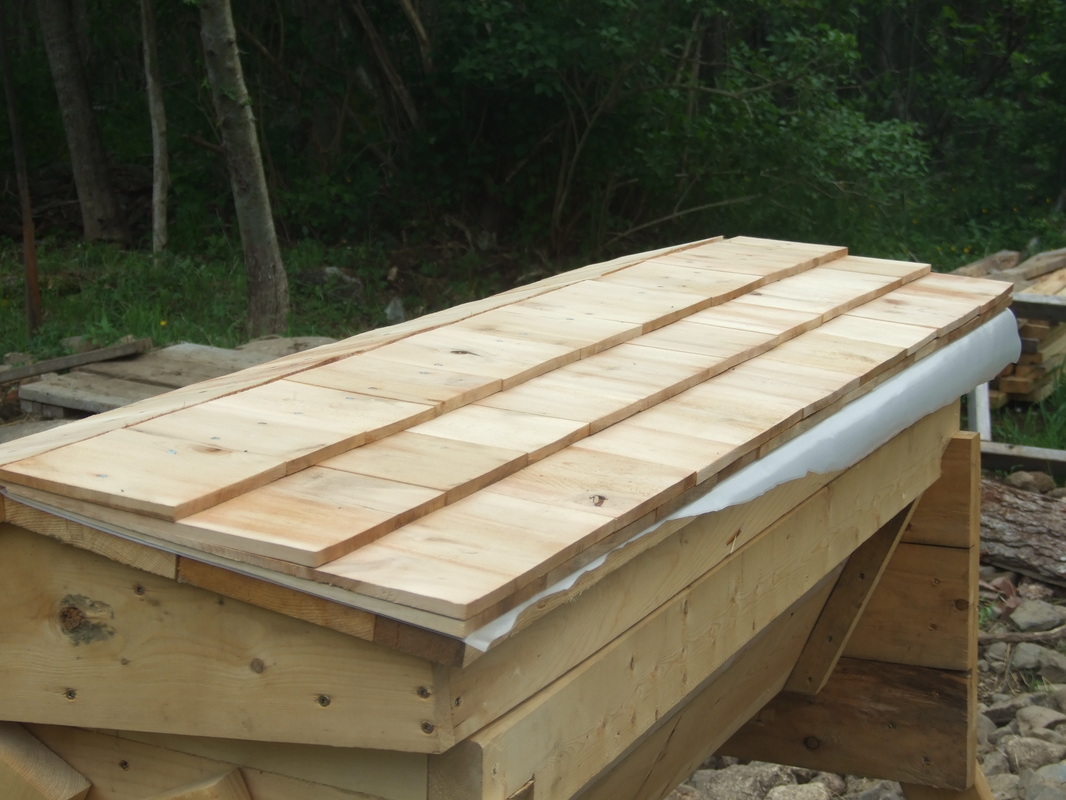
Despite the chaos, we have managed to get some things done this week.  The roof is now on the beehive; just a little trimming to do.
Picture
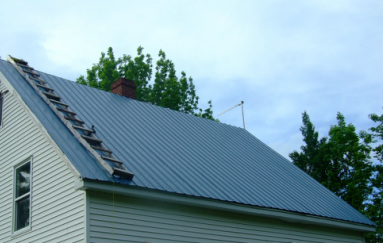
The last of the steel is also on the house roof:
Picture
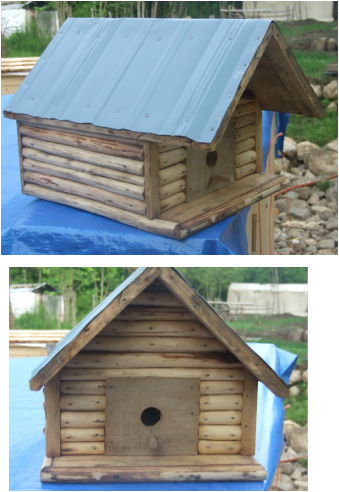
With enough steel left over to give Killwilly a new roof, and a very handsome top for Reliey's woodworking project birdhouse.
Picture
Miss Avril's babies are growing like weeds, we have decided to sell both the doeling and the buckling as we have decided to start breeding Alpines. There is more information about the babies here. As I posted on the facebook page, Patches is bred and she is due to farrow September 1. We already have a waiting list so if you think you are interested please email me!
Picture
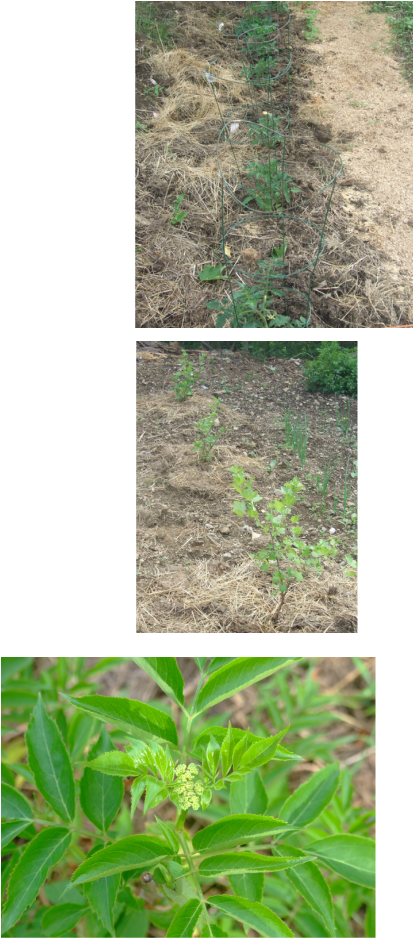
Despite my best attempts at total neglect, the gardens are growing. The tomatoes are blossoming, the sweet peppers are up and thinned, the gooseberry hedge is planted, and the elderberry are producing blossoms!
Picture
Finally, on a purely asthetic note, the perennials I brought with me last fall benefited from the deep snow cover last winter and are making me smile everytime I look at the front yard. The stone path is Gary's doing and will one day circle the house.  We have a new front door, it is on the to do list this summer, just keeps getting bumped.
Picture
Thanks to everyone who emailed about the pig post, there will be a part 2 this Monday dealing with housing and pasture habitat. please feel free to use the comments option on the blog. Share what you're thinking or ask questions. (I promise we don't bite)  Take care everyone I'll see you tomorrow!
0 Comments

Babies!!

4/6/2014

0 Comments

 
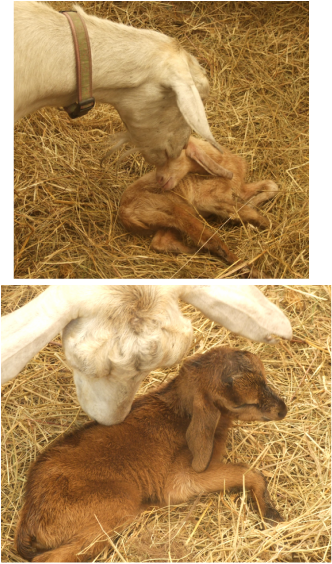
Yes we have babies! Miss Avril delivered twins earlier today. One doeling one buckling. Yes, just twins. She had better milk her little backside off. She put on a good 40 pounds and delivered 10 pounds of baby!
Picture
The doeling is the light caramel one, top picture, and the buckling is the darker.  I will add more pictures when they are up and about tomorrow.
I am freshly back from the judging 101 course yesterday. It was an exceptional program and a great group of ladies. Hopefully I will get the opportunity to do some judging this year and continue to improve my skills.
Enjoy the baby pictures, I am taking care of some family issues today but will be back tomorrow with a full post. i want to talk about rabbits, and why they should be a part of every homestead. See you then.
0 Comments

Tidings and Tidbits

28/5/2014

0 Comments

 
Hey everyone, sorry for my prolonged absence. I have been swamped recently
and it has left my shoulder way too sore to type. (Too sore to do much of
anything to be honest). So just a few updates today...
The first  really isn't an update, it's NEWS. Big News. Big news I've been sitting on for  more than a week, bet'cha thought I couldn't  do it,  Drum roll.......
Our oldest son, Matt and his longtime girlfriend Sheena are moving to Bear River! YEA! They would like to buy the property up the road from us but it is a private sale and the owner lives out west. It is taking forever to even get in there and view. So they got tired of  living on edge and have found a rental in Bear River. They want to start getting to know the community, building relationships and developing opportunities now.
This is great news for us, we miss the kids.  Matt is our garden guy. He has been in charge of  family gardens since he was about 13. Also they are just fun to have around.
Welcome to the neighbourhood guys!
Picture
Last weekend I posted on facebook  that  Miss Avril was due on Sunday. Turns out Reiley read the calendar wrong. She is actually due next Tuesday.
Now Avril is a large goat, her normal weight is just shy of  200 lbs, right now she is HUGE. I feel for her. I was up in the pasture last  night seeing if the goats had cleaned up the latest crop of knotweed  we brought them and poor Avril came over to get her head scratched and she just stood beside me .... moaning. I could see the babies kicking her sides. She had  triplets last year and I wouldn't be surprised if she did it again this time.
We'll know in a few days!
Picture
The garden continues to be on hold. If it ever warms up enough I have the plants ready, but with frost forecast again tonight they will have to continue spending days outside and nights inside. I am ready to put in the first raised bed for the herb garden. Maybe some pics of that and information for you in the next few days. It can't stay cold forever.. can it?

We have been busy making soap. There are many lovely bars of soap curing in the house awaiting their debut. I have taken some pictures of the process so tomorrow there will be a post about making goat's milk soap. For today I will leave you with a great recipe for laundry soap that you can make at home... no weird chemicals needed.

                       Laundry Soap
Ingredients:
                    1 bar of a good laundry bar soap. I believe Sunlight still makes                       one, you might be able to get one in the grocery store or  Bulk                         Barn used to carry it
                      Baking Soda or Washing Soda
                      Borax 
                      Hot Water
                      Essential oil of your choice (optional)
Directions:
Grate the bar of soap, for every 1 cup of soap add 1 cup of soda and 1 cup of borax.  Mix well. Add boiling water to the mixture and stir. (I use a clean paint stick) continue to add water until all of the soap mixture is wet and there is approximately a half an inch of water above the soap mixture. (You may need to let it settle a little). Add the essential oils if you wish then set the mixture aside to cool overnight.
You should have a detergent that is almost a gel by the next morning. I use between 1/4 to 1/3 of a cup depending how dirty the clothes are.
 If you have a mechanic in the house orange essential oil is superb for cleaning grease.
 Before I go for today, I'll leave you with a little soap teaser for tomorrow....
Have a great day everyone!
Picture
0 Comments

New Additions

10/5/2014

0 Comments

 
Hey everyone. Just a quick post, after almost 9 hours in the car yesterday my shoulder is on fire and typing doesn't help! I will say that every minute of that time was worth it; because we were bringing home the 2 new additions  to the farm...
 
TA - DA!!
Picture
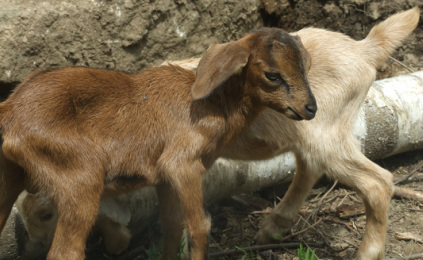
Meet Pepper                                                             and Fawn

Are they not just too adorable?
Yesterday Reiley and I had the privilege to meet  Alicia and Dan of Backwards Brook Farm in Upper Stewiacke. They have a great homestead started up there, and they were the breeders of these two adorable babies.  One of these adorable little girls will be Reiley's  4-H goat for the year, and both will be milking goats in our herd for many years to come. 

0 Comments
    Picture
    A  4-H Family
    Lives Here

    Receive inspiration and information for your homestead several times a week

    * indicates required

    Author

    Hi! I'm Shelli Killen,
    a homesteading, homeschooling, wife and mother of five. 

    I am a student  herbalist with a passion for learning and a  habit of bringing home strays.

    I love music, and the power of creating things with my hands.
     
    I tend to do best when life around me is organized chaos
    .

    RSS Feed

    Categories

    All
    Bees
    Canning
    Chickens
    Economy
    Gardening Vegetables
    Goats
    Herbs
    Hobby Farming
    Homesteading
    Homesteading Skills
    House Management
    Lifestyle Planning
    Pigs
    Self Reilance
    Self Sufficiency

    Archives

    December 2014
    November 2014
    October 2014
    September 2014
    August 2014
    July 2014
    June 2014
    May 2014

Powered by Create your own unique website with customizable templates.