Hand-Forged Farm
  • About Us / Contact

Heating With Wood

28/10/2014

0 Comments


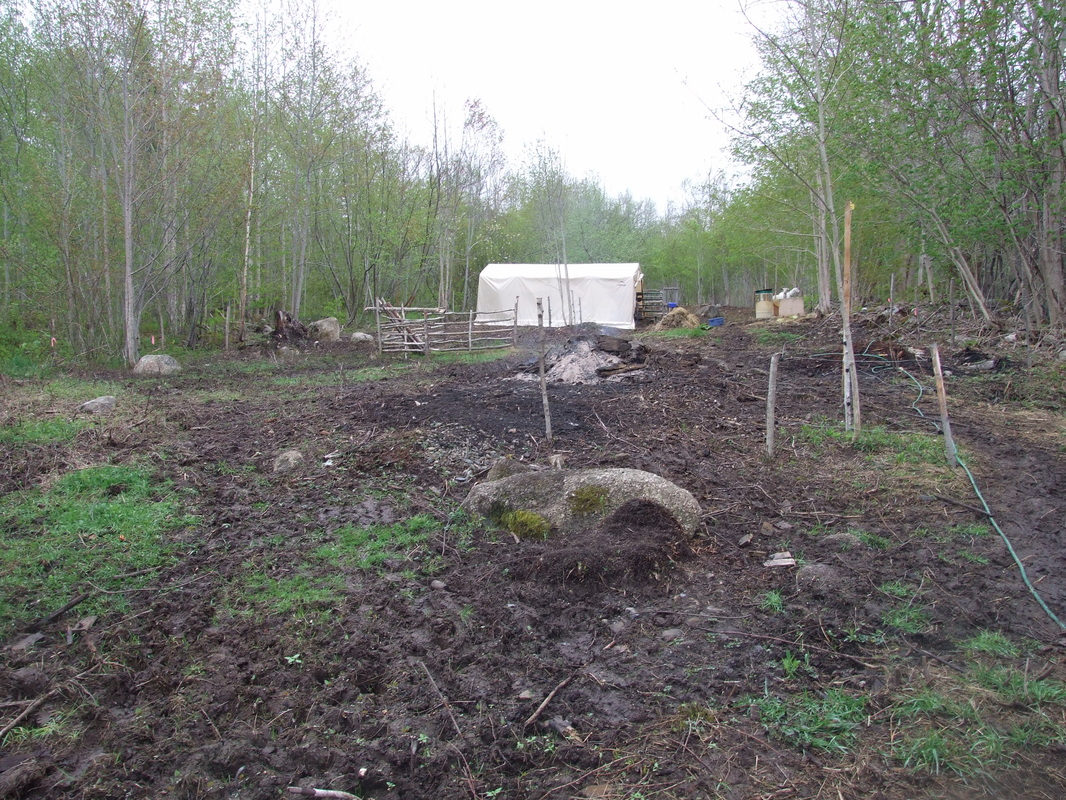
Hi everybody, well I am back! Last week is officially one of the worst in recent memory; in fact, the last few weeks have been rough. If I look back things started to go off the rails around the last week of September which happened to coincide with the last new moon,  so I was really pleased to see the cycle end late last week.

To give you an idea of how bad last week was Monday morning started off when Jason, (child number 4), called and began the conversation by saying " I'm out of the hospital, and I'm OK...." fellow parents breathe deeply. He was working on his girlfriend's car late Sunday when he was removing the blocks the jack slipped and he was pinned by the partial weight of the car. He is going to be OK. He has torn cartilage in his ribcage and lots of inflammation around his spine. I wasn't able to see him until Saturday so no matter what I tried to do last week I just couldn't focus. I couldn't sleep every time I tried to think I just kept seeing him trapped. Sometimes being a very creative visual person just doesn't work! Add to that continuing computer issues, front axle car trouble and a weather system that turned the homestead into a post-apocalyptic landscape and I have never been so happy to welcome Monday. 

That's enough whining, on with the week.

Today is Tuesday and in the spirit of How to Tuesdays, I thought I would talk about heating with wood. It was cool and damp here last week and that meant time to fire up the wood furnace. We do have a wood furnace in the basement, it heats via a hot air system. Not my first choice and the long term plan is to install a wood cookstove which will heat the house and our hot water, but this will not happen until next fall at the earliest. We do use the wood furnace exclusively.

There has been a lot of talk about wood heat not being sustainable and about the carbon effects of burning wood for heat. My position is that if you manage your woodlot properly, then wood heat is carbon neutral. It is certainly better than oil, natural gas or coal. (Coal being burned to supply you with electric heat.) There is also a lot of misinformation on the safety and efficiency of wood heat; but again if you do it properly, wood heat is safe, efficient and cheaper than most other fuels available.
Picture
So, what is the "proper" way? Well there are as many opinions on that as there are people who have ever attempted to make a fire. We have used wood either partially or exclusively for heat for the almost 30 years that we have been together, and there are five questions that always come up when we talk about heating with wood: how much wood will I need, what is the proper way to start a fire, what kind of stove do I need, what about insurance and what type of wood is best?  While most of the answers start with "it depends", I'll try and make a dent in them today.

First insurance, it annoys me to no end that if wood is your only source of heat you are going to have trouble getting insurance. This explains the pattern we see around here of new houses equipped with electric baseboard heaters. They are cheap to put in and cover your backside for insurance purposes. Unfortunately, when people buy these houses and don't want to heat with wood they end up selling their souls to Nova Scotia Power in order to keep warm. For those who aren't blessed with that particular entity in their lives, my most recent power bill tells me I am paying a base charge of $10.83 a month and $0.14251 per every kilowatt hour I use; and don't forget to add the 15% harmonized sales tax. You can understand my desire to get off the grid. So if you have an existing heat source other than wood, don't remove it. I have a friend who bought a house that had an old oil furnace in the basement, the tank had been removed but because the furnace sat in the basement they were able to install a beautiful Pacific Energy stove and use it to heat their 1200 square foot home with wood and keep their insurance. I am sure individual cases will vary but if you are building or renovating it is worth it to check with your insurance broker.

The next question is what size and type of stove do I need? This will depend upon the size of your house, how much insulation it has, what your climate is like and why you want a stove in the first place. There are many types of stoves and other ways to heat with wood. If I was building from scratch, and had a sizable budget I would build my house around a masonry heater. Masonry heaters work on the principle of heating a large thermal mass and then allowing that heat to radiate back into the living space. This is the same principle behind rocket mass stoves, just on a larger scale. They tend to be the most efficient way to heat with wood and certainly give off the most even heat from wood. Most masonry heaters are extremely heavy and require beefing up of foundations. If you are looking for supplemental heat and emergency heat in case of a power outage then an airtight wood stove is probably the best option. There are multiple brands on the market, my personal preference is for the Pacific Energy brand. That said, it has been a few years since I did any research into this type of stove so there may be better ones out there.

Do your research, manufacturers list the stats for each model including btu's and square footage recommendations. These should be treated as fuel milage ratings on new cars, they represent the optimum when the unit is operating at peak efficiency; and for wood stoves this means burning at full draft with dry hardwood. This is not how most people use wood stoves.
Picture
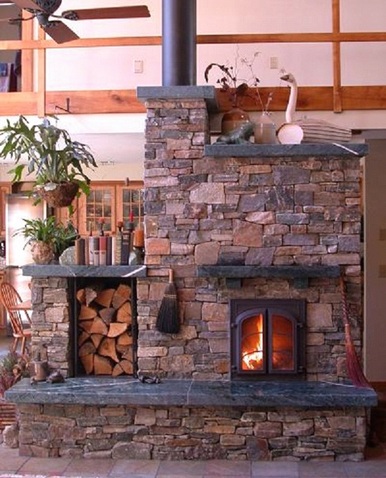
Photo credit http://www.inspirationgreen.com/masonry-heaters.html
​We have decided to install a wood cookstove. We want the stove to be our main source of heat and to use for cooking as well as hot water, a cookstove will allow us to do all of these things. Just a note on buying a used stove, you can get great deals on stoves but be warned, if you want to install it in your house, it will need a CSA tag on it. I'm not sure about US regulations. If you are looking at a used stove and have determined that it does have a CSA tag, you need to be most concerned with checking for cracks in the firebox. Things like dirty or broken glass and missing or bad door gaskets are easily rectified. In fact, if you are going to have a wood stove you should be prepared to replace the door gaskets every year at least.

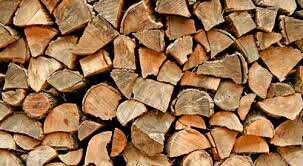
So you have the stove and the chimney installed, what to burn? If you are purchasing firewood, ask friends and acquaintances for recommendations. There are many great people selling firewood but there are also not so great people selling firewood.  Know what you are buying. Most firewood is sold by the cord. A full cord of firewood, when stacked, will measure 8 ft X 4 ft X 4 ft. I have found that the closer you get to suburbia the more likely you are to find people selling "face cords", face cords are 1/4 of full cords when you stack it will measure 8X4X1.

If you are handy with a power saw ask about getting eight-foot lengths; suppliers will usually give you a deal if they don't have to cut and split the wood. Ask if the wood will be cut and split, this is not a given.

You are looking for hardwood, species like maple, oak, birch, and ash. The denser the wood fibers the longer and hotter the wood will burn. Hardwoods also burn cleaner. Softwoods like spruce, fir, and pine, especially if not properly dried, will have resins or sap. When this sap burns it gives off black smoke. This smoke is full of creosote, creosote sticks to the inside of your chimney and will catch fire. Wood that has not been properly dried, is referred to as greenwood. It is to be avoided at all costs. It has high moisture content and therefore does not burn well. You will get much better heat, efficiency, and safety from dried hardwood. Wood you will be burning this winter should have been cut last winter, older is fine. We cut firewood in the early spring and let it dry until early fall. If you moved to your homestead in the summer and plan to harvest your firewood from your own land, look for standing deadwood, trees that have died but remained standing or deadfalls, trees that have died but were caught in branches of other trees as they fell, keeping them from hitting the ground. Both of these will be suitable for burning. It will put you much farther ahead to start with dry wood, even if you have to buy your wood for the first year.  
Picture
Picture
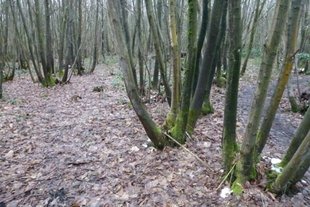
When harvesting wood from your land, learn about coppicing trees. When you cut a hardwood tree during its dormant phase, it will send up 'shoots' the next spring. These shoots will grow into great firewood in a few years, by learning to tend and manage your woodland you will provide yourself with a completely renewable energy resource that will keep you warm for years to come.


How much wood do I need? The answer to this is impossible for me to say. Even if we had identical houses on the same road it would be impossible to say. Square footage is a place to start, you must also take into consideration how well your house is insulated, how warm you like your home to be as well as the design of your house. A sprawling ranch style house will never be as easy to heat with wood as a compact Cape Cod-style house. How does the air move around your house? Will you be home during the day to tend the stove or do you need supplemental heat for when you are at work. If you have bought your property, you should be able to get a ballpark figure from the previous owners, it pays to err on the side of caution, having too much wood is better than having not enough, and it's not going to go bad, you can burn it next year. One other point, unless your house consists of one room directly over another, you will need a fan(s) to move the heat around the house. It is worth the investment to look at convection fans like the Ecofan.  

The final question I want to tackle seems somewhat silly to some people, but I have seen grown men argue forever about the proper way to start a fire! I have found it is usually men who have the view that the only way to start a fire 'properly' is their way. As if a fire started any other way will not burn as well??? There are many methods of starting a fire: grid and teepee, paper, no paper, it can go on for hours. The basic principles are all the same: you need a dry, easily combustible material such as wood chips, paper, thin bark, etc. You need a small stack of kindling, thinly split pieces of very dry hardwood, and they need to be arranged so that air will move around the individual pieces, yet touching so that the flames can spread. That is really all there is to it. Find a configuration that works for you and that is all you need. So while everyone else is arguing about how to start a fire, you can just go ahead and do it.

For the last word, I will refer you to woodheat.org  this site will answer any and all questions you might ever have concerning heating with wood.
​

Have a great day everyone, and stay warm!  
0 Comments

Toxic Cleaners and Non-Toxic Alternatives

20/10/2014

0 Comments

 
Hi Everybody, well we survived the 4H awards banquet. I was a little nervous when I found out that Reiley and the Jr hostess Kiera, were going to MC the evening. You can never be too sure when you hand over the stage and a microphone to a 13 year old boy and girl, but they did a great job! Everyone had a great time, great food and now  the cycle begins again.

We have been working to get things completed as the weather has continued to hold. After a rather rocky start, October has turned into a beautiful month. Warm days and mild nights with a mix of sun and steady rains have allowed us to finish up those few projects we had left. The guys are in the garden today finishing the work on the soil and planting the last of the garlic.

Inside, I have been making soaps for the Christmas orders and for the craft fair I am attending next month. I haven't done a market or craft fair since before my first shoulder surgery almost three years ago. Reiley will be coming with me to help. So we shall see. We are continuing to chip away at the renovations inside, but the heavy work inside won't begin until everything is frozen outside. We are under a tighter deadline this winter as there will have to be a forced break in the work once the baby arrives in late February or early March.

Back to the matter at hand! I had a couple of posts written on cleaners and chemicals to avoid for post on Thursday and Friday, but they were lost in this computer and are lost for all time. So today you are going to get the coles notes version of both posts rolled into one.....

If you feel that you just aren't ready to ditch the commercial cleaners you are used to; and that is fine, I am not here to judge just inform. Try to find a list of the ingredients contained in your products and look for ones that are less harmful. Here are the nasty chemicals and what they do.

Powdered Silica. This is the staple ingredient in the abrasive cleansers, like Comet. Powdered silica is recognised as a known human carcinogen by the International Agency for Research on Cancer. It is made from finely ground quartz and is hazardous if inhaled. Unfortunately it also becomes a carrier for the other dangerous chemicals contained in the cleaners.

Ammonia. A staple in glass and stainless steel cleaners / polish. Ammonia vapours can irritate the the skin and mucous membranes of the eyes, throat and lungs. People with asthma and C.O.P.D. are susceptible to small concentrations of ammonia. The real problem with ammonia in cleaning products, and this is one that sends people to the Emergency room all over North America every year, is the accidental mixing of products containing ammonia and products containing chlorine bleach. When these two chemicals combine they form chloramine gas, Chloramine gas was used as a chemical weapon during WWI. Enough said. Ammonia is also found in drain cleaners, all purpose cleaners, car polish, toilet cleaners and oven cleaner.

2-Butoxyethanol (2-BE, also known as butyl cellosolve)

This nasty little ingredient is a known eye and skin irritant and has been shown in laboratory experiments to cause reproductive issues. Health Canada has listed indoor air and skin contact with cleaning products as the main exposure. It is listed as a toxic substance under the Canadian Environmental Protection Act and is limited to a concentration of five - six percent in household cleaners but some products such as laundry stain removers may contain as much as 22%.


So what should we do? It is difficult to find a label that actually lists full ingredients; the laws surrounding label claims such as "green" or "environmentally friendly" and "non toxic" are as toothless as hens. What do we do? My solution has been to make my own cleaners.

Most modern cleaners are based on recipes that utilized natural ingredients. In order to develop markets, companies began to try and isolate the properties of these natural ingredients and synthesize cheap chemical ingredients with the same "properties"’. Going back to the original ingredients you can make effective products which don't pollute your home or the surrounding environment and are much cheaper than the commercial options.

The basic ingredients needed to make your own cleaners are probably already in your cupboards my stock includes:

White Vinegar. Vinegar is a mild acid, natural deodorizer and grease cutter. Vinegar will remove mildew, wax buildup and scale from hard water.

Lemon Juice. Lemon juice does similar things as vinegar, however it has a slightly lower ph and is therefore slightly stronger. It also has a pleasing scent.

Baking Soda Baking soda is a base. It is useful for softening water, deodorizing, cleaning and as a mechanical scouring agent.

Soap. You are looking for a plain, unscented biodegradable soap. It can be liquid, flakes or bar. I make my own so I can make flakes or liquid as needed. Washing soda. Washing soda is a mineral, powdered sodium carbonate decahydrate to be exact. It is also one of the strongest ingredients in my cleaning supplies. It is a water softener, removes many stains and is a fabulous grease cutter. I use washing soda in my bathroom cleaner and as a laundry additive for loads that are particularly nasty from homesteading activities. Matthew uses grease pencils at his day job right now and sometimes they get in the laundry. Washing soda paste will take out the results.

Rubbing alcohol. Isopropyl alcohol is  the technical name. As one would assume it is an excellent disinfectant. Use common sense, or as a friend is fond of saying, good sense as it is not common anymore. If you are using rubbing alcohol to disinfect around the kitchen rinse afterwards.

Borax. Of late, there has been talk of how environmentally friendly borax really is. I have looked at most of the talk and I still continue to use borax. Most of the concern seems to focus on boric acid, however borax is not boric acid,. Boric acid is formed when borax is added to any acid. Borax on it's own, is a moderately strong alkaline with a pH of 9 -9.5 range. I have looked at most of the studies and find issues with many of them. I cannot tell you to use it or not use it, all I can say is I still use it. I don't spread it willy nilly around the house, but then again I never did. Bottom line borax is not absorbed through the skin, it is non carcinogenic, (as far as we know) and it does not bio-accumulate.

Essential Oils. I use tea tree, lavender, and orange essential oils in my cleaning recipes. I don't use them all the time, only when needed. They are great for extra disinfecting, grease cutting and aromatherapy.

So those are the raw materials. Tomorrow I will share my recipes with you and some tips and tricks I have learned over the years. Have a great day everyone!
0 Comments

What's In Your Cleaning Supply Cupboard?

15/10/2014

0 Comments

 
Canadians spend roughly $300 million dollars a year on household cleaners. Most of these contain highly toxic chemicals that harm the environment, threaten the health of our pets, our children and us.

Current regulations do not require companies which produce and market these products to list the ingredients. Under the current regulations companies insist that this is proprietary information and would be detrimental to their corporations, read bottom line, to do so. So not only are we paying to poison ourselves and those we love, we are not even allowed to know what compounds we are doing it with. Some companies are now offering up ingredient lists, mostly buried deep on their websites, but it is worth having a look.

We have all seen the hazardous warning labels on cleaners, but think about the last time you actually had a good look at the array of bottles in your cleaning supplies cupboard. If you have not yet made the switch to natural cleaners I challenge you to open up your cupboard. Send the kids out to play and take all your stuff out of the cupboard and lay it out on your table. Have a good look at the labels, how many different warnings are there? How often do you use these products? Do you wear gloves or masks when you use them? How many say to use only in a well ventilated environment? How many list the ingredients?

Those hazard labels are for short term acute exposures, there is no requirement for companies marketing these products to tell you what kind of effects low level long term exposure will do to you or what effect this might have on the development of your young children. Since they do not have to report this most companies do not even test for this. Nor are they required to report, and therefore test, the cumulative effects of these products.

It is entirely possible to have exposure to a dozen hazardous chemicals between getting up and leaving the house in the morning. There is very little testing being done as to the health effects of this continuous low level exposure. When we use these products in our homes they "off -gas". This is due to a nasty little group of chemicals known collectively as VOC's. Volatile organic compounds.

According to the United States Geological Survey, 2005: "Many VOC's are human - made chemicals... They are often compounds of fuels, solvents, hydraulic fluids, paint thinners, and dry-cleaning agents commonly used in urban settings. VOC contamination of drinking water supplies is a human.-health concern because many are toxic and are known or suspected human carcinogens"

VOC's form particulate matter and react with nitrogen oxides to form smog. In our homes these compounds linger in the air and we breathe them in. If your product has a fragrance you are breathing in VOC's. New car smell, new carpet, plastics, fresh paint and my personal pet peeve: air fresheners? All of these are off gassing VOC's. Research into VOC's has found an increase in leukemia and lymphoma rates linked to prolonged exposure of VOC's in the indoor environment.

If this blog does nothing but make you ditch those poisonous, toxic fragrances marketing has made you believe you need I will be a happy camper. As far as I am concerned, those behind Febreeze, Air Wick, Glade and anyone who pedals paraffin candles with synthetic fragrances should be taken out and shot.

As I said yesterday, I began actively trying to purge our home of toxic chemicals back in 1993. If you had asked me in 2003 I would have said we had a relatively toxic free house. Then came Gary's accident.

One of the most debilitating long term aspects of his injury is the environmental illness he has. He has no tolerance for VOC's. Just walking into any Canadian Tire store will give him a migraine for a day or two. The man can smell the school bus coming. This has become a major factor in our lives. It dictates where we live, everything that is brought into this house needs to be assessed. VOC's have become such a ubiquitous part of North American life style that even when we think we are culling them they are there.

Unfortunately, VOC's are not the only culprit in this chemical warfare. The chemicals in these products absorbed through the skin and ingested as residues on our dishes and through household dust.

My top three avoid at all costs ingredients are:

Triclosan
This product really pushes my buttons. Triclosan is the antibacterial component in the plethora of antibacterial products on the market today. It is toxic, the European Union lists it as an irritant to the eyes and skin. It is a suspected endocrine disruptor and is very toxic when it enters aquatic environments. It can also react with other compounds in the environment to form dioxins. Dioxins are bio accumulators, meaning they persist and concentrate as they move through the food chain, and are a known carcinogen. They are also suspected in the rise of antibiotic resistant microbes. The Canadian Medical Association has called for a ban on all antibacterial products.

Triclosan is found in dish soaps, disinfectants, sanitizers, deodorants, liquid hand soaps, laundry soap, tissues, mouthwash, toothpaste and antiseptic ointments. It is also impregnated into plastics for garbage bags, children's toys, babies teethers, high chairs, mattresses, toilet seats, clothing and furniture.

Fragrance and Parfume. Such a harmless sounding words. There are currently over 3000 chemicals which come under the heading of fragrance, most of them are petroleum based. Even products labeled as scent free usually contain fragrances, but they also contain parfume. Parfume is a nasty little beast. it's only function is to inhibit our brains ability to detect scent. Think about that for a minute. Most of the compounds included in the fragrance category have little testing. Manufacturers argue that since there is such small amounts in each product they pose no health concerns. Fragrances, and lets be specific, synthetic fragrances, are the most common trigger of asthma and allergic symptoms. A 2002 study on fragrance compounds suggested that exposure to perfumes and colognes can; "exacerbate asthma, and perhaps even contribute to its development in children."There have been several laboratory studies which indicate a link between individual fragrance compounds and cancer as well as neurotoxicity. Environment Canada has categorized several synthetic musks as bioaccumulative, and/or toxic, and persistent and to human health. Measurable amounts of synthetic musk has been found in the fatty tissues of fish in the Great Lakes, amounts of these compounds found in the sediments of the lakes are also rising. Fragrance and Parfume are found in almost everything. Sodium lauryl sulfate (SLS) and sodium laureth sulfate (SLES) These 2 compounds are why I began making my own soap and consequently sent me on the path to becoming a herbalist. There is a lot of things wrong with these compounds, however there is also a lot of erroneous information on the Internet about these compounds. Lets have a look. SLS and SLES are found in anything that makes suds. They are degreasers found in everything form baby wash to floor cleaners marketed to automobile garages, obviously in different concentrations. Both compounds are well known skin irritants. They are damaging to skin and mucous membranes. They have been found to strip the outer layers of skin and mucosa cells. Especially the mucosa of the mouth when SLS and SLES are present in toothpaste and mouthwash. It is important to remember that concentrations in household cleaning products will be higher that in cosmetic/ personal care products. The link to cancer and long term damage is less clear. Most likely because there have been few studies to look at the effects. What is well documented is the presence of known carcinogens 1,4 dioxane and ethylene oxide in SLES, and nitrosamines in SLS 1,4 dioxane and ethylene oxide are a result of of the manufacturing process used to create SLES. As these carcinogenic compounds are byproducts of the chemical reaction, under law they are not ingredients. So even though they are known carcinogens and present in your baby shampoo, they do not need to be listed as ingredients. The Center for Disease Control describes 1,4 Dioxane as"probably carcinogenic to humans," toxic to the brain and central nervous system, kidneys, and liver. It is also a leading groundwater contaminant." Nitrosamines are carcinogens which cause your body to absorb nitrates, which are known to be carcinogenic. The nitrosamines are a result of contamination of the SLS during manufacture. The contamination can be one or many of multiple of chemicals. Given the vast number of products containing SLS there are literally millions of possible combinations of chemicals which could result in the presence of nitrosamines. The manufacturers will tell you that the amounts are so small they do not pose a health risk, however we have to consider the cumulative effects of all the products our bodies are exposed to on a daily basis. Ultimately, if there are alternatives, why would you choose to play chemical roulette with the health of your family? I know this has been a long post and somewhat of an information overload scenario. This is a subject I am passionate about, and I tend to get a little 'preachy' when I stand on my virtual soapbox. Take some time to read, or re-read the information I hope it is a jumping off point for you to do your own research. As always the comments and my email are open for questions. I don't know if I will have a post tomorrow. I had one written but it is lost in this ancient computer of mine. I have to decorate the hall for the Digby County 4H awards dinner tomorrow. I think I also have to take Miss Avril to visit the breeding buck tomorrow and I believe it is the day to go and pick up feed. I will make every attempt to get the post out for you! Have a great day everyone!
0 Comments

The Last Full Week of September...

20/9/2014

0 Comments

 
Hey Everybody, well it has been another crazy week here at the homestead! The push is on to get everything done as we feel fall closing in. It really is a weird September, we have had frost for the past two nights now, we were lucky to escape the snowfall they had out west,  but the cold mornings are a hurry up and get it done kick in the pants; and the forecast for tomorrow is calling for close to 2 inches of rain.

 The guys have been busy getting the garden ready, they have moved close to half a ton of rock, by hand, away from the new garden. There was an old  foundation smack dab in the middle of where the garden needs to be, the pigs did  a great job of rooting up the rocks so they were close to the surface. KillWilly in particular loves tossing rocks around. The lower bed is leveled and Gary will be taking the rototiller, aka the beast, in there within a day or two to incorporate the manure from the pig yard. Then we will be planting garlic next week. We haven't received the Siberian variety I ordered from Vesseys yet, but it should be here soon and we have our own saved seed to plant. I was hoping to be able to plant a covered crop of buckwheat in the garden that we could till under come spring, but with  the cooler weather coming early I think we are going to end up just mulching heavily with old straw or hay. This is what the pasture looked like on May 20th of this year:
Picture
Then on Labour Day weekend after the pigs had been there for a few days:
Picture
Now today, the first terrace, closest to the camera, is leveled and just waiting for the manure to be worked in.
Picture
Speaking of the pigs, Patches has been bringing her latest litter out foraging
this week. They were born on the first, so she is keeping to the same schedule
she always has. They are starting to eat from the creep feeder, but had a great
time running around and pushing up dirt with their snouts! There is nothing that
is as hysterical to watch as a little piglet trying to catch a grasshopper. I
could watch them all day!
Picture
The doorframe for the new basement door arrived yesterday, so we should get that in next week. Then we can start closing up the basement at the back of the
house. That is going to make a huge difference in the amount of wood we burn
this winter, it is also going to make it easier to keep the basement at a steady
temperature for sprout production. After a year of experimenting Gari is producing well over 100 pounds of fodder a day and we want to double that for the winter! I have been busy putting together a guide to growing fodder, we are producing all this feed, winter and summer, on a set up which cost less than $150.00 to put in place. And it saves us somewhere around $300 a month in feed costs!  The animals love to get their fodder everyday.
Picture
The other preoccupation around here this week is getting ready for 4H Pro-show. This is the huge provincial show for all the top qualifiers for kids from 4H  clubs all over Nova Scotia, Reiley is showing both Ivan and Pepper next weekend. He was supposed to show both animals in conformation and showmanship but there was an overlap in the schedule so he had to choose between beef and goat for showmanship and has decided to show beef. So pepper will only be shown in conformation class. Reiley is also taking one of his wood working projects, and  will be competing in the beef and goat judging classes also. It is always a  crazy busy weekend with kids running on too much sugar and caffeine with too  little sleep, (barns open at 5:30 Saturday morning) and we wouldn't miss it for the world.
Picture
So, next week is garlic planting time, I may set up a couple of cold frames in the new garden and plant some greens just to give us a bit of an extended season. The tomatoes have all succumbed to late season blight so they
need to be hauled out and burnt, the heavy frost last night has finished most of
everything else off so a clean up in the garden is necessary. It is also time to
get the bees ready for winter. I will be opening up the hive and checking on the
amount of honey they have, insulating the unused portion of the hive and the
top. I am hoping to be able to remove those two plastic frames from the original
nuc which gave us such a headache in July. I don't anticipate harvesting any
more honey this fall. I would rather leave the honey there for winter stores
than have to start feeding them in March.  I am also going to be testing the soil in the new garden beds and  figuring out what amendments need to be done. It is easiest to do these in the fall and  I will  have a post next week about this topic.

 So the final full week of September, chores in the garden as we take most of the last of the harvest from the garden, there is still a lot of canning and preserves to put up, apples to can for applesauce and pie filling, pumpkin and some squash the rutabagas will need to be canned and I need to put up some more blueberry. On the herbal side I am drying sage, thyme and basil. I will be
potting up the cuttings I have for the herb "window" in the kitchen; rosemary,
basil and chives. The mint, lemon balm and othe tea ingredients are drying nicely. I will be attending the Christmas Craft Sale at the Digby Elementary School the last weekend in November. I will have a wide assortment of soaps and herbal products there as well as some of my silver wirework jewelry. Lots of fiddley things to get ready for a craft show.
I am also in charge of decorating the rental hall for Digby County 4H awards night on the 17th of October, (how do I get myself into these things?). I want to join the Exhibition Committee so the first meeting there is October 1st and I have just started working to try and resurrect the Digby Farmers Market for next year. On top of that Reiley needs to start schoolwork, There is painting to be done inside, the pantry and 1/2 bath to gut and build new, the regular 4h meeting schedule to start up again..... I think I need to lie down now.

I have always been uber organized, you have to be with five kids all going in different directions. This past year being here with just Gary and Reiley I have kind of let things slide, time to pull up my socks and get things running again. Honestly the busier I am, the more I can get done. Firstly I have to get the house running on it's schedule again. If you have a set schedule for your house, monthly meal plans, who cleans what and when; it frees up so much time. It was how I went back to school with four kids aged 4 - 10yrs. Not only went back to school full time, but  took a part time job as tutor and lab instructor in the nursing program, maintained a 3.95 GPA and kept the kids going to Girl Guides, gymnastics, karate, soccer and public school all while Gary was working 70+ hours a week and managed to meet the target of family meals at the table a minimum of 5 days a week. Yes I had a lot of support from Gary but the organization I had built into our routine made it possible. I have let it slide, time to get it back! Have a great day everybody! ( Remember to breathe!!)

0 Comments

How To Tuesday - Canning Tomatoes With a Pressure Cooker

19/8/2014

2 Comments

 
As I said yesterday I have found that canning straight tomatoes is
the most versatile way I have found to preserve our  tomato harvest. These can
then be made into sauce, paste, puree or stewed.  I process these in the
pressure cooker as that is the safest way for me.

There are ways to process tomatoes in a water bath by adding lemon
juice or citric acid. Lemon juice can affect the taste while I have not found
that citric acid affects the taste. The decision is yours, by adding a mild acid to each jar, you can lower the pH enough to be sure your tomatoes are safe providing you follow the normal processing directions. However, as I said yesterday, we are trying to reduce our reliance on deep freezers, so things that I used to freeze, sauces, broth, and some meat is now being canned and for these you absolutely need a pressure canner. You are messing with botulism, it is odourless and tasteless and it can kill you. Enough said.

So preparing tomatoes for canning. There are as many ways to do
this as there people reading this. For my preserves I choose to simply use whole tomatoes. It is recommended to skin the tomatoes, now you can use a vegetable  peeler and try to peel your tomatoes, or you can freeze your whole tomatoes after cleaning them and cutting off any blemishes.

Freezing the tomatoes does two important things for you;  first it
will make the skins slip right off the fruit. Secondly and probably more
importantly it will remove, a large portion of the water in the tomato. This
allows you to use the glut of less meaty tomatoes, what my grandmother use to
call slicing tomatoes. The usual problem with using these tomatoes is that it
takes so much energy and time to boil off the water. Probably the best thing about freezing the tomatoes is that you can stockpile them until you have enough to make preserves with no loss in quality.
Picture
Water from 2 tomatoes frozen for 2 days.
They are now very easy to peel, the skins just rub off. You can also remove the skins by blanching your tomatoes, dropping them in boiling water for approximately 15 seconds and then putting them in ice water.
Picture
If you want to remove the seeds you can put the pulp through a food mill at this stage. I don't remove the seeds, I eat the seeds when I eat fresh tomatoes so I don't worry about them in my canned tomatoes.

It takes a surprising amount of tomatoes to make tomato sauce. In my experience it takes approximately 5 1/2 pounds of tomatoes to make 1 litre of thin sauce, and closer to 7 lbs for a really thick sauce. My regular tomato preserves are the consistency of a thin sauce. Depending on what I am using it for I can reduce it some after I open.

Now that you have  lots of your peeled tomatoes, put them in your stock pot and bring to boil, add 1 tablespoon of brown sugar and 1/4 teaspoon of salt  for each pound of tomatoes you put in. This helps to really bring out the flavour. Once the tomatoes have reached boiling, turn down the heat and continue to simmer until the amount has been reduced by one third, (for thick sauce reduce by 1/2).

While the sauce is simmering, prepare your supplies as you would for any other canning project, sterilize the jars and lids. If you are using lemon juice or citric acid get these ready and prepare for water bath processing. The amount of lemon juice for 1 litre jars is 2 tablespoons, for 500ml jars is 1 tablespoon. If using citric acid, use 1/2 teaspoon for 1 litre and 1/4 teaspoon for 500 ml jars.

The pressure cooker.
Picture
Picture
Essentially a pressure cooker is a heavy pot with a lid that seals and a
valve that controls the steam pressure inside. It increases the pressure inside
the pot relative to the atmospheric pressure outside of the pot. For cooking
food, this decreases the amount of cooking time; for canning it increases the
temperature of the water and steam inside. In regular water bath canning the
water boils at 100 degrees C, no matter how much more heat you put under that pot the water will not get any hotter than 100 C, (212 F).
 A pressure cooker allows steam to build up inside the pot increasing the pressure and the temperature inside the pot. By just increasing the pressure to 15 psi, you will raise the temperature inside the pot to something close to 120 C, (250 F).  This is hot enough to kill any pathogens which are in your preserves. For cooking this means tenderising and cooking a 2 pound beef roast in less than an hour, and if you add beef broth and mushrooms you will be a pressure cooker convert.

 While features may vary from model to model, all modern pressure cookers
will have a lockable lid usually via a spring mechanism within the handle, a
sealing ring, a pressure regulator vent pipe and a safety release plate or
valve. Please read the manual that came with your cooker to become familiar with the model you have. The manual will also give you instructions for care and  maintenance of your cooker. It is important to inspect the seal and safety release valves or plates each time you use your cooker. For those of you who are somewhat intimidated by the idea of the pressure cooker, as I was, try setting up the cooker and just putting water in, bringing it up to temperature and then letting it sit. It will give you the confidence of  knowing it wont blow up, without all the hectic distraction of canning at the same time.

So that is pressure cookers 101. Somewhat intimidating but you just need to become familiar with them. Sort of like milking a goat for the first time, or operating a rototiller. Scary at first but we are all homesteaders here! We didn't choose to live this lifestyle because we hate learning new things. Now back to the tomatoes....

Once you have reduced your tomatoes to the level you desire, fill your jars and place the lids on, you do everything as you would for water bath canning, so do not over tighten the rings on the jars. Now you will have to put water in your cooker, the amount will vary depending on the size of your pressure cooker. Unlike a water bath you will not need enough water to cover your jars. In a pressure cooker it is the steam that does most of the heating. usually an inch to two inches of water is the recommended amount, but please check the directions that came with your cooker.

Place the jars into your cooker and lock the lid in place. turn on the heat and wait. Start timing once steam starts coming from the cooker, 10 - 15 minutes is the recommended time frame. Once the time is up, remove the cooker from the heat and leave it alone, do not try and remove the lid from a hot pressure cooker. Some models will have a pressure valve that allows you to manually vent pressure, if yours does you can release steam and then open.  Remove the jars and let them cool.

Picture
Sauce I made for my daughter, she uses it for pasta and prefers to have peppers and herbs added, hence the green.
So that's it You have now made tomtao preserves... with a pressure cooker! These will safely keep for 2 years, but if your house is anything like mine they will dissapear long before that deadline. Try experimenting with different recipes, you will find sop many ways to utelise these tomatoes.

 As always I'm happy to answer any questions. Have a great day everyone.
2 Comments

Preserving The Tomato Harvest... Part 1

18/8/2014

0 Comments

 
Before I get into today's post I just wanted to give everyone a heads up on this week. As I mentioned last week this wee is exhibition time for us. Reiley is showing Pepper and Ivan tomorrow and Wednesday, I am judging crafts and sewing for the 4H on Wednesday. Thursday through Saturday I am barn manager at the 4H barn from 7am- 7pm. Posts will be sporadic. When I sat down to write the tomato preserves post I realized it was just too long to be one post so I've split it up in two parts. The real technical one will be tomorrow; How To Tuesday this week will be on canning tomatoes with the pressure cooker. Not scary, I promise!

It's that time of year again, all the stuff, well at least a large majority of it, that you planted is flooding you with an abundance of produce. You have given away vast amounts of it; your neighbours draw the curtains and lock the doors if they even SEE you picking more zucchini, what to do with it all? Hopefully you have remembered your local food bank, they love getting fresh produce!

There are some things that you just can't find at a supermarket, and at the top of that list is fresh vine ripened tomatoes. In my humble opinion, there is nothing that tastes as good as a tomato warm off the vine, and those tomato facsimiles sold in supermarkets are not worth taking home even if they gave them away.

Remember back to last February, the nasty cold wind blowing the snow around, if you were anywhere near Nova Scotia we were having a blizzard every Wednesday. Now imagine this coming February; sitting down to peruse one of the seed catalogs which has recently arrived in you mailbox, the wind is howling and its freezing outside, but you are sitting down to a lunch of fresh baked bread, some of your own chevre seasoned with basil and rosemary and a bowl of roasted tomatoes and thyme spread which you lovingly made and stored last August. Sound like a good way to spend a February afternoon? Well to get that February afternoon, you need to preserve your tomatoes now. Yep even though you think that you are sick of tomatoes and you really can't imagine ever wanting to eat another one! So let's get started.

There are three main ways to preserve tomatoes; freezing, canning and drying. You should utilize all three for the greatest variety of use during the coming winter. Freezing and drying are the easiest ways, canning tomatoes requires some experience, as tomatoes tend to be on the border when it comes to acidity levels. Remember last week when I talked about high acid and low acid foods? High acid foods can be canned safely in a water bath canning process, low acid content foods require a pressure cooker to safely preserve them.

I don't fool around with tomatoes, they are done in the pressure cooker. If this terrifies you don't worry, I think pressure cooker stories have become the rural version of an urban myth. Every family had an aunt or a friend of a grandmother who was injured in a pressure cooker explosion or a large dent in a ceiling that came from a launched pressure cooker lid. Some are true, but the truth is all modern pressure cookers are so absolutely safe that you would have to seriously tamper with one to even get it to explode. I promise I'll walk you through it.

There are four main products I make from our tomato harvest: salsa, tomato sauce, tomato paste and tomato soup. It used to be a guessing game of how much of each to make every year. However a couple of years ago I realized that I only needed to make canned tomatoes. I could then take the jar of tomatoes and make a sauce, soup,  or paste from my canned tomatoes. They also make a fabulous paella.

My favourite way to prepare tomatoes is to roast them and then freeze them. This makes a wonderful base for sauce, especially good on pizza, it also makes an amazing spread that works on crackers, or the afore mentioned fresh bread of a February afternoon. All things being equal, I would prepare all of our tomatoes this way. However we simply do not have the freezer space to do this, and with the planned switch over to off grid living I am trying to drastically cut our reliance on deep freezers. So this method is now reserved for about 30% of our harvest. This is a very simple recipe and you can use any variety of tomato, from meaty roma variety to those so sweet little cherry tomatoes, try putting a couple of different varieties together to get a mix of flavours.

Roasted Tomato 
Ingredients

As many ripe tomatoes as you have
Olive Oil
Garlic
Fresh Thyme or Rosemary (optional)
Salt & Pepper
Picture
Pre-heat your oven to 350 F
Wash your tomatoes, pat dry and cut off any skin blemishes, Slice them in half,
even the little cherry ones.  Drizzle a moderate amount of olive oil in the bottom of your roasting pan and place the tomatoes cut side down in the pan. Don't be afraid to jam them in as they will shrink up in the oven. Peel and slice, or mince, your garlic. The amount will vary depending upon how much you like garlic and how many tomatoes you have. Sprinkle the garlic over the tomatoes, and drizzle more olive oil on top. To encourage the flavours to mix, sprinkle with salt and pepper.
Picture
Place in the middle rack of your pre-heated oven and bake for 45 minutes. Now sit back and wait for everyone to come asking what smells so good! (Think bruschetta).
Picture
After they are done rosting you simply need to let them cool, and then place in a freezer bag and put in the freezer.You can put in the oil if you want or just the tomatoes. I put in just the tomaotes, Gary has been known to add everything.  That's all. When you are ready to use them, simply thaw and they are ready to use. You can place them directly on bread for a sandwich,make fab pizzas and they go really well with both fish and lamb. They do wonderous things to soups! You can use them as they are or you can put them through a food processor, add any herbs you wish.

Hopefully you will give these a try, they are so easy and in the dark of winter will bring back the taste of summer.

Tomorrow we are going to make canned tomatoes with the pressure cooker. I know they are intimidating, but they really are the safest way to can pure tomatoes; and if you have any asperations of canning meats, stews, soups or vegetables they really are a necessity. Once you take the plunge you will be suprised how easy it really is. I was, and I let my pressure cooker sit in the cupboard for a full year before I attemped to use it!

If you put any whole tomatoes in the freezer last week, take them out tonight to thaw we can use them tomorrow. Have a great day everyone.
0 Comments

Come Over To The Dark Side...

13/8/2014

1 Comment

 
Yes I'll admit it, I intend to lure you to the dark side: the dark side of cooking that is. My goal today is to convince you that cast iron deserves a place in your kitchen.

Not that long ago cast iron was the staple in almost every kitchen. Known for it's durability, versatility and strength, it was not limited to frying pans; waffle irons, griddles, kettles, dutch ovens and food grinders all in cast iron were commonplace in most kitchens. While your grandmother may have not had the array of choice we enjoy today, she knew a good thing when she saw it.

A properly seasoned cast iron pan is the original nonstick pan. Ahhh there is the catch! "Properly seasoned" . Every time I bring up the topic of cast iron I hear the same two complaints or concerns... "I've tried it but everything sticks!"; or, "isn't cast iron a lot of work to care for?". Neither are true if you have a properly seasoned pan. Even cast iron pans that have been living in someone's basement for the last 30 years can be brought back to life as a useful versatile piece of cookware.

Finding a piece of cast iron at a garage or estate sale is like finding buried treasure; especially since I know that getting it back into shape is not a big deal. Once you ascertain that there are no major cracks in the piece, even really badly rusted cast iron pans can be brought back to useful with little effort.

The first thing you need to do is to bring the piece back, as close as possible, to base metal. This is easily accomplished by first giving it a good scrub with a wire brush and then coating it with oven cleaner, letting it sit and then applying lots of elbow grease.  Or putting the pan in the oven and running the cleaning cycle if you have a self-cleaning oven. This will bring the piece back to base metal. Once you have done this you can begin to season the pan as you would a brand new one. Seasoning a cast iron  pan isn't difficult, but it is time consuming to put the first layers of seasoning. You will need access to an oven for a few hours and lard or shortening, I prefer lard as it has a higher smoking temperature, but you can use either.

To season a cast iron pan:
1. Preheat oven to 250 degrees F
2. Place pan in the oven for approximately 15 minutes. This time will vary slightly depnding upon the size of the piece, but you're goal is to warm the pan through.
3. Remove the pan from the oven and coat with the fat of your choice. You don't want it dripping in fat, but you want a good and even coating.
4. Place the pan back in the oven and let bake for 30 minutes.
5. Remove from the oven and wipe off excess oil. Wipe, not scrub. Place it back in the oven for another 30 minutes.
6. Remove the pan from the oven and let cool completely.

You have now put one layer of seasoning on your pan, I have found putting four layers on a new, or newly conditioned pan to be a good base layer before you begin using the pan. That said some of the pans being produced now, as opposed to a couple of generations ago, tend to have a much more 'open' iron structure. Not sure of the proper term, but the iron seems to have more and / or pigger pores. These pans can take five or six coatings before they reach the fully sealed state that makes cast iron pans non-stick.

Caring for your lovely cast iron cookware is not dufficult, but it does tend to be counter intuitive to haw we have been raised to clean things. Most importantly, don't use soap on your pans. The harsh degreasers in dish soap will break down and remove your careful sealing layers. Do not put your pans in the dishwasher. and finally, never put water in your pan and leave it to 'soak'. All of these will remove the seasoning from your pan and you will have problems with food sticking or rust forming.
To clean your pans, just wipe with a clean damp cloth when they are cool enough to touch. If you use your pans infrequently, you might consider rubbing a thin coating of shortening or lard into the pan after you have wiped it clean and before you put it away. I would also recommend rubbing in a small amnount of fat the first few times you use your newly seasoned pans. It helps to build up the seasoning lost to foods the first few times you cook.
 
Eventually your pans will develop the typical black patina that we associate with cast iron cookware, and the bottoms of the pans will become smooth as glass as the fat molecules bind with the iron molecules giving you a non-toxic non-stick surface.

 If you should have a mishap and burn something in the pan or you notice food is sticking to the  pan because it was improperly cleaned you can easily bring your pan back to it's non-stick surface. Just clean the burnt material completely from the pan. (Try using a baking soda scrub as opposed to a scouring pad.) then just repeat the seasoning cycle as outlined above. Usually they only need to be baked once and oiled before putting them away to bring back the surface.
Picture
Some of my cast iron cookware. The two frying pans in the bottom right corner are pans that we bought new 27 years ago when we moved into our first home together. The pans in the upper right corner are two pans Gary found buried in the yard here last fall. I cleaned them with oven cleaner, and put several coats of seasoning on them. The dutch oven in the top left is great for camping and is my prefered pan to bake my apple spice cake in.
I really wouldn't be without my cast iron cookware. It can handle high heat, it distributes heat evenly over the surface of the pan, and it is incredibly economical. If properly cared for it will be around long after you are gone.  Have a great day everyone, hopefully I've convinced you to at least try  the dark side!
1 Comment

How To Tuesday... Bread and Butter Pickles

12/8/2014

0 Comments

 
Welcome to the second How to Tuesday.
 Last week I showed you how to make zucchini relish, today I'm going to show you how to make bread and butter pickles. These are wonderful pickles that go well with just about everything and are really easy to make. Please,  if you haven't read the post on making relish please do so before making the pickles. There is importanat safety instructions and helpful tips. 
Lets get started!

 Ingredients:
16 cups of sliced pickling cucumbers, approximately 11 pounds
8  medium onions  sliced, approximately 5 pounds
3 cups apple cider vinegar
4  cups brown sugar
2 Tablespoons of mustard seed
1 1/2 teaspoon celery  seed
1 1/2  teaspoon tumeric
1/3 cup pickling salt
Ice, about 6 cups
You will need a non metallic bowl, large enough to hold the sliced
onions and pickles. A pot large enough to hold all the ingredients, a separate
pot large enough to hold your jars for sterilizing and processing, measuring
cup, measuring spoons, ladle, spoon and colander. A mandolin is very helpful and a time saver.
Picture
PictureGary rinsing the veggies!
Start by washing the cucumbers and then slicing, as close as you
can to 1/8th of an inch. After the cucumbers are done, slice the onions, as
close as possible, to the same thickness. Place both onions and cucumbers in
your large non metallic bowl, add pickling salt and ice. Mix everything together
until the salt and ice are evenly distributed. These now need to sit in the
fridge for a minimum of three hours or a maximum of 12 hours.  After the allotted time is up, drain the mix, rinse and set aside. 


Combine the sugar, vinegar and spices in a pot and bring to a rolling boil. Stir
frequently to prevent the sugar scorching on the bottom. At the same time, bring  the water in your processing pot to a boil in preparation for sterilizing your jars. Try to time the sterilizing so that you are putting your cooked pickles
into still warm jars.

Picture
Vinegar, sugar and spice solution.
Once the sugar and vinegar solution is boiling, add the onion and cucumber
mixture. Stir thoroughly and bring the mixture back to a boil, stirring frequently.
Picture
Once the mixture has started to boil remove from heat. Ladle into
your sterilized jars. This recipe will not leave any extra liquid, so you may
have to play with the levels a little to be sure they are filled to 1/4 of an
inch below the rim. Once the jars are full, wipe the rims of the jars with a
clean damp cloth to make sure there is nothing on the edges to prevent a full
seal. Place the lids on the jars and add the screw bands, do not over
tighten.

Place the filled jars into the water of your processing pot. The
filled jars need to be processed for ten minutes at a rolling boil. Do not start
timing until the water returns to a boil after you add the jars. Once the
processing is finished, remove the jars from the pot and allow them to cool. You  should hear the telltale "POP" sound which tells you that you have a strong  seal. Always check the lids before storing your preserves.
Picture
This recipe will make approximately 8 litres of pickles, and in my experience
they regularly stay crisp for two years.

Well! If you have completed either the relish or this pickle recipe, hopefully both, you now have a good working knowledge of basic canning. YAY! I knew you could do it.
Next week we are going to step things up a notch and deal with the glut of tomatoes many of us have at this time of year. If you are already innundated with luscious tomatoes don't panic. Wash the fruit and cut off any obvious blemishes. Pop the tomatoes into a freezer bag and put them in the freezer until next week. There you have already started! See you tomorrow, have a great day everyone,
0 Comments

How to Tuesday - Zucchini Relish

6/8/2014

2 Comments

 
In an effort to start giving this blog a little structure, today I am starting a weekly feature .... presenting ...

The first How To Tuesday!

Every Tuesday I am going to feature a necessary homesteading skill and break it down for you, step by step, complete with pictures. Since this is preserving season we are going to start with making my amazing zucchini relish.
I know, man cannot live on relish alone, even though it is a great relish. I have chosen this recipe for a few reasons, firstly it is a small batch recipe. You don't need a lot of ingredients or even lots of fancy canning equipment. Second, the acidity in this recipe is such that there is very little chance of having an issue with bacteria contamination. Provided you follow the recipe and you get a good seal with your lids.

So let's get started.  For this recipe you will need:
  5 cups of finely chopped zucchini,  approximately 5 small zucchini, I like to make this relish colourful so I use  green and yellow 
  1 1/2 cups of finely chopped onions, approximately 2 medium or 3 small, you can use white or red onions
  1 1/2 cups finely chopped sweet peppers, approximately 2 medium sized, can be any colour
   1/4 cup of pickling or coarse salt
    cold water
   1 3/4 cup of sugar
   1 1/2 cups white vinegar
   1/4 cup water
   1 teaspoon each celery seed and ground tumeric
   1/2 teaspoon of mustard seed

You will need approximately 6 - 250 ml (half pint) canning jars with fresh, never used, lids and rings. A sharp knife or food processor to chop your vegetables to a fine chop.  A measuring cup and a cutting board.. A non-metal bowl large enough to hold all the chopped ingredients, a colander, a pot to cook the relish in and a pot to process the newly filled jars in. A ladle and a canning funnel make the job a bit easier.
Note: it is helpful to have a way to keep the full jars directly off the pot bottom during processing, this tends to lesson the chances of jars splitting during processing. You can buy one of those fancy jar holder / lifter racks. (Heck you can buy mine because I never use it) What I generally use is a round wire rack that Gary modified to fit my canning pot. I use this because the fancy lifter rack only allows me to process five jars at a time, while I can do eight with the rack. I will show you a different option today if you don't have either of the above.
Picture
Ready to start!
As always, rinse off your vegetables and cut off any noticable skin blemishes. Cut the ends off of the zucchini. If you are buying zucchinni you can tell if they are fresh by looking at the stem end. A fresh zucchini will have a straight moist end where it was cut from the stem. After a few days this will start to look puckered and leathery. Only cut the ends off of a couple of zucchini at a time, you are looking for 5 cups of chopped so measure as you go. When you are processing vegetables, especially to a fine chop, it is better to chill them first. The structure tends to hold up better, especially for water heavy things like peppers and onions. Remember we are going for a fine dice, not mush.
Place the chooped vegetables in your non metal bowl.
Picture
Now sprinkle your 1/4 cup of pickling or coarse salt over you veg.
Picture
Now mix thoroughly. When everything is well blended add just enough cold water to cover everything.
Picture
Now you need to cover your bowl, I just put a plate on top, and let it sit for three hours at room temperature.

While you are waiting, it is a good time to measure out your sugar, vinegar and spices. Place them directly in the pot you will be using to cook the relish. Set up your colander in the sink. Now you can relax with a good cup of tea, or carry on with the 500 other things you have to do.
Earlier I mentioned that it is better to prevent your full jars from sitting directly on the pot bottom when they are in the processing stage. I use a stainless steel cake rack in my large canning pot
Picture
You can see it's a perfect fit. However today I don't need the big pot so I will just be using one of my large stock pots/ To keep the jars from sitting on the bottom of the pot I will use some extra Wide mouth jar rings that I have
Picture
Just place them in the bottom of the pot, flat side up and fill the pot with water.
O.K. When there is about 1/2 an hour  left for your mix to sit, wash out the jars you will be using, and bring to boil the water you will be using to steralize your
jars and  process the relish in.

When your 3 hour time is up, pour the mix into your colander. Let it drain, and rinse thoroughly with cold water. You will lose some small particles through the colander; don't worry it's fine.
Now is when things all start to happen at once. First, turn on the heat for your sugar vinegar mixture. Not too high as you don't want to scorch the sugar. Stir well and frequently to avoid this. You want to bring this mix to a boil, then reduce the heat and simmer for 3 minutes. The steam from this will effectively clear your sinuses from now to Christmas.... don't say I didn't warn you.
While you are doing this, add your jars to the boiling water. This is to sterilize the jars. They don't need to stay in long but they can. You want to time this so that the empty jars are out of the water, but still warm when you are ready to add the relish to the jars. So you can put them in now and take them out when you bring the relish to a boil.
After the vinegar mixture has simmered for three minutes, add the well drained vegetable mixture to the pot. You now need to stir this well, bring the mix back up to a boil stirring occasionally. Once it has reached a boil, turn down the heat and let simmer for 10 minutes. This is a good time to remove the jars from the steralizing pot.
There are various schools of thought on the lids. Some say put them in with the jars, some say just use hot, not boiling water. I fall in the middle. I take each lid individually and dunk it in the hot water after I remove the jars. I hold them in a pair of regular tongs.
Ok. We should have relish simmering, jars sitting close to the stove steaming and lids inside up ready to go on the jars.
Picture
Simmering relish, it should be smelling much better now.
Once the relish has simmered for the required 10 minutes, remove it from the heat, you are ready to start filling jars. I use a canning funnel. It is a wide mouth jar funnel that makes filling the jars so much easier.
Fill the jars to 1/4 of an inch from the top. You will have to play with the levels a little here. You are looking for a good mix of liquid and solid. I use a combination of a large ladle and a slotted spoon to make sure there is enough liquid in each jar. 
Once all the jars are full, take a clean damp cloth and wipe the rims. You want to remove anything from the edge that will prevent the lid from making a good seal. Place the lids seal side down on top of the jars, screw the rings onto the jars. Do not put on really tight. If you screw the rings too tight, air cannot escape from the jar during processing, you will then not get a vacum effect thereby no air tight seal.
After you have tightened the lids place the full jars of relish into the pot of water for processing. The jars have to boil for 10 minutes. Do not start timing until after the water returns to a good rolling boil.
This is crucial to getting a good seal and therefore a safe product.
After 10 minutes, turn off the heat and remove the jars from the water. Place them where they can sit until cool. You should start hearing that distinctive 'POP' sound. Try and keep count, there should be 1 pop per jar. You can also check for a good seal by making the sure lid has a slight depression. This indicates a good seal.
TADA! Your relish is is now done.
Once the jars have cooled down, store them in a cool dry place. They will keep for at least two years. That said, always inspect the jars before you open them, the lid should be difficult to remove the first time.  Once you have used the lids they should not be used again for anything that requires a seal. You can use them to store other things in your jars. So you can keep them or not. The rings are good for many uses. As are the jars, unless you have a chip on the top rim of the jar. If this occurs, you will not be able to get a seal and you should repurpose or toss the jars.
Picture
I hope you have found this helpful, if there are specific homesteading skills you would like to see on How To Tuesday just let me know in the comments. In the next few weeks I thought about skills like trimming goats hooves, preserving different parts of the harvest planting the fall garlic, putting together a herbal based first aid kit, one for people and one for your four legged people. It will soon be 'pig day' here which is what we call the day we have all hands on deck for butchering our early fall pig.  There will be chickens to process in a few weeks time so I could cover that also.
I am really looking for direction from you, if there are skills you want to learn, let me know and we will do our best to feature them for you!
Have a great day everyone.
2 Comments

How We Came to Homesteading

3/8/2014

0 Comments

 
Last week I had a little rant about some of the things I love about homesteading and certain aspects of our 'global economy' which annoy me. We meet a lot of people who want to live the type of life we do. Invariably the questions turn to how can you afford to do this? I have alluded to Gary's health throughout this blog, but I have never actually explained the story behind it, as the details are vital to how we manage to homestead he has given me permission to tell the story.

In the spring of 2002 we were living in Ontario, managing a small hog farm. Reiley was just about to celebrate his first birthday and I had just completed the  second year of training for my RN diploma. We were happy, the kids were doing well the only point of discontent was that we missed 'home'. (I have rarely met a Maritimer outside of the maritime who did not continue to refer the maritime as home.) As Gary was one of the best in Canada at what he did, we knew that there were very few farms east of Ontario that could afford to pay him what he was making at our current job, and more importantly for Gary, keep his interest long term.

Gary had become known as a fixer; someone who came into a farm that, for various reasons was in trouble. He had a skill set of knowledge, drive and work ethic that allowed him to problem solve, examine the operation and discover why it was no longer profitable. He would formulate the plan to bring the farm back to profitability and also had the work ethic to then set the plan in motion. Sometimes this took a few months sometimes a year or two. Once the farm was running along where Gary thought it should he would get bored. The challenge was gone, it would be time to move on. While this led to a bit of a nomadic lifestyle, it was interesting. While I knew much less about the business when I first met Gary, he taught me the basics and I became his sounding board. We discussed his 'projects' and by the time our daughter Bethany started school I understood the industry as well as Gary. The farm we were running in spring of 2002 had been a startup We had been hired  by a businessman from Toronto in 1995 to start a hog farm just outside of Pickering Ontario. We had the farm up and running in that location. Due to urban sprawl, in 1998 we moved the farm to Little Britain, a small community between Port Perry and Lindsay.

By this time, the oldest four kids were all in school, and we had decided to stay where we were. The nature of the farm we were running was such that it kept Gary on his toes and held his interest. I had started training as an RN, something I had always wanted to do. Our favourite surprise ever, Reiley, was about to turn 1. We had a great co. unity of friends, things were looking settled. Then on Easter Sunday 2002 Gary had a call from a farm in New  Brunswick; could he come for a job interview? It was our chance to come home.

We went for the interview, Gary then flew back to New Brunswick a couple of weeks later for a one week trial, he was offered the job. When he flew back home we talked it over, there were many disadvantages to the move. He would be taking a pay cut for the first little while, his salary was dependent upon performance bonuses, it would mean uprooting the kids and I would have to switch from an RN diploma program to a bachelors degree. None of this was insurmountable, We knew meeting the performance targets was possible, kids are resilient, and with a GPA of 3.95 I knew I could complete the degree program easily. All or this was no obstacle in the face of that magic word....'home'.

So, on Mother's day weekend 2002 we moved to New Brunswick. Everything progressed as planned for the first year. We settled in, Gary met the targets and in early spring of 2003 negotiated a new contract that with combined salary and benefits put his annual income just in the 6 figures bracket. I had taken the first year off from university to help the kids adjust, but had already been in contact with UNB and transferring my credits would be no problem. We were living the typical upper middle class lifestyle; car loans, gold card, soccer teams, music lessons, gymnastics and pizza night. We had some token nods to our roots, we kept a small vegetable garden, I made some preserves and knit some mittens and sweaters for the kids, but essentially we were fully integrated into the North American consumer lifestyle. Then suddenly, everything changed.

On June 19th 2003, just two days before his 36th birthday, while attempting to rescue several weaner pigs which had fallen through a hatch in the floor, Gary suffered a hydrogen sulfide knock down event. I entered the barn several minutes after he lost consciousness, his herdsman, the only other person in the barn, had attempted to remove him but she could not lift him from where he was. I placed the 911 call and kept them informed until the emergency responders arrived. Gary was removed from the manure storage area and was unresponsive but combative. He was rushed to the ER at the local hospital where he was assessed placed in a medically induced coma, intubated, catheterised, given detox kits for hydrogen sulfide, methane, and ammonia. He was stabilized with regard to cardiac function and transported with attending physician and RN accompanying, to the nearest trauma centre 30 miles away.

It has been just over 11 years since this occurred, and I still go into nurse brain when I have to recount that day. The ambulance arrived at the trauma centre shortly after I did as I was sent ahead to complete the paperwork. Gary was immediately admitted to the ICU. While his heart was strong, he remained in a medically induced coma, and would not be taken off the drugs until at least the next day. He was given another set of detox kits. I made the decision to go home to the kids and come back early in the morning. I spent the night trying to sleep but I just remember sitting beside the phone waiting for it to ring and planning Gary's funeral.

Well, I didn't need to worry about the funeral. Gary was released from the ICU
to my care three days later. He spent the next two and a half months recovering  before he returned to work. By the end of September he was back to working full time. While he was good at hiding his symptoms from his employer I knew he  wasn't right. He could hide the amount of pain he was in, but he couldn't hide  his memory problems, his inability to concentrate and the reaction he was having to being in the barn environment every day.

We went to see specialists, psychologist, neurologist. He had CT scans and  EEG's. For a man who detests hospitals, and has always treated illness as something to be overcome by shear stubbornness, he endured this with little complaint. The verdict was always the same, something was going on but they didn't know what. There was nothing wrong anatomically, but his wiring had been disrupted. They could give him pain killers, which he didn't want, but other than that they offered little hope.

As I said he became adept at hiding symptoms. He increasingly began to rely on the boys to help him. When the boys had finished their schoolwork for the day they were allowed to go to the barn. Jason in particular loved being in the barn. He had celebrated his 9th birthday a month before the accident and he knew how to operate every system in that barn, and where each 'room' of pigs was in the growth cycle.

We  continued this way for almost two years. Then early in 2005 Gary was given a promotion. Until; then he had been in charge of the 10,000 head feeder barn. Now he was being put in charge of the day to day operation of the entire farm. The  commercial and purebred breeding program, the finishing operation
....everything. The irony was this is what he had been working for since he
graduated from N.S.A.C. in 1998. We talked it over, he wanted to try. At this
point he was still not telling me all the trouble he was having, I think that
with his short term memory issues even he didn't know how bad everything was. 

The promotion involved a move to the "home farm" an hour away. We moved over in  the summer. What we hadn't counted on was the change in environment. 

While in his barn, Gary had come to rely on environment triggers to help him. Just his familiarity with the layout had given him cues on what had to be done and an order to his day. Now he had to learn 4 new barns, feeding systems tons of new paperwork and supervise five staff. he started to flail almost immediately. Still he maintained the facade. He had enough knowledge locked up in is head to keep it going. Again, the boys helped, I think  I had the only 11 and 12 year old boys around that could breed pigs via A.I..

By Christmas 2005 I had face the fact that Gary was not going to be able to
continue, he was starting to face it too. For the first time in his life Gary
took vacation time. I began paying down debt like crazy and trying to put
together a plan for "after".

By March of 2006 it was over, the career Gary had worked so hard to build, the life we had imagined for our kids had just evaporated. Gary had gone through several phases of testing and was put on short term wage replacement through Workers comp. He underwent a grueling two day vocational assessment. Within weeks he was placed on long term disability by NB Workers Comp.

We had to move as our house had been included in Gary's salary package. We decided to come back to NS, specifically to the Valley to be close to my dad and we thought it would be an easier adjustment for the kids to remain in a predominately agricultural community.

Between May of 2006 and early 2010 things were not great. We managed to avoid bankruptcy, just By the time the dust had settled, and Workers Comp. had finished clawing back the CPP disability benefits our annual income was just over 33% of what it had been before the accident..

For a while I tried to protect Gary.by keeping him away from barns of any kind. Another  result of the the injury is a sensitivity to many pollutants. Exhaust gasses, off gassing plastics, paints, varnishes synthetic fragrances of any kind will set him back. He can not go shopping. Fluorescent lights and off gassing fumes make him incredibly ill. Cleaning supplies, laundry detergents; you name it, he  is incredibly sensitive to it. So, I reasoned that exposure to manure gas, the very thing had had first triggered this should be avoided at all costs.

This was not going to work. In my haste to protect him, I was trying to suppress who he, we were at heart. We are a farm family. We worked in agriculture because we love it, we love animals and taking care of them, we love the independence of growing our food and providing for ourselves.

This realization finally came to me in the spring of  2010, I went out and bought Gary a piglet. So began the homesteading journey that has brought us here. To these 20 acres, this blog and to sharing our knowledge and our journey with you. 
 
I have shared this with you for one very simple reason; We could not be living this  life homesteading unless we had learned to live without debt. Unfortunately the way we have learned to do that was a rather harsh life lesson. We often meet people who want to live this life style, but what we hear most often is, "we can't afford it". I am hear to tell you that you can live on a lot less than you think you can and be a lot happier than you are now. The only debt we carry is our mortgage, and our mortgage is less than many people spend on their monthly car payment. Everything we do here is done on a pay as you go basis.

I know this goes against everything advertisers, society and even
our government has told you, but debt, especially consumer debt, is
neither necessary nor acceptable. We have been sold a myth that taking on debt is normal, why wait  for what you want? You can have it now! We can give you low interest, spread  the payments out over five years, you can upgrade to leather, it's only an extra $30 a month! One of the most disturbing memories I have surrounding the 9-11 bombings is the image of George Bush telling a still 
shocked and grieving continent to "go out and shop" ???  Seriously?

We have become a society whose economic stability is based on a premise of cheap disposable goods.

If you want to homestead and you don't think you can afford to join me tomorrow. I am going to share with you how we got out of debt, and a couple of different  strategies that could help you get to this life quicker than you may have ever imagined. Have a great day everyone!

Picture
Gary showing Jason and Reiley how to trim cattle hooves

0 Comments
<<Previous
    Picture
    A  4-H Family
    Lives Here

    Receive inspiration and information for your homestead several times a week

    * indicates required

    Author

    Hi! I'm Shelli Killen,
    a homesteading, homeschooling, wife and mother of five. 

    I am a student  herbalist with a passion for learning and a  habit of bringing home strays.

    I love music, and the power of creating things with my hands.
     
    I tend to do best when life around me is organized chaos
    .

    RSS Feed

    Categories

    All
    Bees
    Canning
    Chickens
    Economy
    Gardening Vegetables
    Goats
    Herbs
    Hobby Farming
    Homesteading
    Homesteading Skills
    House Management
    Lifestyle Planning
    Pigs
    Self Reilance
    Self Sufficiency

    Archives

    December 2014
    November 2014
    October 2014
    September 2014
    August 2014
    July 2014
    June 2014
    May 2014

Powered by Create your own unique website with customizable templates.