Hand-Forged Farm
  • About Us / Contact

Step By Step

29/8/2014

0 Comments

 
Wow, Friday of labour day weekend already!! It has been such a busy summer here at the homestead. Our first full summer, trying to get everything done at once. So I thought this would be a perfect time for an update on the summer's main projects.

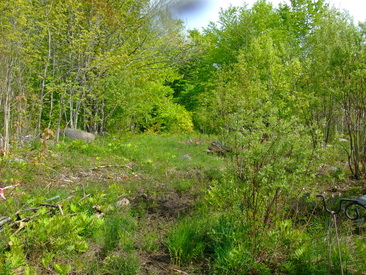
Gary's big goal for this summer was to get the first section of road  that will give us access to the back of the property. The first section being from the driveway to the pig yard. So at the end of May the area looked like this
Picture
Looking up the hill.
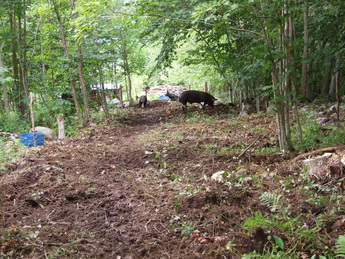
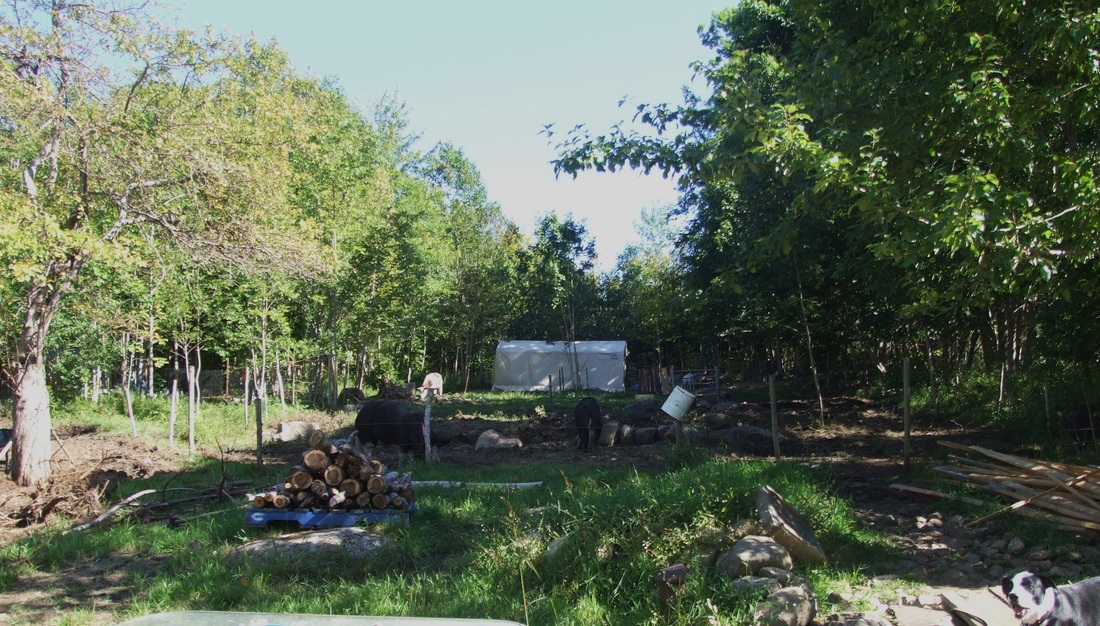
The first week in July the pigs were working their magic
Picture
Looking down the hill.
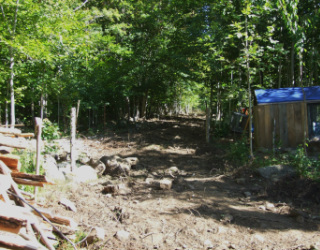
Today the 'road' looks like this.
Picture
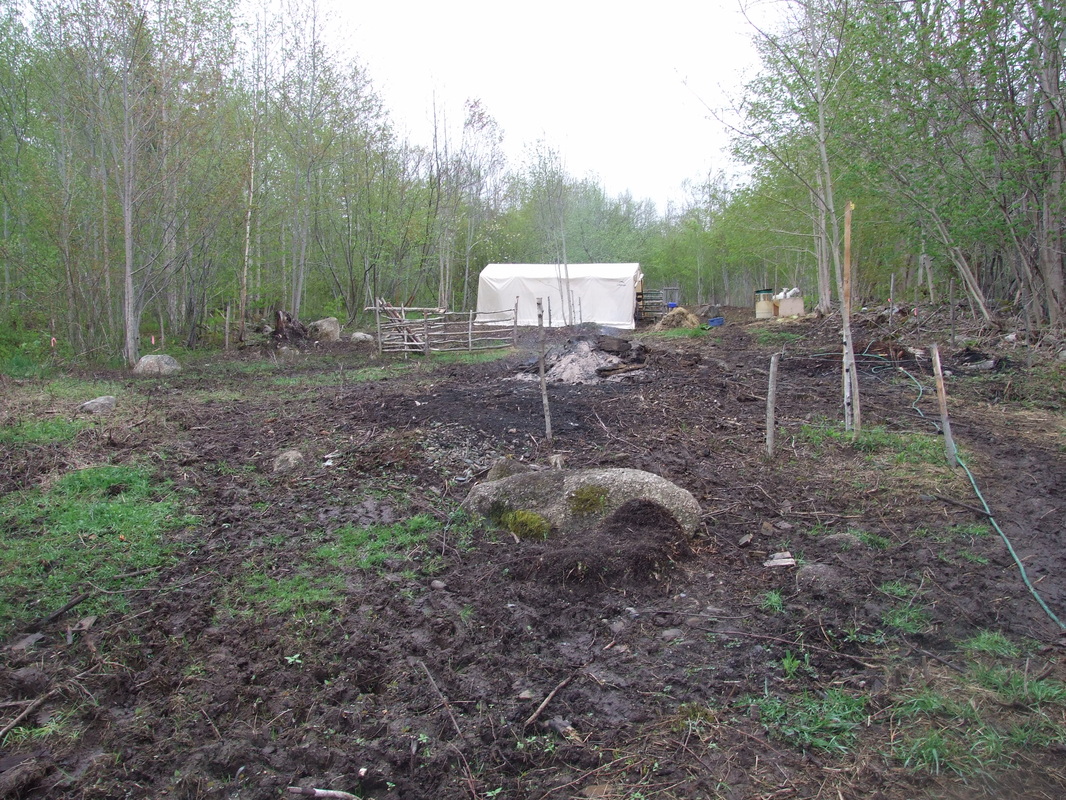
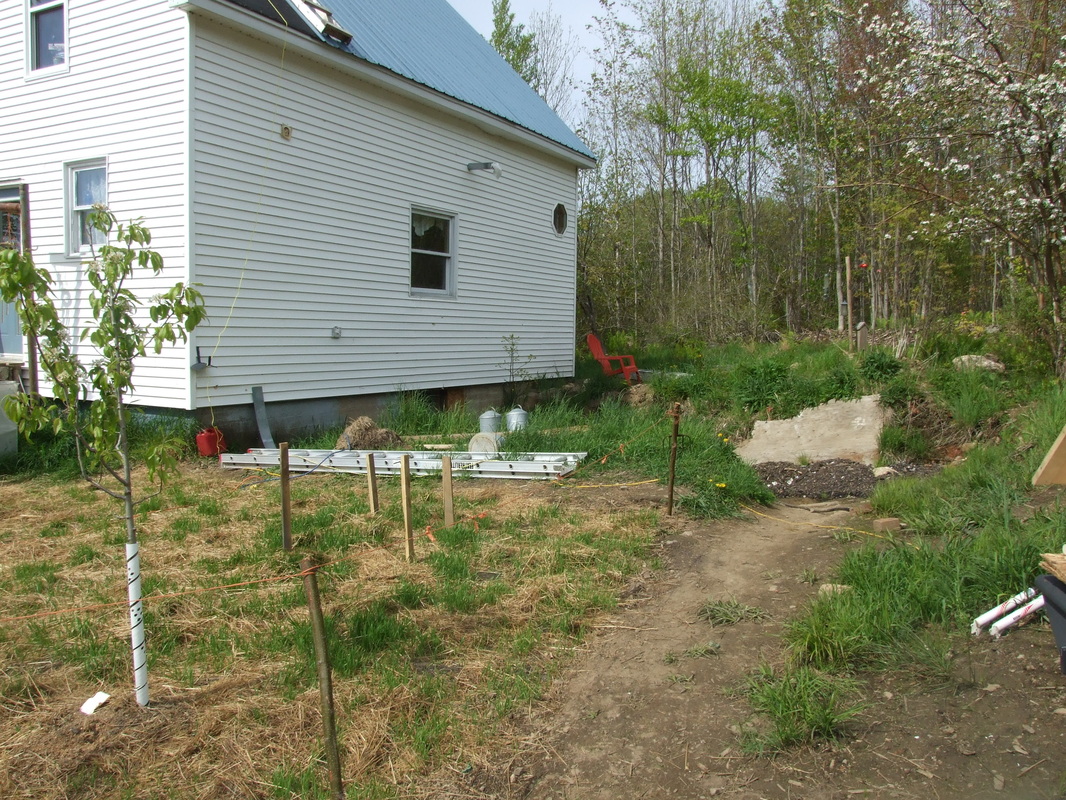
The change is even more dramatic down by the house where the diveway is being extended to meet up with the 'road'. The changes in the landscape all around the house even suprised us when we started looking at what had been accomplished this summer. Back in May the place looked like a nuclear test area, remember how cold May was?
Picture
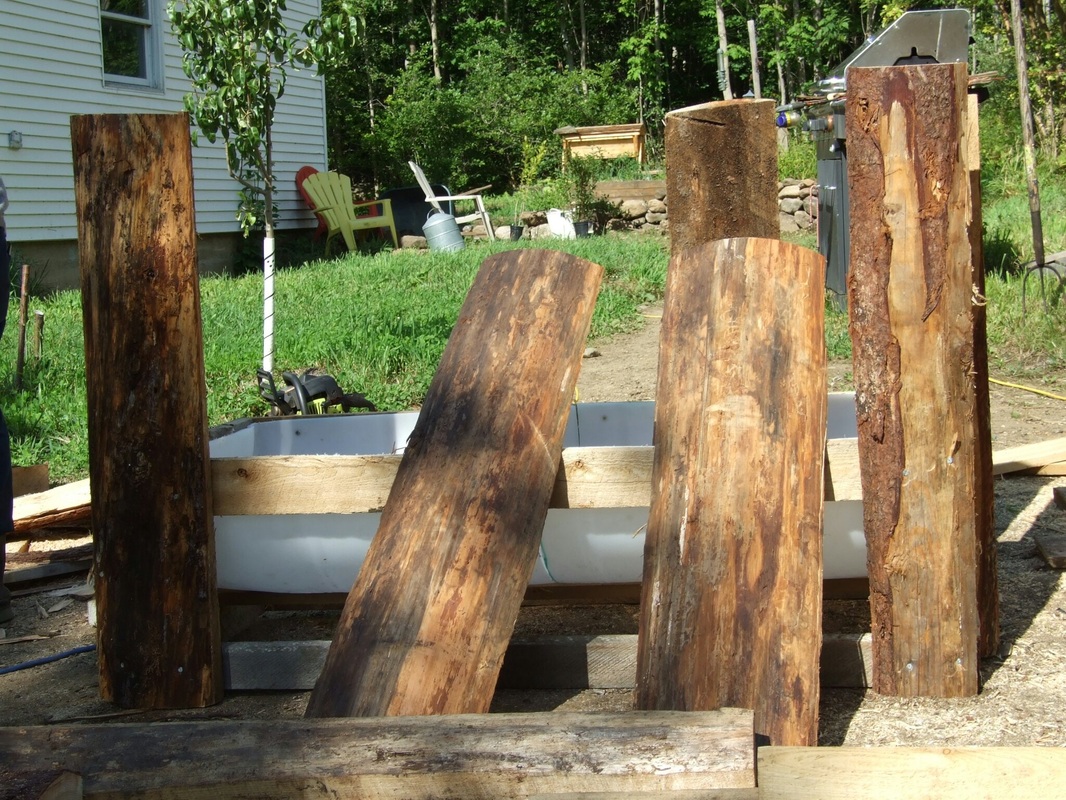
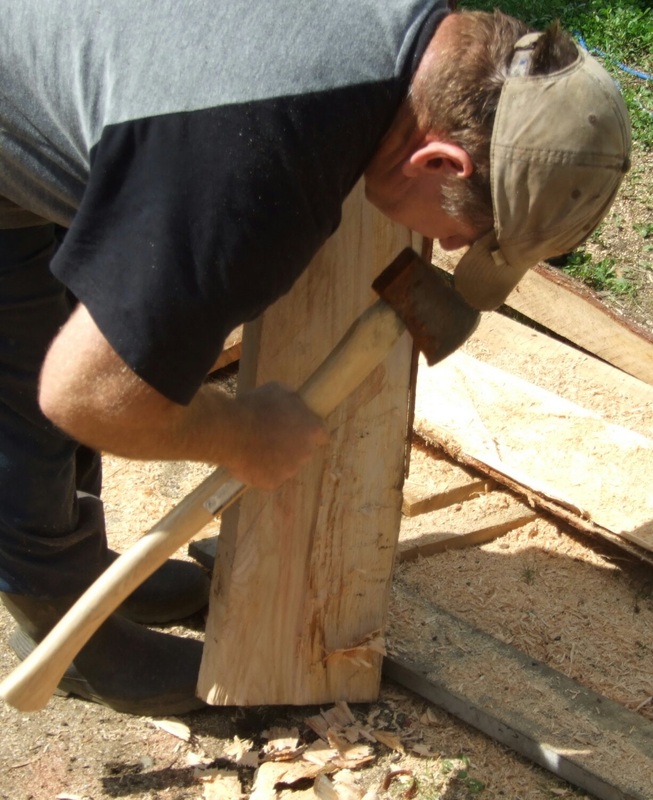
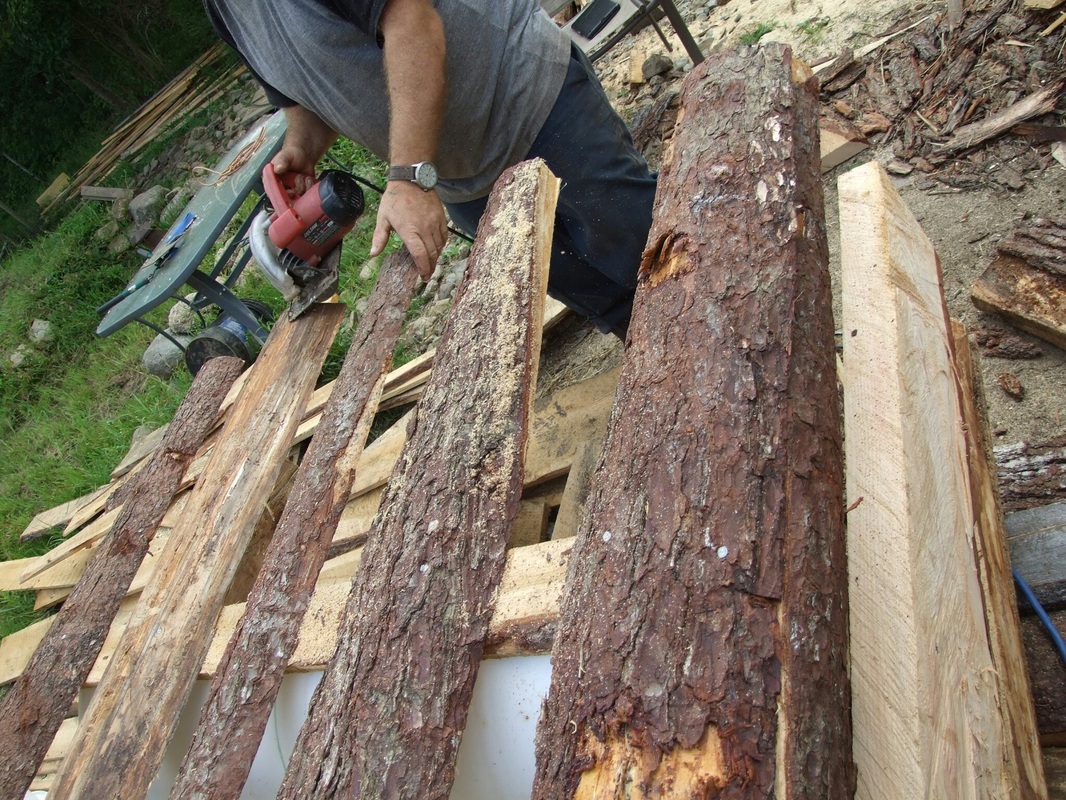
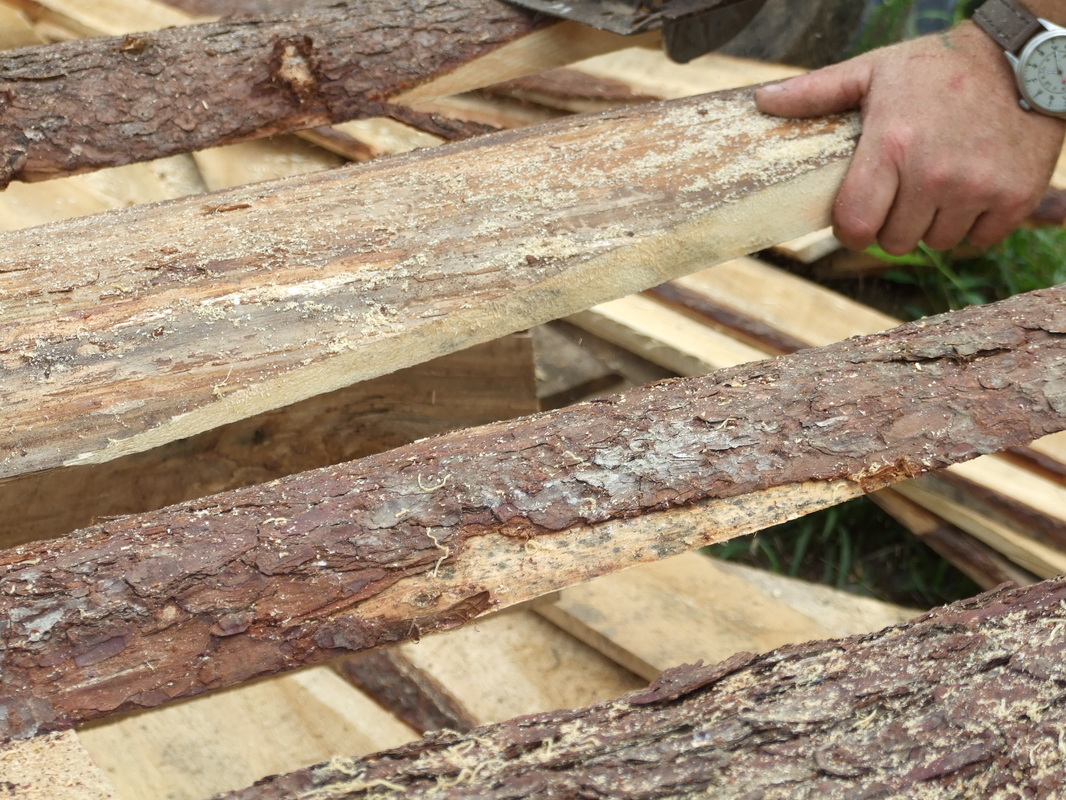
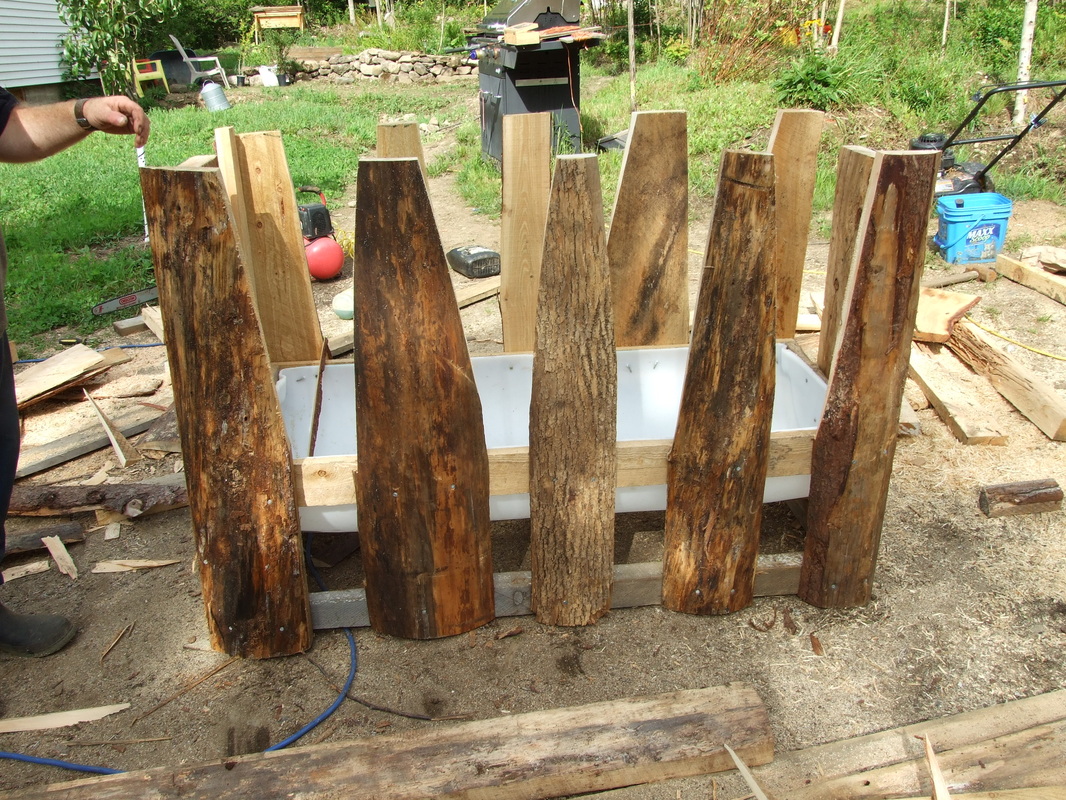
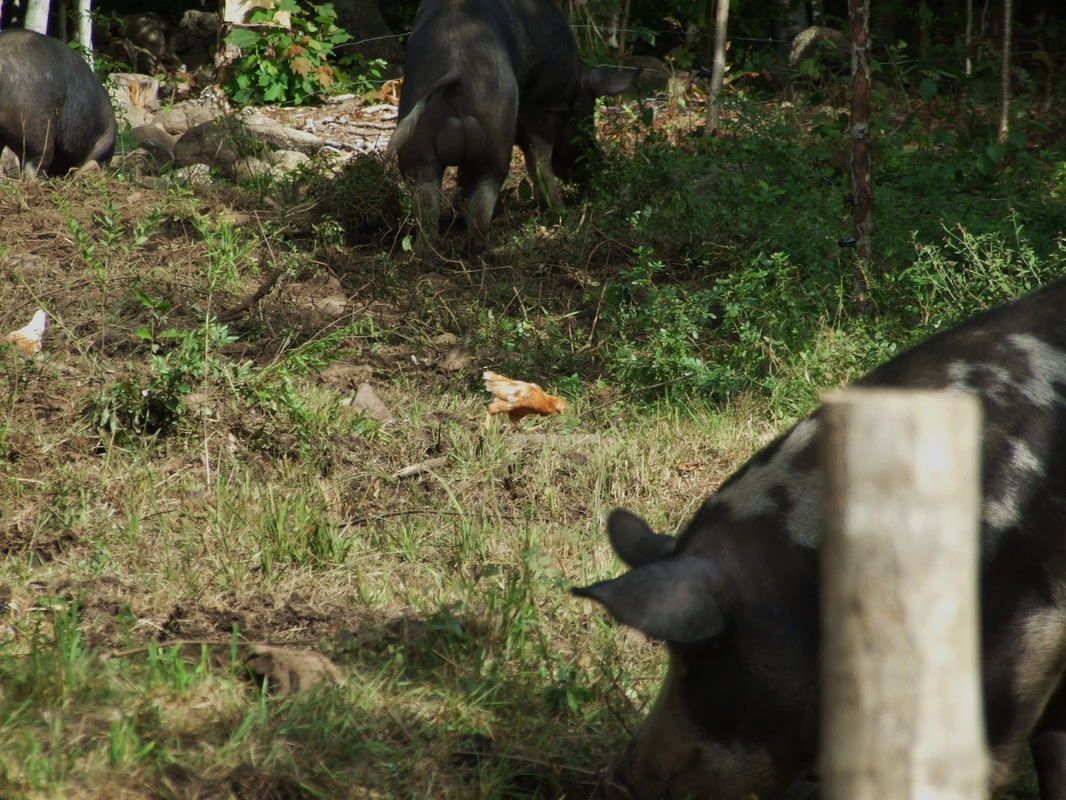
It is much nicer now. The goats fence has been moved back towards their shelter. The large rocks where the pigs are playing are the start of the rock we will be using to make terraces for the vegetable garden. The guys are currently rebuilding the pig yard at the top of the hill. They are getting a new yard and Patches and KW are getting new shelters. (More pics on that next week.) The pig yard has been highest priority for this weekend as patches is due to farrow a week from today. The wood stacked on the pallet is from the large branch we lost from the apple tree during Arthur. Gary has been saving to use in the smoker when we graduate Wart in a couple of weeks.
Picture
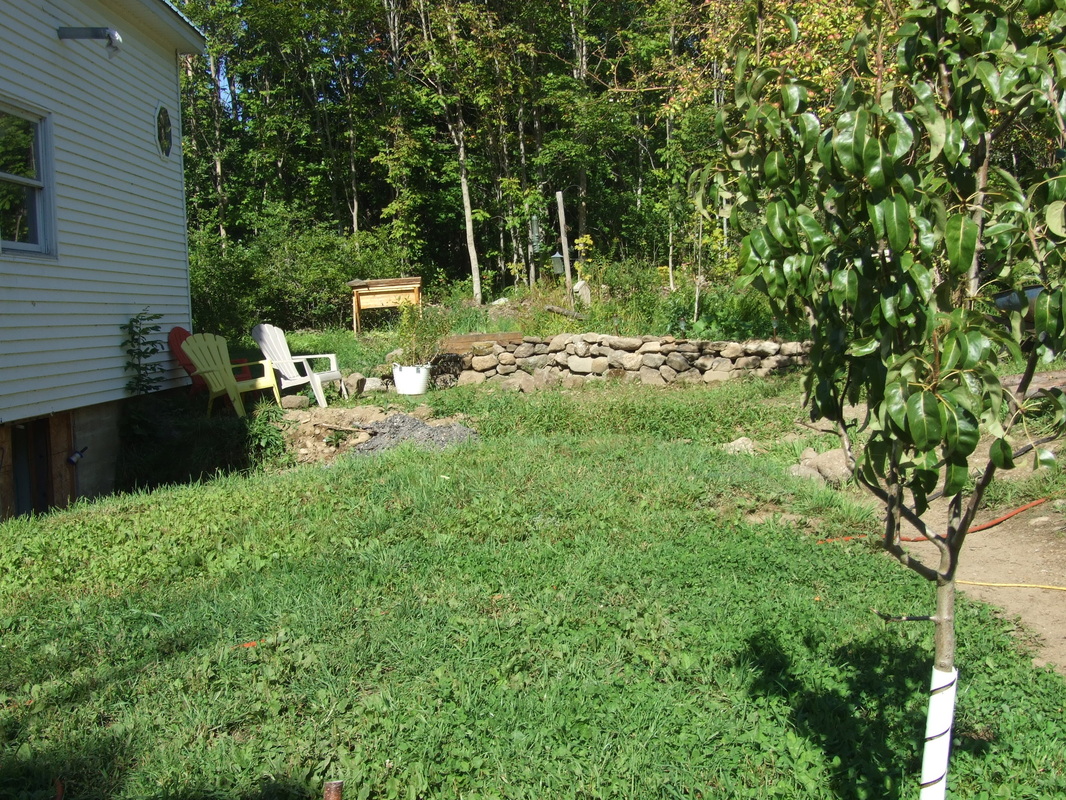
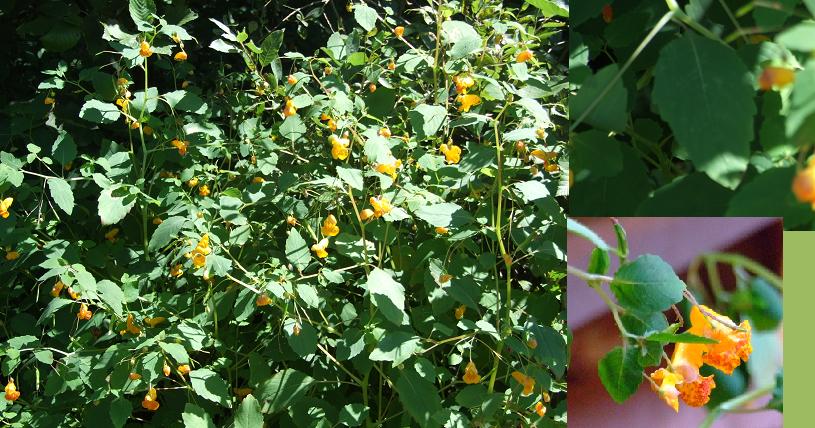
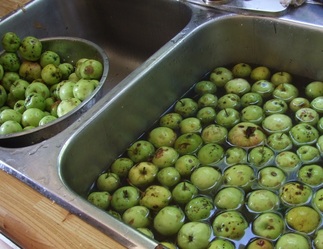
My priorities were getting the bee hive up and running, putting in medicinal more herbs and just getting the immediate space around the  house cleaned up. I have put in 2 elderberries, a witch hazel, lavender, and lots of  comfrey and calendula. The back yard has gone from this
Picture
To this...
Picture
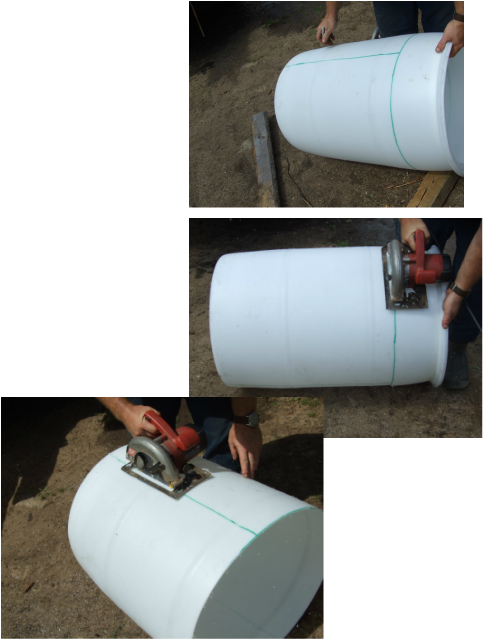
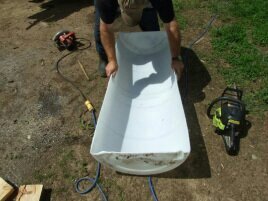
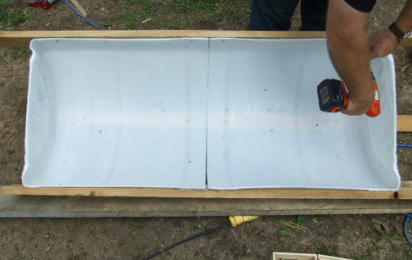
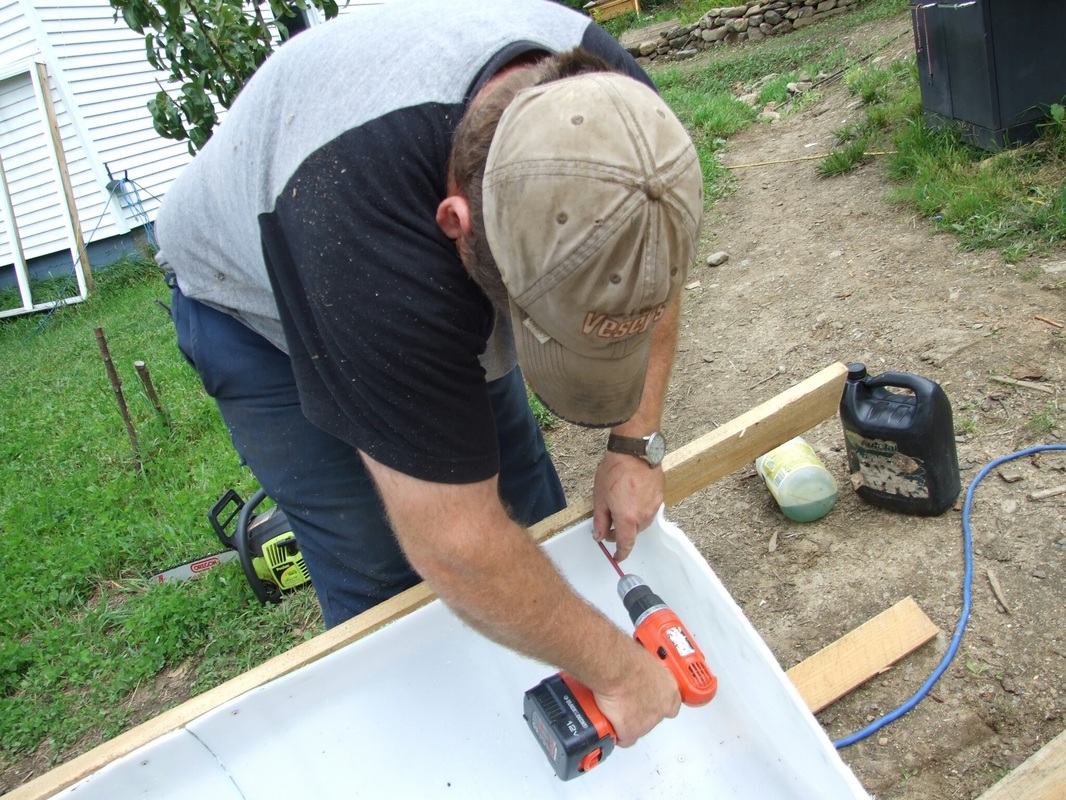
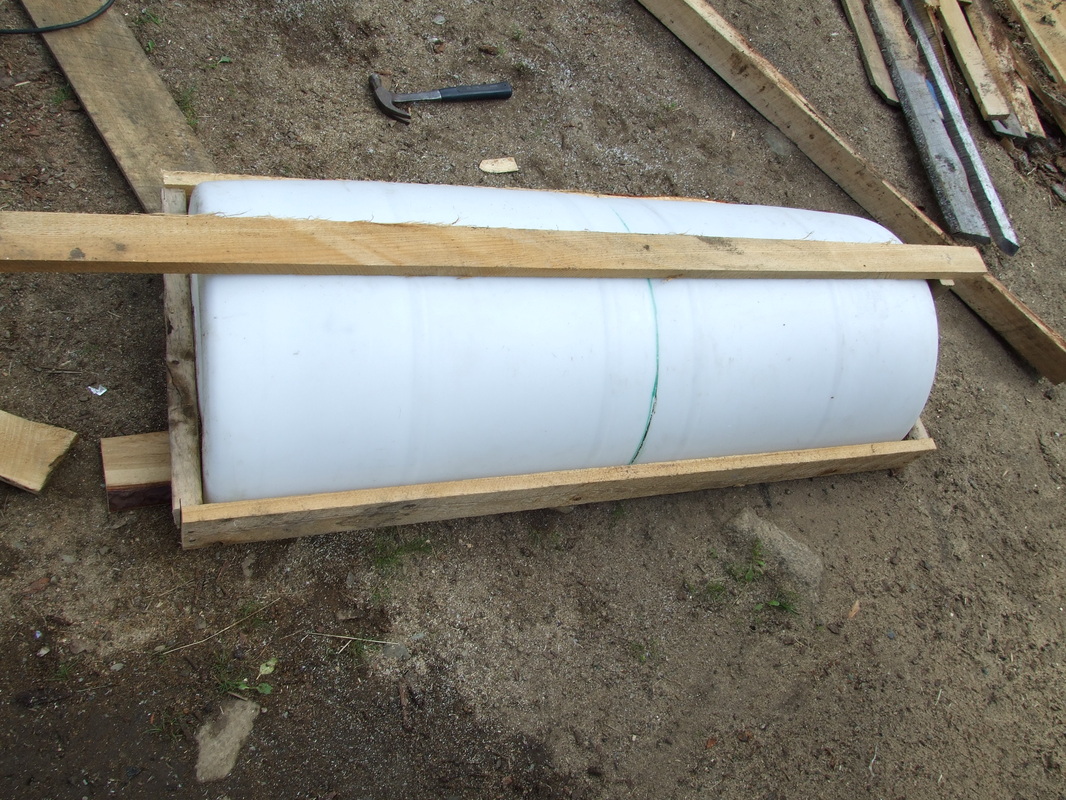
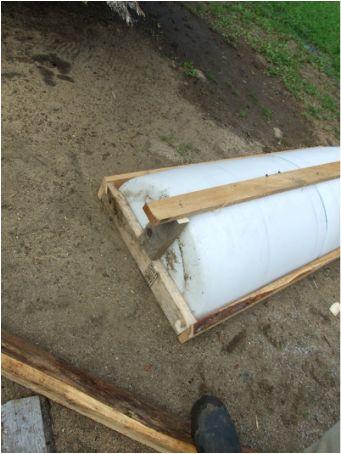
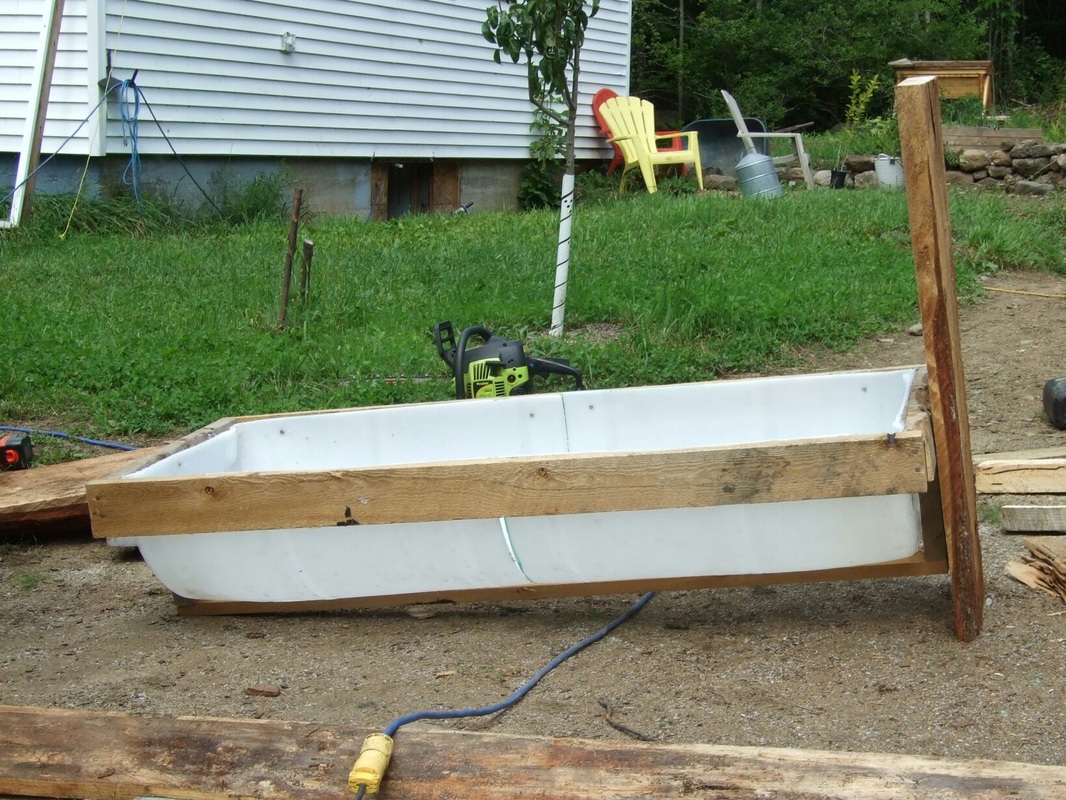
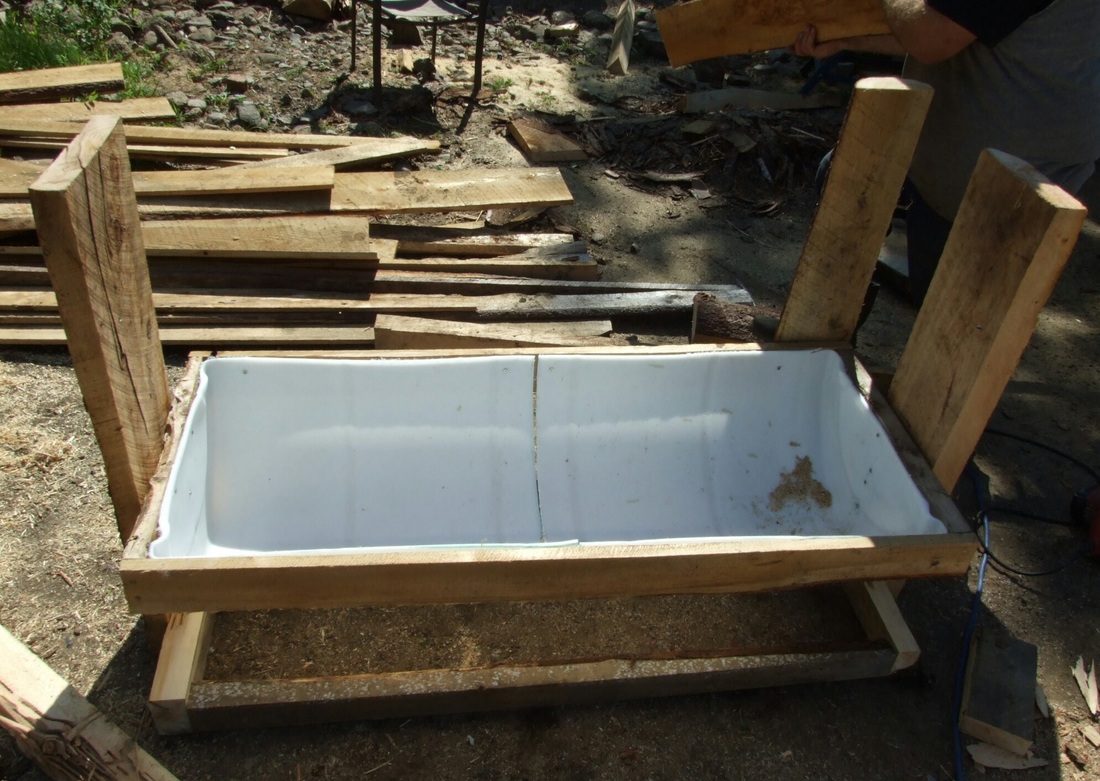
The pit to the basement entry is only half filled in. The new door we ordered to go in the other side of the house will be here in a week or so. Once we have that in we can fill in the current door with cement block, lay the tile drain and back fill the hole. Finally the new freanch door will go in the back wall of the house. I am hoping the doors will be in by my birthday the first week of October. (hint hint)
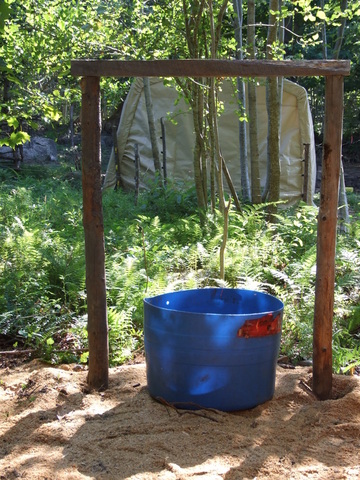
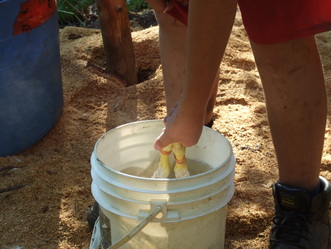
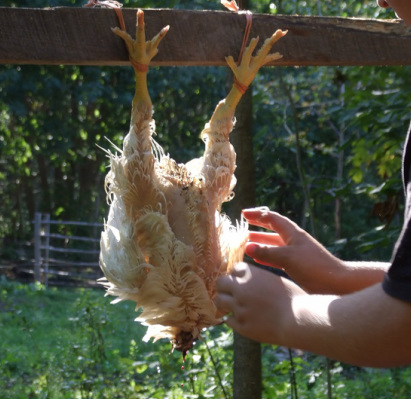
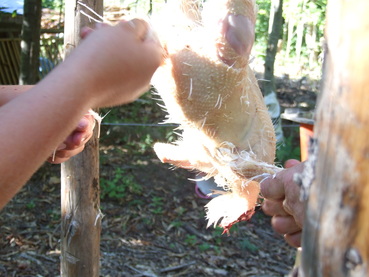
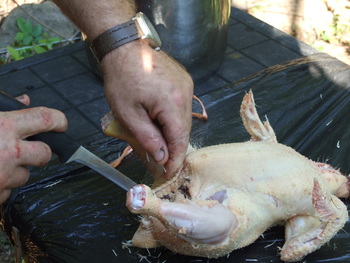
We also managed to have one rotation of meat birds. They will be starting to graduate soon, and I have 8 laying birds growing in the chicken area. The chickens have actually ended up doing really well in their little sun-dappled area at the bend in the "road". I am thinking of just beefing up the defenses of this hut and adding a few nest boxes to keep the layers in this winter.
Picture
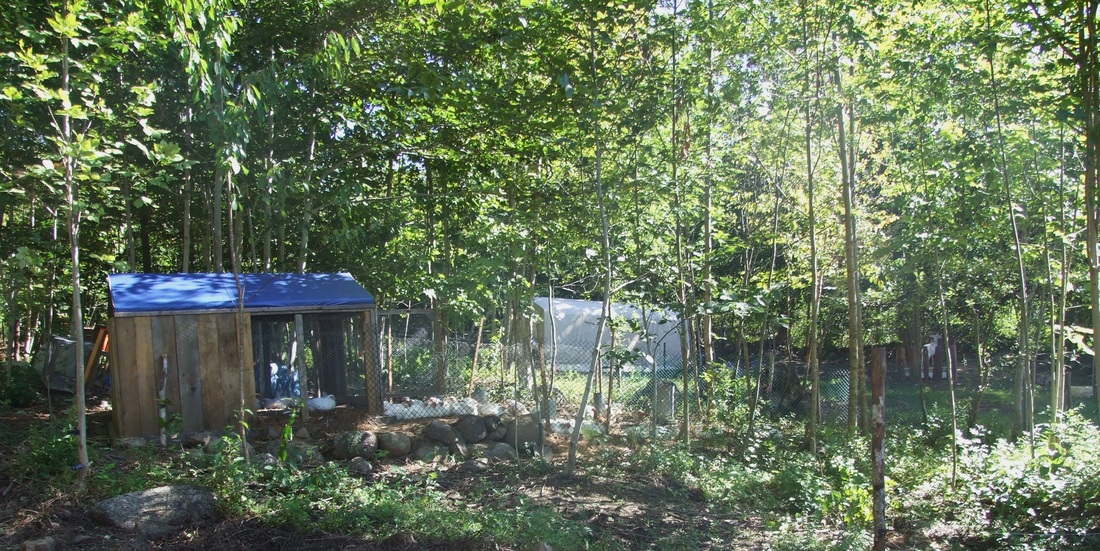
We have also thinned out the small coppices of trees in the back of the house, and added a swale to deal with water issues above and in front of the bee hive. We have had a couple of so-so rains and it has worked well. We shall see with the rains fall ususally delivers. Gary has the three soild sides up on his wood storage shed and he and Reiley have been working to fill it. As mentioned the new pig yard and huts should be finished tomorrow. There is still about 1/3rd of the truck full of 2X4's to get started on the new permanent  goat shed.

Moving the basement door is going to be the real game changer. Once that wall is blocked up Gary can expand the sprouts operation and we will notice a real difference in the power usage this yaer as the old door funneled cold wind directly onto the hot water tank.

There is also going to be time for one larger infrastructure project this fall. We are going to be talking workshops this weekend and I will let you know what we decide on. The infrastructure project will be directly related to which workshops we decide to have next year...so stay tuned.

It has been a busy summer, and will continue to be so until freeze up. But when winter finally hits this year we will be much more secure and settled and ready to take great leaps forward in our plan to teach others the skills we have and in doing so learn from them.

It is not always easy, but is is possible. You have the dream, start taking action that will bring the dream closer. Piece by piece it comes together, but you need to start. Small steps everyday and suddenly you are miles fromwhere you started. IT IS POSSIBLE! Start living your dream today.

I'll be back Monday, have a great weekend everyone!
0 Comments

Jewelweed

28/8/2014

0 Comments

 
Picture
As I mentioned yesterday, Thursdays here on the homestead blog are going to be devoted to herbs and their application on the homestead. I may also occasionally talk about alternatives to chemical laden cleaners and "beauty" products which people seem to throw about their living spaces and bodies with reckless abandon.

I decided to start with jewelweed, simply because it is blooming in great perfusion all around me right now and plants are usually easiest to identify when they are in bloom.

Jewel weed, Impatiens capensis, is an annual which grows in moist shaded areas, and is common throughout the entire eastern half of North America from southern Saskatchewan to Newfoundland south through to South Carolina, Alabama and Oklahoma. Reaching 3- 5 feet it is most easily identified when in bloom. You should look around now to identify colonies as they will readily self seed in the same area. You should wild craft them before they bloom next year. The sap within the stem, and oils in the leaves are at their most potent before the plant blooms. You can harvest after it blooms and have a reasonable product, but it will always contain the most potency before bloom. Remember when wild crafting to take no more than 1/3rd of any given population.

To identify when not in bloom check for the following:  oval, round- toothed leaves. Leaves at the bottom of the plant will be opposite, leaves near the top of the plant will alternate. upper ones alternate.  Before blooming the stems will be almost translucent and will also have the large nodules in the stems.  Pale Jewelweed has yellow flowers, Spotted jewelweed has orange flowers with dark red dots. (see photo above) The Spotted Jewelweed variety is most commonly used medicinally, although the Pale Jewelweed may also have medicinal properties . It will be helpful to have a good field guide for your area.

While this plant has been used for centuries as as treatment for poison ivy and poison oak, it  has moderate anti histamine and  anti-inflammatory properties making it  very useful for any allergic reaction of the skin including bug bites and hives. I also give it to the men folk around here as a  treatment for heat rash. It has also proven effective when used in combination with other herbs as a treatment for acne. Traditionally it has been used as a poultice for treatment of bruising, burns cuts or wounds,warts and ringworm. I also include it in certain salves for healing of cuts and wounds and in my "excema remedy".

I particularly like jewelweed as it is safe for use on the animals. I use it for treating bug bites, including allergic reaction to fleas, and in my healing ointment for the barn. I also find it useful to use as part of a poultice to help heal sprains.

The most common way to use jewelweed is to make an infusion for topical use. It is not recommended to take jewelweed internally. To make an infusion place cut up plant in a pot, you can use the stems and leaves, cover with water then cover and bring water to a boil. Once the water is boiling  reduce heat and simmer until water is reduced by half.
Picture
Strain the plant material from the liquid, you will now see the characteristic orange of jewelweed infusions.
Picture
You now have a couple of different ways to store the infusion. You can make ice cubes by pouring the infusion into an ice cube tray. You can safely store the frozen infusion for a full year. This is convientent as you can take a "cube" out of the freezer and rub it directly on affected areas, if you paln to use the infusion to make salves or cream you can put it in canning jars and process for ten minutes in a pressure cooker. You can then store the jars in a cool dark place along with your other preserves. Please label accordingly. This method will also store for a year quite safely.

If you come in contact with poison ivy or oak the quicker you can apply jewelweed to the affected area the less severe the symptoms will be. You should cut a piece of jewelweed and open the stem. Apply the sap inside the stem directly to the affected area. If it is late in the season and the plant is blooming or has already bloomed, you can scoop some of the soft tissue from inside the stem and squeeze some sap. You can also make a poultice from the leaves by rubbing them between your palms to release some of the oil and the placing them directly on the affected area. You can hold them in place with a sock or gauze or whatever you have on hand.
Picture
If there is not a lot of sap in the stem, you can remove the soft inner tissue and squeeze sap from it. Note the stem widening to nodules at each side of the picture
Jewelweed is one of the medicinal plantswith a long history of use that has fallen out of use in favour of "modern medicines". I have been using it in creams, salves, soaps and custom prducts for clients for years. I have no problems using it whenever someone would typically use hydrocortisone cream. It is well absorbed topically, with no listed side effects. As with all herbals you should test for allergies before starting a treatment program. Empower yourself and your family by learning about herbs and what they can do for your health. Have a great day eveyone.

**Please note. I am not a doctor. This post is not intended to diagnose, treat or cure any disease. The information presented here has not been verified by Health Canada.**
0 Comments

Apple Cider

27/8/2014

0 Comments

 
This year Gary has decided that instead of just picking up the crab apple falls from our trees and giving them to the pigs he is going to make cider. He doesn't want to make hard cider, but fresh sweet cider. We drink a lot of mulled cider in the fall and winter and Gary uses it in the brine before he smokes the hams and bacon from our pigs.

He has spent the better part of the last two weeks picking the falls from the many wild apple trees we have on the property, and using the juicer to experiment with. The first attempts were filled with sediment and had to be put through the juicer  a couple of times.
Picture
He has been experimenting with various straining methods while Reiley and I have been off doing exhibition and the crafter's guild work.  This seems to be his final version:
Picture
A simple wood frame which holds the cheese cloth bag from my cheese
making supplies and drains into a pot.  A full bag takes the better part of a
day to drain. While he washes the apples before grinding them, they still seem
to be full of yeast. At least to my nose there seems to be a lot of yeasty odour
to his cider. The first attempts are in the freezer now to stop the fermentation
process that started naturally from the first batches.


The more recent batches are much clearer and look more like traditional fresh cider; but they are very ..... tart. Sort of make your eyes screw shut kind of tart.

A new plan has been developed. Gary will continue to refine the process and  freeze the results. The first of the 2014 apple harvest should be getting underway in the valley soon, and we will spend a day picking apples for our preserves. We will pick extra this year and he can experiment with different
blends.


Of course the pigs are having a great time as they are the beneficiaries of all the pulp, and Wart is getting most of it as we are preparing to graduate her to the freezer next month. I need to find a day when Jason can come down as it is all hands on deck for pig day. With Graham still working out west it is going to be even more crazy this time. The plan is to try and butcher her shortly after patches has her litter on or about the 5th.


What I don't know, and haven't had time to research with the cider is how to keep the it once Gary has the blend right. I know I can freeze it but we are back to the fact that I am really trying to cut back on the freezer dependency.  We can our applesauce and apple pie filling using the pressure cooker so I think we should be able to do that with cider but I need to find out if that process will stop the fermentation. If anyone has any experience with this please share!

Speaking of sharing, we are up to several hundred views a day, I find this very humbling. I know there are many people who want to live a simpler life and just down shift from the craziness. I hope you are finding the information I post useful. If there is something you would like to see here please let me know.

 I would also like your feedback on workshops. I am going to sit down with Matt and Gary this weekend and  start. planning our workshops for next year.  I would like to know what topics you would like covered in the workshops. Even if you would never be able to come and take a workshop with us, please let me know what topics you are interested in.

We are going to be building infrastructure here in the next 6 weeks and having a solid idea of which workshops we will be hosting will help us decide which projects have priority.

 That's all I have for today. Today was my last day working at the crafter's guild at Upper Clements Park, the park shuts down after this weekend. So apart from a large fundraiser for 4H and pro-show next month the calendar is open to get on with homesteading again. Yay!

I have been doing some behind the scenes work on the site and some planning for the blog and some writing projects also. Starting tomorrow  Thursday's will be, for the most part, featuring different herbs and how to 
incorporate them into your homesteading life. Or alternatives to the chemicals
we dump into our houses and bodies on a daily basis.  More on that tomorrow.
Have a great day everyone.
0 Comments

How to Tuesday: Dressing Your Chickens

26/8/2014

0 Comments

 
Well we are out of the kitchen.. sort of. Last night a mink breached the defenses of the chicken pen. Fortunately Gary and Reiley were outside and heard the ruckus so the mink was dispatched posthaste. The vermin did badly injure one of the meat birds so the guys have put the bird out of it's misery and I will share with you how to clean and prepare a chicken. This bird is still quite small for us so it will be going as a gift to a great neighbour and friend.

I shall spare you visuals of the dispatching part of the process, however I will show you the set up we use to dress chickens. We usually raise 60 - 80 chickens / year and we usually have 3 - 4 "chicken days". ( our family euphamism for kill days). We always have several roosters that hit the magic weight zone first so they fall into the first day, then the majority are done 2 or 3 weeks later with the last few stragglers a week or so after that. We raise big chickens, we prefer our birds to dress out at about 7 pounds. (Refer back to our four sons. )

Actually, just an economics of farm animals note, the cheapest weight you will put on any meat animal is the last 20 percent of the total weight. During the time after the frame is grown out, you will get the most bang for your feed dollars in terms of feed conversion to usable product. The trick is to do this without simply laying on fat. Part of this can be accomplished with genetics, heritage animals tend to put on less fat. (Although berkshire pigs will always lay on heavy back fat if you over feed them). Learning how to feed at this critical time can make the difference between profit and loss, but I will have more on this topic in the coming week.

So, here is our setup for doing chickens
Picture
The three station processing system we have been using for several years.
Picture
The cones for holding the birds. Four at a time
Picture
Plucking station
Picture
The table is for organ removable.
 Usually this is set up in the barn as it is easier to clean up on a concrete floor, but you  work with what you have. It is much easier if you have at least cold running water at hand

As I said, we remove the heads and leave the birds in the cone until they have bled out. They are then dunked in a pail of HOT water.
Picture
This helps to loosen the feathers, especially the tail and wings.
The birds are then hung up at the plucking station
Picture

Reiley was quite excited to be plucking! In the past, as the youngest, he has been delegated to running hot water from the stove, bringing completed birds to me in the kitchen and cleaning up. With just Gary and Reiley here today he got a promotion!

You need to work quickly but carefully to avoid tearing the skin. A small bird like this can be done in a few minutes.
Picture
The tear on the leg was compliments of the mink!
After the bird is plucked,  it is moved to the table and the legs and internal organs are removed. To remove the legs cut through the joints. To remove the  organs, make an incision just below the breast boneand cut down to the vent opening just above the tail. DO NOT make a deep cut. If you cut deeply you will nick or cut through the intestine and contaminate the bird. This is a mess you just don't need to deal with. If you do accidently nick the intestine, try and pull it out as gently as possible so you spill a minimum of fecal matter. After you have removed all the organs dunk the bird in clean hot water and rinse the inside thoroughly with hot water.
Picture
Once you have opened up the bird, reach into the cavity with two fingers going up under the breast bone, scoop out the organs. Small birds like this one are difficult to clean as there is not a lot of room to get your hand inside. You can purchase a rake the you can use to clean out the organs but we have always done this with our hands. If you withheld feed from the birds at least 12 hours before slaughter, the crops should be empty and easy to remove. If the crops are full they are likely to tear and then you have a bird full of partially digested food and stones,sticks or grass. It is difficult to wash off and just really slows down the whole process.
Picture
This is a good time to get rid of the little feathers that may have been missed.  You can remove the neck if you wish and the tail as well. I have the guys leave these in place as they provide flavour.

At this stage the birds are brought to me in the kitchen. I rinse the birds, remove any small feathers the boys have missed, pat dry and place in plastic bags for freezing. All of our birds are frozen whole, if I need them cut up I will do so before cooking. Just remember to remove the pea size glands in the neck, they can change the taste of your chicken, as they release bitter lymph fluid into the meat when cooking.

So that is how to dress a chicken. The procedure is exactly the same for a turkey. The turkey will require a little longer dunking in the hot water to loosen the feathers, but it won't take you long to guage the time needed.

It takes a little practice to get everything right, but like anything else the more you do, the better your skills. There are always a couple of birds that seem to tear, just roll with it. As long as I have good looking turkeys for the Thanksgiving and Christmas table I'm good. Even the slightly wounded birds taste so much better than anything you get in a store!

Hopefully this will inspire you to try dressing your own chickens, raising your own birds is great but if you can't dress them out it is not a self sufficient system. Have a great day everyone!


0 Comments

Thoughts on the Exhibition

25/8/2014

0 Comments

 
The exhibition in Bear River NS, known as the Digby County Exhibition, is celebrating it's 135th incarnation this year. It is one of the last small exhibitions around. A celebration of rural living and rural skills.
There is a hotly contested quilt contest, classes for root vegetables, art work, photography, knitting, jams, pickles, cookies, cakes, bread, grain and hay. It is a reminder of a once flourishing rural culture, a true celebration of the skills and community that was once needed to survive. It does not have a midway, there is not a cheap plastic giveaway in sight, no loud music nor flashing fluorescent lights.
Picture
Picture
As I walked through the barns this week, I am reminded of the rich history of animals in the  process of settling and building our country. The original homesteaders didn't use animal power because they wanted to be environmentally conscious or because they thought it was more in line with the permaculture  systems we wish to install on our homesteads; they used them because that was all they had.


In Nova Scotia much of that work was done by the humble ox. For those who don't know, an ox is usually a steer, but cows and bulls can be used, in this part of the country they are usually a cross breed involving Hereford and red or grey Durham.  Oxen of one type or another have been used as "beasts of burden" for over 6000 years, and have been helping farmers, loggers and transporters in Nova Scotia since the first team was brought here in 1610. 


Picture
While you may use one ox, they usually work in teams and their training starts very early in their lives. They must become used to the yoke that binds them together and to working with their partner. The team must be of similar size, housed together and given the same quality and quantity of feed so they  grow at the same rate. 

Usually a team is around two years of age before they can do any serious work as they must have the maturity and discipline to work together for long periods. Ox teams are not hooked to any reins or harness; instead their drover or teamster walks in front of the team  and the team follows responding to voice commands or specific motions of the whip which the drover carries.  

Picture


 By the time a team reaches full maturity at approximately 4 years of age  
they are a formidable animal in both size and capacity to work, and are only then referred to as "oxen". 
Personally, the most striking thing about these beautiful animals is their docile nature. As someone who grew up handling horses I am always struck by the usually calm and agreeable nature of these animals. I have spoken to people who  work with oxen and they assure me that the teams have their days when this is not the case, but for the majority of the time they are agreeable to work with. 

Picture

 For me, this is always most striking when I see the small children of the drovers casually walking around with a massive pair of mature oxen following at their heels. Animals weighing well over a ton following a fifty pound child who, when looking for someone or something, will bend over to look between the legs of their charges as it will be several years yet before they have a hope of seeing over the animals.
Yeah, try that with a team of horses!
Picture
Picture
Picture
While no one will deny the shear majesty of a gleaming team of heavy horses with polished hooves, flowing fetlocks and jingling harness; the quiet and humble  oxen with their seemingly endless patience has, over the years, won me over. Now I just need to convince Gary!
 
I hope everyone had a good week while I was tending to the 4H beasties, We had a good year and Reiley has qualified for the 4H provincial show, being held in Truro next month. We will be taking both Ivan and Pepper and the paper towel rack Reiley made for woodworking.

Pro-Show, as it is called is always an amazing experience. 4H  families from Yarmouth to Sydney descend on the host town in trucks and trailers and minivans containing everything from beautifully decorated cakes to draft horses!  Reiley has qualified to show in beef and goats both showmanship and conformation classes. He will also be competing in the judging competition for both those categories.

These projects are the culmination of years of work for most kids and I have to say these are great kids. Inside the ring competition is fierce, outside the ring you will find laughter, hugs and the loan of equipment and tools to help each other out. Competition starts early Friday afternoon and winds up Sunday afternoon. In between there are hours of styling and primping of livestock,  barns open at 5:30 am, heated tug of war rivalries, a fashion show and auctions for market lamb, turkey and steer projects. Yes, animals that the kids have spent all year, or two years in the case of market steers, raising will not make the trip home. Fortunatly Ivan will be comming home this year; next year only a large box of kleenex will make the drive home with us.

It's a crazy weekend with long days and no sleep and the kids wouldn't have it any other way!

I'll be back tomorrow with a How-To-Tuesday post, not sure what the topic will be but I'm hoping to get out of the kitchen! Have a great day everyone!
0 Comments

How To Tuesday - Canning Tomatoes With a Pressure Cooker

19/8/2014

2 Comments

 
As I said yesterday I have found that canning straight tomatoes is
the most versatile way I have found to preserve our  tomato harvest. These can
then be made into sauce, paste, puree or stewed.  I process these in the
pressure cooker as that is the safest way for me.

There are ways to process tomatoes in a water bath by adding lemon
juice or citric acid. Lemon juice can affect the taste while I have not found
that citric acid affects the taste. The decision is yours, by adding a mild acid to each jar, you can lower the pH enough to be sure your tomatoes are safe providing you follow the normal processing directions. However, as I said yesterday, we are trying to reduce our reliance on deep freezers, so things that I used to freeze, sauces, broth, and some meat is now being canned and for these you absolutely need a pressure canner. You are messing with botulism, it is odourless and tasteless and it can kill you. Enough said.

So preparing tomatoes for canning. There are as many ways to do
this as there people reading this. For my preserves I choose to simply use whole tomatoes. It is recommended to skin the tomatoes, now you can use a vegetable  peeler and try to peel your tomatoes, or you can freeze your whole tomatoes after cleaning them and cutting off any blemishes.

Freezing the tomatoes does two important things for you;  first it
will make the skins slip right off the fruit. Secondly and probably more
importantly it will remove, a large portion of the water in the tomato. This
allows you to use the glut of less meaty tomatoes, what my grandmother use to
call slicing tomatoes. The usual problem with using these tomatoes is that it
takes so much energy and time to boil off the water. Probably the best thing about freezing the tomatoes is that you can stockpile them until you have enough to make preserves with no loss in quality.
Picture
Water from 2 tomatoes frozen for 2 days.
They are now very easy to peel, the skins just rub off. You can also remove the skins by blanching your tomatoes, dropping them in boiling water for approximately 15 seconds and then putting them in ice water.
Picture
If you want to remove the seeds you can put the pulp through a food mill at this stage. I don't remove the seeds, I eat the seeds when I eat fresh tomatoes so I don't worry about them in my canned tomatoes.

It takes a surprising amount of tomatoes to make tomato sauce. In my experience it takes approximately 5 1/2 pounds of tomatoes to make 1 litre of thin sauce, and closer to 7 lbs for a really thick sauce. My regular tomato preserves are the consistency of a thin sauce. Depending on what I am using it for I can reduce it some after I open.

Now that you have  lots of your peeled tomatoes, put them in your stock pot and bring to boil, add 1 tablespoon of brown sugar and 1/4 teaspoon of salt  for each pound of tomatoes you put in. This helps to really bring out the flavour. Once the tomatoes have reached boiling, turn down the heat and continue to simmer until the amount has been reduced by one third, (for thick sauce reduce by 1/2).

While the sauce is simmering, prepare your supplies as you would for any other canning project, sterilize the jars and lids. If you are using lemon juice or citric acid get these ready and prepare for water bath processing. The amount of lemon juice for 1 litre jars is 2 tablespoons, for 500ml jars is 1 tablespoon. If using citric acid, use 1/2 teaspoon for 1 litre and 1/4 teaspoon for 500 ml jars.

The pressure cooker.
Picture
Picture
Essentially a pressure cooker is a heavy pot with a lid that seals and a
valve that controls the steam pressure inside. It increases the pressure inside
the pot relative to the atmospheric pressure outside of the pot. For cooking
food, this decreases the amount of cooking time; for canning it increases the
temperature of the water and steam inside. In regular water bath canning the
water boils at 100 degrees C, no matter how much more heat you put under that pot the water will not get any hotter than 100 C, (212 F).
 A pressure cooker allows steam to build up inside the pot increasing the pressure and the temperature inside the pot. By just increasing the pressure to 15 psi, you will raise the temperature inside the pot to something close to 120 C, (250 F).  This is hot enough to kill any pathogens which are in your preserves. For cooking this means tenderising and cooking a 2 pound beef roast in less than an hour, and if you add beef broth and mushrooms you will be a pressure cooker convert.

 While features may vary from model to model, all modern pressure cookers
will have a lockable lid usually via a spring mechanism within the handle, a
sealing ring, a pressure regulator vent pipe and a safety release plate or
valve. Please read the manual that came with your cooker to become familiar with the model you have. The manual will also give you instructions for care and  maintenance of your cooker. It is important to inspect the seal and safety release valves or plates each time you use your cooker. For those of you who are somewhat intimidated by the idea of the pressure cooker, as I was, try setting up the cooker and just putting water in, bringing it up to temperature and then letting it sit. It will give you the confidence of  knowing it wont blow up, without all the hectic distraction of canning at the same time.

So that is pressure cookers 101. Somewhat intimidating but you just need to become familiar with them. Sort of like milking a goat for the first time, or operating a rototiller. Scary at first but we are all homesteaders here! We didn't choose to live this lifestyle because we hate learning new things. Now back to the tomatoes....

Once you have reduced your tomatoes to the level you desire, fill your jars and place the lids on, you do everything as you would for water bath canning, so do not over tighten the rings on the jars. Now you will have to put water in your cooker, the amount will vary depending on the size of your pressure cooker. Unlike a water bath you will not need enough water to cover your jars. In a pressure cooker it is the steam that does most of the heating. usually an inch to two inches of water is the recommended amount, but please check the directions that came with your cooker.

Place the jars into your cooker and lock the lid in place. turn on the heat and wait. Start timing once steam starts coming from the cooker, 10 - 15 minutes is the recommended time frame. Once the time is up, remove the cooker from the heat and leave it alone, do not try and remove the lid from a hot pressure cooker. Some models will have a pressure valve that allows you to manually vent pressure, if yours does you can release steam and then open.  Remove the jars and let them cool.

Picture
Sauce I made for my daughter, she uses it for pasta and prefers to have peppers and herbs added, hence the green.
So that's it You have now made tomtao preserves... with a pressure cooker! These will safely keep for 2 years, but if your house is anything like mine they will dissapear long before that deadline. Try experimenting with different recipes, you will find sop many ways to utelise these tomatoes.

 As always I'm happy to answer any questions. Have a great day everyone.
2 Comments

Preserving The Tomato Harvest... Part 1

18/8/2014

0 Comments

 
Before I get into today's post I just wanted to give everyone a heads up on this week. As I mentioned last week this wee is exhibition time for us. Reiley is showing Pepper and Ivan tomorrow and Wednesday, I am judging crafts and sewing for the 4H on Wednesday. Thursday through Saturday I am barn manager at the 4H barn from 7am- 7pm. Posts will be sporadic. When I sat down to write the tomato preserves post I realized it was just too long to be one post so I've split it up in two parts. The real technical one will be tomorrow; How To Tuesday this week will be on canning tomatoes with the pressure cooker. Not scary, I promise!

It's that time of year again, all the stuff, well at least a large majority of it, that you planted is flooding you with an abundance of produce. You have given away vast amounts of it; your neighbours draw the curtains and lock the doors if they even SEE you picking more zucchini, what to do with it all? Hopefully you have remembered your local food bank, they love getting fresh produce!

There are some things that you just can't find at a supermarket, and at the top of that list is fresh vine ripened tomatoes. In my humble opinion, there is nothing that tastes as good as a tomato warm off the vine, and those tomato facsimiles sold in supermarkets are not worth taking home even if they gave them away.

Remember back to last February, the nasty cold wind blowing the snow around, if you were anywhere near Nova Scotia we were having a blizzard every Wednesday. Now imagine this coming February; sitting down to peruse one of the seed catalogs which has recently arrived in you mailbox, the wind is howling and its freezing outside, but you are sitting down to a lunch of fresh baked bread, some of your own chevre seasoned with basil and rosemary and a bowl of roasted tomatoes and thyme spread which you lovingly made and stored last August. Sound like a good way to spend a February afternoon? Well to get that February afternoon, you need to preserve your tomatoes now. Yep even though you think that you are sick of tomatoes and you really can't imagine ever wanting to eat another one! So let's get started.

There are three main ways to preserve tomatoes; freezing, canning and drying. You should utilize all three for the greatest variety of use during the coming winter. Freezing and drying are the easiest ways, canning tomatoes requires some experience, as tomatoes tend to be on the border when it comes to acidity levels. Remember last week when I talked about high acid and low acid foods? High acid foods can be canned safely in a water bath canning process, low acid content foods require a pressure cooker to safely preserve them.

I don't fool around with tomatoes, they are done in the pressure cooker. If this terrifies you don't worry, I think pressure cooker stories have become the rural version of an urban myth. Every family had an aunt or a friend of a grandmother who was injured in a pressure cooker explosion or a large dent in a ceiling that came from a launched pressure cooker lid. Some are true, but the truth is all modern pressure cookers are so absolutely safe that you would have to seriously tamper with one to even get it to explode. I promise I'll walk you through it.

There are four main products I make from our tomato harvest: salsa, tomato sauce, tomato paste and tomato soup. It used to be a guessing game of how much of each to make every year. However a couple of years ago I realized that I only needed to make canned tomatoes. I could then take the jar of tomatoes and make a sauce, soup,  or paste from my canned tomatoes. They also make a fabulous paella.

My favourite way to prepare tomatoes is to roast them and then freeze them. This makes a wonderful base for sauce, especially good on pizza, it also makes an amazing spread that works on crackers, or the afore mentioned fresh bread of a February afternoon. All things being equal, I would prepare all of our tomatoes this way. However we simply do not have the freezer space to do this, and with the planned switch over to off grid living I am trying to drastically cut our reliance on deep freezers. So this method is now reserved for about 30% of our harvest. This is a very simple recipe and you can use any variety of tomato, from meaty roma variety to those so sweet little cherry tomatoes, try putting a couple of different varieties together to get a mix of flavours.

Roasted Tomato 
Ingredients

As many ripe tomatoes as you have
Olive Oil
Garlic
Fresh Thyme or Rosemary (optional)
Salt & Pepper
Picture
Pre-heat your oven to 350 F
Wash your tomatoes, pat dry and cut off any skin blemishes, Slice them in half,
even the little cherry ones.  Drizzle a moderate amount of olive oil in the bottom of your roasting pan and place the tomatoes cut side down in the pan. Don't be afraid to jam them in as they will shrink up in the oven. Peel and slice, or mince, your garlic. The amount will vary depending upon how much you like garlic and how many tomatoes you have. Sprinkle the garlic over the tomatoes, and drizzle more olive oil on top. To encourage the flavours to mix, sprinkle with salt and pepper.
Picture
Place in the middle rack of your pre-heated oven and bake for 45 minutes. Now sit back and wait for everyone to come asking what smells so good! (Think bruschetta).
Picture
After they are done rosting you simply need to let them cool, and then place in a freezer bag and put in the freezer.You can put in the oil if you want or just the tomatoes. I put in just the tomaotes, Gary has been known to add everything.  That's all. When you are ready to use them, simply thaw and they are ready to use. You can place them directly on bread for a sandwich,make fab pizzas and they go really well with both fish and lamb. They do wonderous things to soups! You can use them as they are or you can put them through a food processor, add any herbs you wish.

Hopefully you will give these a try, they are so easy and in the dark of winter will bring back the taste of summer.

Tomorrow we are going to make canned tomatoes with the pressure cooker. I know they are intimidating, but they really are the safest way to can pure tomatoes; and if you have any asperations of canning meats, stews, soups or vegetables they really are a necessity. Once you take the plunge you will be suprised how easy it really is. I was, and I let my pressure cooker sit in the cupboard for a full year before I attemped to use it!

If you put any whole tomatoes in the freezer last week, take them out tonight to thaw we can use them tomorrow. Have a great day everyone.
0 Comments

Problem Fixed

17/8/2014

0 Comments

 
Hi Everyone,

     I'm so sorry for any frustration caused by the problem with broken links on the new blog archive feature. I'm not sure what went wrong, but it is now fixed. Clicking on the "Homesteading Skills" link or the "Animal Husbandry" link on the home page will take you to the appropriate pages.  The gardening archive page will be set up today. 
Again sorry for the frustration.
        

0 Comments

A Little Barnyard DIY

16/8/2014

3 Comments

 
With the doelings getting bigger, and Ivan getting bigger, room at the trough has become a little sparce. In true homesteader fashion we are building a second bunk feeder for feeding hay and fodder. This one is almost like the first one the guys built last fall and it has held up really well; it is easy to clean and with the tombstones the animals don't waste food when they shake the mats of fodder.
We are using a food grade 45 gallon barrel and slab wood we get from a neighbour's sawmill.
Picture
First thing to do is mark the cut lines on the barrel, you need to cut at the point where the barrel starts to narrow at the top and split it down the middle lengthways.
Picture
Next, line up the barrel so the bottom of the barrel forms the outside of the trough. To build the frame for the trough, screw 2X4's, or reasonable approximation, along the upper edge of each side of the barrel and one along. the bottom. These should be slightly longer that the barrel.
Picture
Picture
Picture
Picture
Picture
Attach a side slab at each end by nailing through the trough and the support pieces between bottom. and top rail. Leave enough room at the bottom to attach a frame that will support  the tombstones.
Picture
Picture
Now it is simply a matter of sorting through the slabs and choosing the pieces yu will use to make the tombstones.
Picture
When using rough lumber some "finish" carpentry may be required!
Picture
Once all of the tombstone pieces have been chosen, simply nail or screw them to the top and bottom rails. Be sure to leave enough space between the tombstones so that your animal can get it's neck between them, and trim them off so that smaller animals can get their heads over the tops.

When all the pieces are attached, it is a time to trim the sides to create the room for animals to get their heads in at the tops of the tombstones.
Picture
Picture
That's it. If you do not require tombstones you can just fill in between the top and bottom rails. So for an afternoons work and less than  $20, we have a second feeder for hay and fodder. Most importantly no more fighting at the goat / steer dinner table!
Picture
On a completely different note. Two of my laying hen chicks, who are a ripe old age of 1 month, decided that with the pigs area expanded again to work their leveling magic on the bottom part of the future access road, today would be a good time to take it upon themselves to become "free range" birds. Not too bad. They spent the entire day cleaning up the bug and worm bits the pigs left behind. Pretty smart for chickens!
Picture
Have a great day everyone! No post tomorrow but I'll be back on Monday.
3 Comments

Site Changes

15/8/2014

0 Comments

 
Hi everyone, no real post today, I spent some time cleaning up the site today. Just going through and making sure all the posts are properly tagged. I have also created a directory of sorts; if you look on the bottom third home page, there are now three columns. One will take you to a list of posts on skills; one will take you to a list of posts on animals. I think it will be easier to navigate, there is still the search feature on each page that you can utilise as not all posts will be in an index. Tomorrow I will add a page for gardening posts.
Hopefully you find this a helpful change. Let me know if you have any trouble with the links! That's all for today, I'll be back tomorrow with a full post. Have a great day everyone.
0 Comments
<<Previous
    Picture
    A  4-H Family
    Lives Here

    Receive inspiration and information for your homestead several times a week

    * indicates required

    Author

    Hi! I'm Shelli Killen,
    a homesteading, homeschooling, wife and mother of five. 

    I am a student  herbalist with a passion for learning and a  habit of bringing home strays.

    I love music, and the power of creating things with my hands.
     
    I tend to do best when life around me is organized chaos
    .

    RSS Feed

    Categories

    All
    Bees
    Canning
    Chickens
    Economy
    Gardening Vegetables
    Goats
    Herbs
    Hobby Farming
    Homesteading
    Homesteading Skills
    House Management
    Lifestyle Planning
    Pigs
    Self Reilance
    Self Sufficiency

    Archives

    December 2014
    November 2014
    October 2014
    September 2014
    August 2014
    July 2014
    June 2014
    May 2014

Powered by Create your own unique website with customizable templates.