Hand-Forged Farm
  • About Us / Contact

Physiotherapy for a Goat or, How I Spent my November!

5/12/2014

0 Comments

 
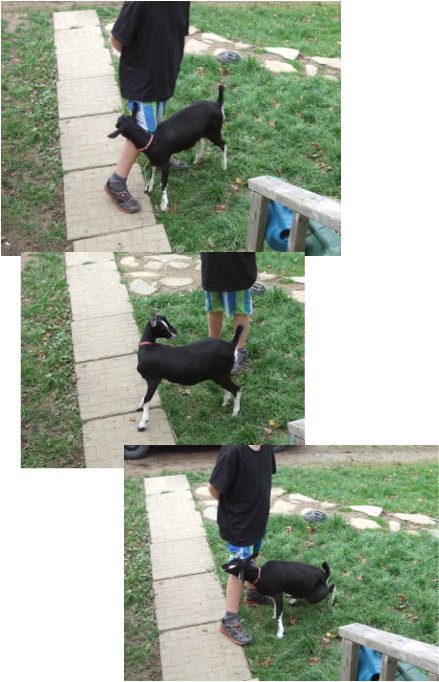
Wow, I can't believe it has been so long since I was here! It has been an extremely busy month! A few hours after I wrote that last post wee hours, overnight Tuesday into Wednesday, Pepper started stumbling and seemed off balance. Gary immediately gave her a shot of a B-complex vitamin and a double dose of penicillin. (Bless his heart) I went to the vet first thing the next morning, the verdict goat polio or listeriosis. We brought her home and made a bed for her in the large dog kennel in the living room.

The next day was not a good day. There were times I thought she was going to give up then and there. The treatment regime is massive doses of pro-pen, 4cc/kg of body weight every 4 hours and 500 units of B1 every 4 hours. Feed as tolerated and push fluids. 

Survival rate of 30%.

 By the next afternoon she could not stand, had complete paralysis on the right side, was drooling and had to be held up to void urine. She didn't protest at the injections. She is a remarkably tough little goat
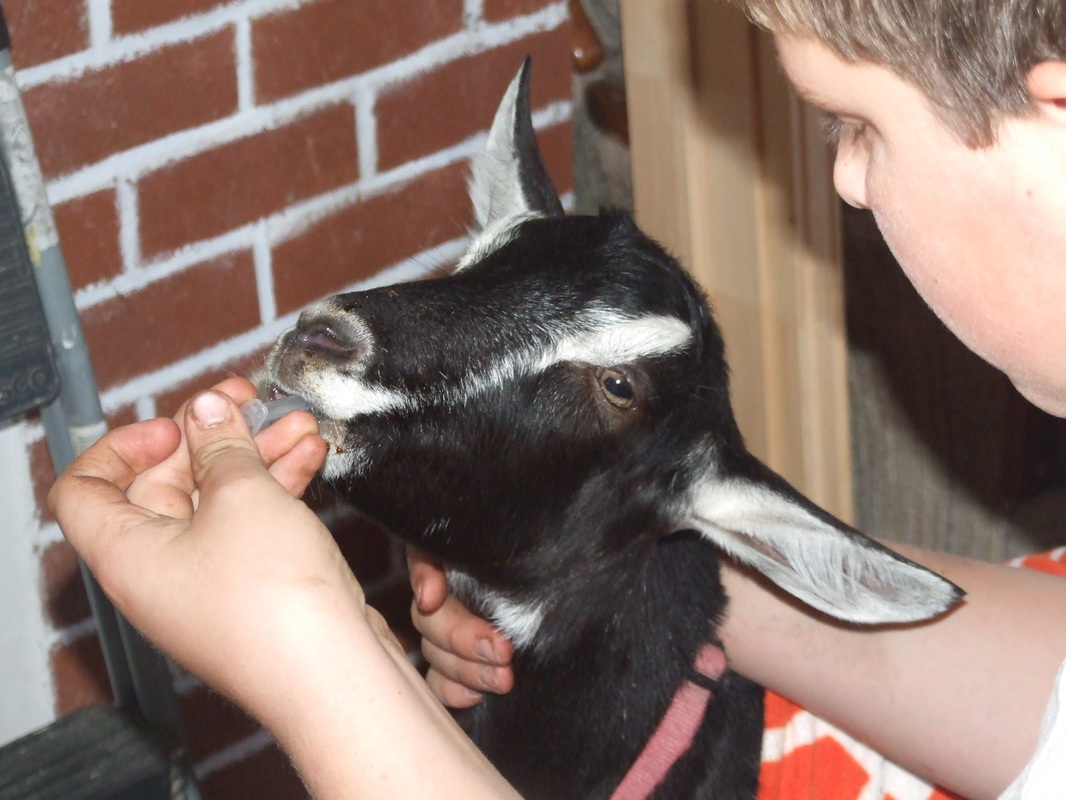
A couple of times the following day Gary and I spoke with Reiley about putting her down or to keep going. She was miserable and confused, but she still responded to Reiley. Turning whenever he walked into the room and relaxing when he spoke to her: he even was able to spoon-feed her a mix of chopped hay and oats with molasses, and feed her electrolyte solution.

 We all agreed to give her the night to see what happened.

 Reiley and Gary set in for a night of tag team care, I didn't expect her to survive the night. At 3:22 am I heard her call out! She was raising bloody hell when Gary gave her yet another shot. I have never been so happy to hear a goat call!

 She was somewhat better that next day. She stopped drooling, was taking a more active role in drinking and was able to stand with assistance.
She is nowhere near better, and we knew we might still lose the battle. We are 99% sure it was listeriosis. The good news is none of the other animals were showing any sign of illness. Gary did give a good dose of penicillin as soon as Pepper started showing symptoms so that was in our favour. The vet thinks we may have listeria bacteria on the property, well who doesn't, and the stress of the bruising she took brought on a full-blown case of listeriosis encephalitis.

 Round the clock nursing care to an almost full-grown goat takes its toll on the schedule. We were giving fluids every hour round the clock for 72+ hours; passive motion exercises every two hours around the clock; spoon feeding gruel; penicillin every four hours, vitamin B1 every six hours and then finally, 5 days after she first fell ill she was laying in the kennel eating some hay! She's a fighter... and we decided as long as she kept fighting we would be right there with her!

The next day we were able to get her to stand, with much support. She had right-side paralysis from the listeria bacterium attacking her brain stem. When we had her stand, she would lean heavily against whoever was with her and start to circle to the right. If she was laying down strong muscle contractions would pull her head around to the right so her nose was touching her side. We began taking turns placing her on her side left side and massaging the muscles on her right side neck and flank.​
Picture
She would lean against you, then when you moved away she would pull hard to the right and then fall...
If we massaged her for 15 or 20 minutes she could relax enough to sleep for a half an hour to 45 minutes. We really were fighting exhaustion, a body cannot heal if it is in a state of exhaustion. We needed to get her to sleep and this was the only way.

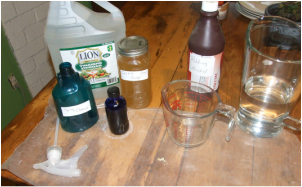
I wrote up a plan to get her back on her feet; I never thought I would be writing up a physiotherapy plan for a goat... but drastic times call for drastic measures! We had to get her moving and start retraining her muscles. It was almost as if she had a stroke, we just kept working on the right side, then getting her up and walking. she would let us lead her to the left but she tired quickly and would then fall. I made up an essential oil blend in oil to help relax her right side and another to stimulate her left side. Multiple times of day she was massaged and we would do passive range of motion exercises with her. Slowly she strengthened. 

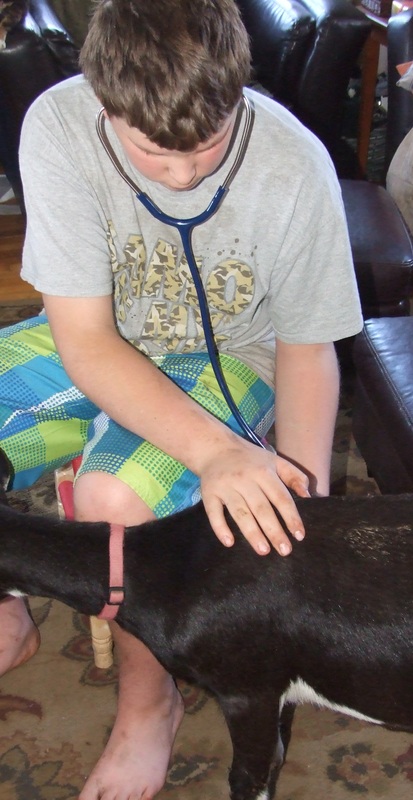
The most difficult part of working with sick animals is that you can not make them understand that you are trying to help them. There has to be a high level of trust there to begin with, and the person Pepper has spent the most time with was Reiley, she trusted him completely and visibly relaxed when he was near, so he did the lion's share of the rehab work with her.
Once we got her on her feet things progressed but very slowly. She was able to tolerate a little more each day, we would take her outside when we were outside; mostly she would lay on the grass but we would get her up to walk every half hour. She was still eating little so we had to push fluids and make up a gruel of barley and molasses and ground corn. It was almost 10 days before she could drink from a bucket! Little by little, there were improvements, we were able to set up a small pen in the yard and bring Pepper's twin sister Fawn down from the goat yard and she would help get Pepper up and walking. After a few days we began taking Pepper up to the goat barn and putting her in a pen with Fawn; starting with a half-hour twice a day until we had worked up to four or five hours a day. After spending over 2 weeks in the house we had to get her used to the cold weather without stressing her; with the amount of penicillin she had, I was really worried about secondary infection. Finally, three weeks to the day after she had first fallen ill, we had a warm spell that was due to last a few days so we left her in the barn full time. We had done all we could do for her, she needed to be with her sister and the other goats to re-train her brain and muscles. She has improved quickly! She was very tentative the first few days and when startled or very tired she would reflexively spin to the right. Occasionally I would see her staring at her left front leg as if to say, "where did that come from?'.
She has been following Fawn around slowly and carefully. Fawn seemed to know something was not what it should be and was very quiet and gentle with her sister, but this past weekend we found them playing king of the mountain on their favourite rock! Both scrambling to stand on the highest point, head butting and rearing up at each other.
It made me cry! I really am still amazed that she survived, I never thought I would see Gary work that hard to save a goat. He is slowly tapering his profit-based approach to farming. He will always know exactly how much it cost for us to raise a pound of pork, and if the sows are paying for their keep. I love that! It helps us make smart decisions about the homestead, but it is nice to know that he thinks some things are more important to us than the bottom line...  
​​
Picture
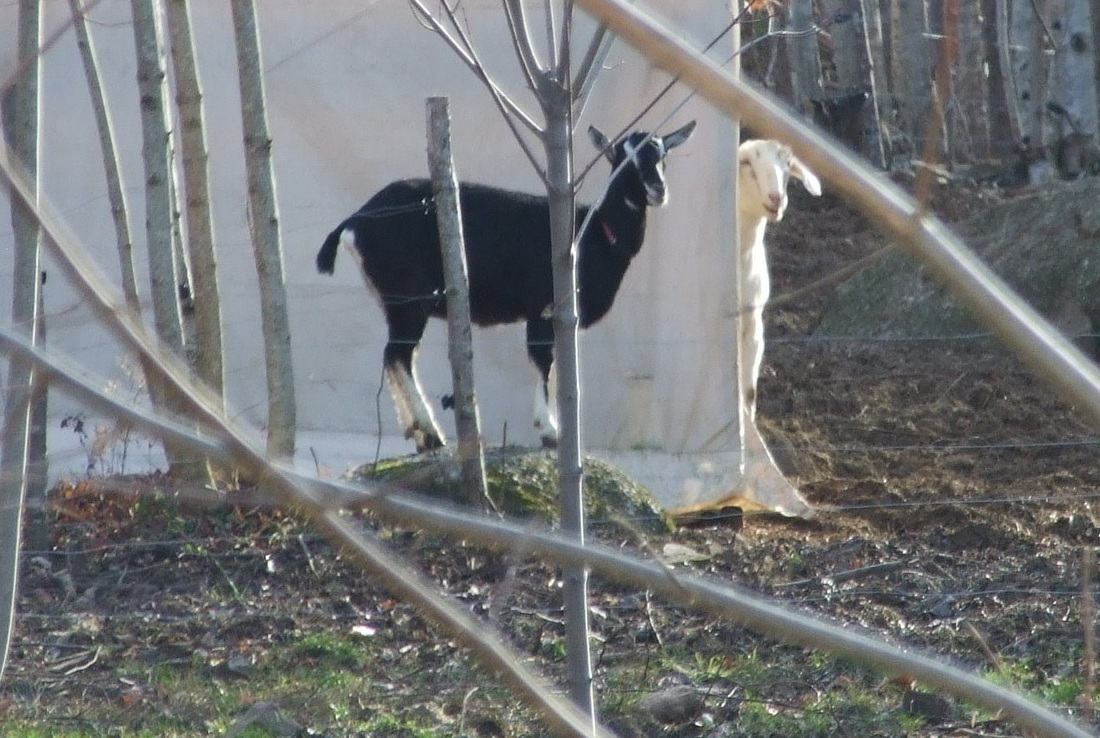
Miss Pepper balancing on her favourite rock, December 5th.
0 Comments

How to Tuesday: Dealing With a Sick Goat

4/11/2014

1 Comment

 
 So I had a plan for today, the guys were going to trim the goat's hooves and I was going to shoot some video and go through hoof trimming on the how-to Tuesday blog post. Great plan!
Never make a cast in iron plan as a homesteader. Plans are like a poke in kidneys to mother nature, goddess of all things homesteads. This morning mother nature decided that I would not be shooting video of goat hoof trimming, instead, we have been dealing with a goat in shock with a mostly shut down rumen. As I mentioned on facebook yesterday, Miss Avril was in heat, so around four pm yesterday Reiley and I drove Miss Avril for her 'date'. By the time we arrived back home, it was pushing six pm and dark. When Avril is in heat she gets aggressive, (well let's face it she is aggressive most of the time), the best we can determine is that after we brought Avril home she either picked a fight with Pepper or Pepper was caught up in a fight between Avril and Ivan. Whatever happened, when Reiley went up to do chores this morning he found Pepper standing off in the corner in deep shock.
​

Goats in shock exhibit the same symptoms as most animals, even 2 legged ones. They appear dazed or blunted they also tremble or shiver and their temperature, especially in the extremities, is much lower than it should be. They also present with pale mucous membranes, the gums and inner eyelids, and rapid shallow respiration and rapid irregular pulse.

Pepper had all of these in spades this morning, my guess is that she was like this most of the night. We brought her into the house, wrapped her into her little coat that I had made her for pro-show, and set about assessing her and warming her. She has no obvious injuries, she is tender in a few spots but nothing major, she can walk and has no signs of internal bleeding. This is good, she needs supportive care. So strap on your boots it's going to be a LONG day. 
Picture
Once she was warmed and more responsive Reiley began to check her temperature, pulse, and respiration. The most critical thing to watch for in sick or injured goats, well all ruminants really, is that the gut does not shut down. If the rumen shuts down it can easily kill the animal. The easiest way to check is to listen to the gut with a stethoscope. I highly recommend having even a basic stethoscope around the homestead, it makes diagnosing things so much easier.

Unfortunately, Pepper's rumen was very quiet, you should be able to hear a goat's rumen working even without a stethoscope. Pepper's was barely audible with a stethoscope. Once the rumen starts to shut down you need to withdraw all grain and offer only good hay and water. Unfortunately, the animals have usually stopped eating and drinking by this point. The danger comes when routinely produced bacteria in the gut become trapped in the digestive system and lead to enterotoxemia. You need to get the gut functioning again.

If the goat is refusing food and water but is not yet dehydrated, you can give fluids via a large syringe, I recommend having a few 60cc syringes on hand; you don't need a needle on it, just the syringe. Use the syringe to give water, if the goat is reluctant to take straight water, try putting little molasses in, the energy won't hurt them and it may encourage them to drink.

Pepper passed stool and urine within the first hour of being in the house, so we were not in any danger of severe dehydration yet. I should note that anytime you are not comfortable handling and treating a sick animal call your vet. Gary and I have over thirty years of experience working with animals and treating them. I trained as an RN and am very comfortable dealing with medications calculating dosages etc., but even we have our limits. We are comfortable stitching wounds, lancing abscesses, pulling babies and a host of other things but we know when we need to call a vet and everyone should recognize their limits and follow their gut instincts. The more experience you get the more comfortable you will be. It is better to acquire experience watching and talking with a good vet than by trial and error.
Picture
S​o we have spent the entire day coaxing fluids into Pepper. She is not well yet. We have been giving children's aspirin for inflammation and pain, she is getting fluid syringed every hour, she has not developed a fever so we are confident that we are not dealing with anything other than a bruised and sore goat. We have given her about a quarter cup of probiotic yogurt, this is helpful in keeping the gut populated with good bacteria. It really is remarkable how fragile goats are when something goes wrong. The same slow digestive system that allows them to digest sticks and bark rapidly becomes a hindrance when a problem occurs.

So, for now, she is holding her own, she is continuing to nibble hay, pass urine and stool. We will keep her in the house overnight and continue supportive care. If she is no better in the morning we will have her seen by the vet.

Ahhhhh, self-reliant homesteading at least you can't say it's boring.....

Have a great day everyone.
1 Comment

Ginger, The Ultimate Warming Herb

1/11/2014

0 Comments

 
Hey, Everybody. Well, winter is coming, I can deny it no longer. The cooler weather has me thinking about snuggly sweaters, fuzzy socks, and warming herbs. The ultimate warming herb is one that most people really don't consider an herb.... ginger.
 
This humble rhizome, Zingiber officinale, is a powerhouse when it comes to herbal medications and herbal health support. Used extensively for thousands of years in both Ayurvedic medicine and Traditional Chinese Medicine; ginger is helpful in protecting and promoting healthy digestion and is also an important anti-inflammatory herb. It can be used fresh, powdered, candied, dried, or as an infused oil, juice or tea. Ginger is part of the Zingiberaceae family, as are herbs like cardamom and turmeric. When taken internally ginger stimulates circulation, thus the warming effect.

While ginger is becoming better known for its anti-nausea properties*, it really does so much more to support the entire digestive system. By stimulating the circulatory system it helps your body absorb nutrient throughout the GI tract. As an anti-inflammatory, ginger works on the colon to reduce inflammation thus reducing the amount of painful gas build-up and in some recent studies, ginger has been shown to reduce inflammatory markers in the colon in as little as one month.
 
It is the anti-inflammatory properties of ginger which make it such a versatile herbal medicine. Inflammation is the body's response to injury or insult. Under normal conditions, an injury occurs and the body protects itself from further injury by setting up a localized inflammation: heat, swelling, and pain, to prevent overuse of affected area until healing occurs. When healing is complete, the inflammation subsides.

Unfortunately, most chronic health issues are caused, or exacerbated by, inflammation. Everything from heart disease to colitis and osteoarthritis is an inflammatory disease. Recent studies have shown ginger to be as effective as nonsteroidal antiinflammatories; things like Celebrex, naproxen, ibuprofen aspirin, and Voltaren, without the nasty side effects.

There is also research that suggested ginger is an effective blood thinner, and is a useful treatment to regulate blood pressure and lower blood sugars. As a result,  if you are taking medications for any of these conditions, speak with your medical practitioner before starting to take large quantities of ginger. Please note: ginger as a medication should not be used in children under two years of age. 
Picture
candied ginger
​As with all herbal medications, it is much better to include whole ginger in your diet than to take supplements or extracts. Part of the reason major drug companies isolate various compounds of traditional herbal medications and then test these "active" compounds to develop medications is because they can't patent a whole plant. If they isolate compounds and figure out how to synthesize or extract the compounds they can patent the compound or process to extract the compound.

Traditional herbal medications utilize the entire spectrum of compounds found in the plant, there are many ways the compounds interact with each other and with the body to do what they do. Unfortunately, large pharmaceutical companies don't study the full spectrum and their interactions... it just isn't profitable for them.

We use ginger around here to treat nausea, tummy troubles such as gas and diarrhea; mixed with turmeric as a treatment / preventative for migraines and to treat the inflammation in my shoulder from the post-op scar tissue in my shoulder. I credit ginger with keeping me upright and mobile some days.
So here is my recipe for simple ginger tea, it can be enjoyed hot or cold...

Cut a 2 cubic inch piece of ginger, wash and peel. Grate the ginger and place it in your teapot.

Cover with 1- 1 1/2 cups of water and steep for 10 - 12 minutes

Sweeten with honey to taste and enjoy!

Fresh ginger is best, you can also freeze fresh ginger by just washing, wrapping and placing it in your freezer. It should keep for up to a year. Fresh ginger will keep in your pantry if you must put it in the fridge, place a piece of damp paper towel in the container and seal. Otherwise, your ginger will dry out.  
Picture
As always, This information is solely for informational purposes. IT IS NOT INTENDED TO PROVIDE MEDICAL ADVICE. Please consult or health care provider for specific medical issues.

* Please note, pregnant women should not consume more than 1 gram of ginger per day, and should not take ginger over extended periods of time, more than 3 days, as ginger can stimulate uterine contractions.
0 Comments

Heating With Wood

28/10/2014

0 Comments


Hi everybody, well I am back! Last week is officially one of the worst in recent memory; in fact, the last few weeks have been rough. If I look back things started to go off the rails around the last week of September which happened to coincide with the last new moon,  so I was really pleased to see the cycle end late last week.

To give you an idea of how bad last week was Monday morning started off when Jason, (child number 4), called and began the conversation by saying " I'm out of the hospital, and I'm OK...." fellow parents breathe deeply. He was working on his girlfriend's car late Sunday when he was removing the blocks the jack slipped and he was pinned by the partial weight of the car. He is going to be OK. He has torn cartilage in his ribcage and lots of inflammation around his spine. I wasn't able to see him until Saturday so no matter what I tried to do last week I just couldn't focus. I couldn't sleep every time I tried to think I just kept seeing him trapped. Sometimes being a very creative visual person just doesn't work! Add to that continuing computer issues, front axle car trouble and a weather system that turned the homestead into a post-apocalyptic landscape and I have never been so happy to welcome Monday. 

That's enough whining, on with the week.

Today is Tuesday and in the spirit of How to Tuesdays, I thought I would talk about heating with wood. It was cool and damp here last week and that meant time to fire up the wood furnace. We do have a wood furnace in the basement, it heats via a hot air system. Not my first choice and the long term plan is to install a wood cookstove which will heat the house and our hot water, but this will not happen until next fall at the earliest. We do use the wood furnace exclusively.

There has been a lot of talk about wood heat not being sustainable and about the carbon effects of burning wood for heat. My position is that if you manage your woodlot properly, then wood heat is carbon neutral. It is certainly better than oil, natural gas or coal. (Coal being burned to supply you with electric heat.) There is also a lot of misinformation on the safety and efficiency of wood heat; but again if you do it properly, wood heat is safe, efficient and cheaper than most other fuels available.
Picture
So, what is the "proper" way? Well there are as many opinions on that as there are people who have ever attempted to make a fire. We have used wood either partially or exclusively for heat for the almost 30 years that we have been together, and there are five questions that always come up when we talk about heating with wood: how much wood will I need, what is the proper way to start a fire, what kind of stove do I need, what about insurance and what type of wood is best?  While most of the answers start with "it depends", I'll try and make a dent in them today.

First insurance, it annoys me to no end that if wood is your only source of heat you are going to have trouble getting insurance. This explains the pattern we see around here of new houses equipped with electric baseboard heaters. They are cheap to put in and cover your backside for insurance purposes. Unfortunately, when people buy these houses and don't want to heat with wood they end up selling their souls to Nova Scotia Power in order to keep warm. For those who aren't blessed with that particular entity in their lives, my most recent power bill tells me I am paying a base charge of $10.83 a month and $0.14251 per every kilowatt hour I use; and don't forget to add the 15% harmonized sales tax. You can understand my desire to get off the grid. So if you have an existing heat source other than wood, don't remove it. I have a friend who bought a house that had an old oil furnace in the basement, the tank had been removed but because the furnace sat in the basement they were able to install a beautiful Pacific Energy stove and use it to heat their 1200 square foot home with wood and keep their insurance. I am sure individual cases will vary but if you are building or renovating it is worth it to check with your insurance broker.

The next question is what size and type of stove do I need? This will depend upon the size of your house, how much insulation it has, what your climate is like and why you want a stove in the first place. There are many types of stoves and other ways to heat with wood. If I was building from scratch, and had a sizable budget I would build my house around a masonry heater. Masonry heaters work on the principle of heating a large thermal mass and then allowing that heat to radiate back into the living space. This is the same principle behind rocket mass stoves, just on a larger scale. They tend to be the most efficient way to heat with wood and certainly give off the most even heat from wood. Most masonry heaters are extremely heavy and require beefing up of foundations. If you are looking for supplemental heat and emergency heat in case of a power outage then an airtight wood stove is probably the best option. There are multiple brands on the market, my personal preference is for the Pacific Energy brand. That said, it has been a few years since I did any research into this type of stove so there may be better ones out there.

Do your research, manufacturers list the stats for each model including btu's and square footage recommendations. These should be treated as fuel milage ratings on new cars, they represent the optimum when the unit is operating at peak efficiency; and for wood stoves this means burning at full draft with dry hardwood. This is not how most people use wood stoves.
Picture
Photo credit http://www.inspirationgreen.com/masonry-heaters.html
​We have decided to install a wood cookstove. We want the stove to be our main source of heat and to use for cooking as well as hot water, a cookstove will allow us to do all of these things. Just a note on buying a used stove, you can get great deals on stoves but be warned, if you want to install it in your house, it will need a CSA tag on it. I'm not sure about US regulations. If you are looking at a used stove and have determined that it does have a CSA tag, you need to be most concerned with checking for cracks in the firebox. Things like dirty or broken glass and missing or bad door gaskets are easily rectified. In fact, if you are going to have a wood stove you should be prepared to replace the door gaskets every year at least.

So you have the stove and the chimney installed, what to burn? If you are purchasing firewood, ask friends and acquaintances for recommendations. There are many great people selling firewood but there are also not so great people selling firewood.  Know what you are buying. Most firewood is sold by the cord. A full cord of firewood, when stacked, will measure 8 ft X 4 ft X 4 ft. I have found that the closer you get to suburbia the more likely you are to find people selling "face cords", face cords are 1/4 of full cords when you stack it will measure 8X4X1.

If you are handy with a power saw ask about getting eight-foot lengths; suppliers will usually give you a deal if they don't have to cut and split the wood. Ask if the wood will be cut and split, this is not a given.

You are looking for hardwood, species like maple, oak, birch, and ash. The denser the wood fibers the longer and hotter the wood will burn. Hardwoods also burn cleaner. Softwoods like spruce, fir, and pine, especially if not properly dried, will have resins or sap. When this sap burns it gives off black smoke. This smoke is full of creosote, creosote sticks to the inside of your chimney and will catch fire. Wood that has not been properly dried, is referred to as greenwood. It is to be avoided at all costs. It has high moisture content and therefore does not burn well. You will get much better heat, efficiency, and safety from dried hardwood. Wood you will be burning this winter should have been cut last winter, older is fine. We cut firewood in the early spring and let it dry until early fall. If you moved to your homestead in the summer and plan to harvest your firewood from your own land, look for standing deadwood, trees that have died but remained standing or deadfalls, trees that have died but were caught in branches of other trees as they fell, keeping them from hitting the ground. Both of these will be suitable for burning. It will put you much farther ahead to start with dry wood, even if you have to buy your wood for the first year.  
Picture
Picture
When harvesting wood from your land, learn about coppicing trees. When you cut a hardwood tree during its dormant phase, it will send up 'shoots' the next spring. These shoots will grow into great firewood in a few years, by learning to tend and manage your woodland you will provide yourself with a completely renewable energy resource that will keep you warm for years to come.


How much wood do I need? The answer to this is impossible for me to say. Even if we had identical houses on the same road it would be impossible to say. Square footage is a place to start, you must also take into consideration how well your house is insulated, how warm you like your home to be as well as the design of your house. A sprawling ranch style house will never be as easy to heat with wood as a compact Cape Cod-style house. How does the air move around your house? Will you be home during the day to tend the stove or do you need supplemental heat for when you are at work. If you have bought your property, you should be able to get a ballpark figure from the previous owners, it pays to err on the side of caution, having too much wood is better than having not enough, and it's not going to go bad, you can burn it next year. One other point, unless your house consists of one room directly over another, you will need a fan(s) to move the heat around the house. It is worth the investment to look at convection fans like the Ecofan.  

The final question I want to tackle seems somewhat silly to some people, but I have seen grown men argue forever about the proper way to start a fire! I have found it is usually men who have the view that the only way to start a fire 'properly' is their way. As if a fire started any other way will not burn as well??? There are many methods of starting a fire: grid and teepee, paper, no paper, it can go on for hours. The basic principles are all the same: you need a dry, easily combustible material such as wood chips, paper, thin bark, etc. You need a small stack of kindling, thinly split pieces of very dry hardwood, and they need to be arranged so that air will move around the individual pieces, yet touching so that the flames can spread. That is really all there is to it. Find a configuration that works for you and that is all you need. So while everyone else is arguing about how to start a fire, you can just go ahead and do it.

For the last word, I will refer you to woodheat.org  this site will answer any and all questions you might ever have concerning heating with wood.
​

Have a great day everyone, and stay warm!  
0 Comments

Recipes For Effective, Safe Cleaning Supplies

21/10/2014

0 Comments


Hey everybody, as promised today I am going to share my recipes for effective alternative cleaners, because making your own cleaners is great but if they aren't effective you will not continue to use them.

These recipes have evolved over many years and all have been tested in our farm family of seven; and believe me my four boys know how to test.

Let's get started with the easy one, glass cleaner. Yep, good old vinegar and water. Add 1/2 cup of vinegar for every litre of water. If you have tried this before and been less than impressed with the results try mixing the vinegar with HOT water, not boiling but close. You may also need to add a 1/2 cup of hydrogen peroxide OR 1/2 cup of rubbing alcohol to the mix to remove the film left by commercial brands. I even use this in my car and truck instead of commercial window cleaners. When making this for the car, always add the rubbing alcohol; it helps with the bug bits in summer and keeps the liquid from freezing in the winter.

Dish Soap.
      
       I'll admit it, this as my last hold out. I could never find a liquid dish detergent recipe that worked for me. It wasn't until I found a recipe for "household cleaning soap" in an old book that I found a effective soap. 
You will need a bar of plain, plant based cold processed soap. I make my own but you should be able to find some at your local health food store. Water, washing soda and essential oils are optional.

Start by grating your soap with an old cheese grater, or a new one from the dollar store. You will need 1/2 cup of these soap flakes. Add 1 1/2 cups of hot water to the soap and stir until the flakes dissolve. Mix in 1- 1.5 Tablespoons of washing soda. The amount will vary depending on your water hardness and personal preference. You can pour everything into an old bottle and use as you would any other dish soap.

All purpose scrubbing powder,

   Mix baking soda and water to form a paste. This will replace products like Comet and S.O.S. pads. It removes any burnt on foods in my stainless steel pans as well as cleaning countertops and stove tops.

   This is also what I clean my oven with. When you use natural products to clean your oven you have to stay on top of spills. Wiping them the day they happen instead of letting them bake in. If you have a particularly stubborn spot try adding some salt to your paste for more scrubbing power.

Bathroom Cleaner

This is an all purpose soft scrub I use for cleaning the tub, toilets and sinks.

You will need:
2 cups baking soda, 1/2 cup to 2/3 cup of the dishwashing soap above and some antibacterial essential oil such as lavender, tea tree or rosemary (optional)
Mix everything in a glass jar, I use a mason jar, and store in your cupboard. If you find the mixture dries out you can add a little water.

Laundry Soap

Powdered Laundry Soap:
 
  You will need more of the vegetable based cold processed soap grated  into flakes, some borax and washing soda and essential oils (optional).

Mix 1 cup of soap flakes and 1/2 cup EACH of borax and washing soda. If you want to skip the borax add equal parts of soap flakes and washing soda. Mix well and add essential oils if desired, 10 - 15 drops will suffice. Use 1 - 2 Tablespoons per load.  You can use this as is or make a 'liquid' laundry soap by placing the dry ingredients in a bucket and adding 2 gallons of hot water. Stir until soap dissolves then let cool. You soap will be more of a gel than a liquid. Use 1/2 cup for regular loads and 3/4 cup for extra dirty loads.

        
These are my staple cleaners, they are the every day workhorses of the homestead and I can tweak these to make more potent products if needed. Give some of them a try, you don't need to start using all of them at once, but you can! As your current products run out try one of these alternatives, they might make cleaning fun or at least interesting!

Have great day everyone

0 Comments

Toxic Cleaners and Non-Toxic Alternatives

20/10/2014

0 Comments

 
Hi Everybody, well we survived the 4H awards banquet. I was a little nervous when I found out that Reiley and the Jr hostess Kiera, were going to MC the evening. You can never be too sure when you hand over the stage and a microphone to a 13 year old boy and girl, but they did a great job! Everyone had a great time, great food and now  the cycle begins again.

We have been working to get things completed as the weather has continued to hold. After a rather rocky start, October has turned into a beautiful month. Warm days and mild nights with a mix of sun and steady rains have allowed us to finish up those few projects we had left. The guys are in the garden today finishing the work on the soil and planting the last of the garlic.

Inside, I have been making soaps for the Christmas orders and for the craft fair I am attending next month. I haven't done a market or craft fair since before my first shoulder surgery almost three years ago. Reiley will be coming with me to help. So we shall see. We are continuing to chip away at the renovations inside, but the heavy work inside won't begin until everything is frozen outside. We are under a tighter deadline this winter as there will have to be a forced break in the work once the baby arrives in late February or early March.

Back to the matter at hand! I had a couple of posts written on cleaners and chemicals to avoid for post on Thursday and Friday, but they were lost in this computer and are lost for all time. So today you are going to get the coles notes version of both posts rolled into one.....

If you feel that you just aren't ready to ditch the commercial cleaners you are used to; and that is fine, I am not here to judge just inform. Try to find a list of the ingredients contained in your products and look for ones that are less harmful. Here are the nasty chemicals and what they do.

Powdered Silica. This is the staple ingredient in the abrasive cleansers, like Comet. Powdered silica is recognised as a known human carcinogen by the International Agency for Research on Cancer. It is made from finely ground quartz and is hazardous if inhaled. Unfortunately it also becomes a carrier for the other dangerous chemicals contained in the cleaners.

Ammonia. A staple in glass and stainless steel cleaners / polish. Ammonia vapours can irritate the the skin and mucous membranes of the eyes, throat and lungs. People with asthma and C.O.P.D. are susceptible to small concentrations of ammonia. The real problem with ammonia in cleaning products, and this is one that sends people to the Emergency room all over North America every year, is the accidental mixing of products containing ammonia and products containing chlorine bleach. When these two chemicals combine they form chloramine gas, Chloramine gas was used as a chemical weapon during WWI. Enough said. Ammonia is also found in drain cleaners, all purpose cleaners, car polish, toilet cleaners and oven cleaner.

2-Butoxyethanol (2-BE, also known as butyl cellosolve)

This nasty little ingredient is a known eye and skin irritant and has been shown in laboratory experiments to cause reproductive issues. Health Canada has listed indoor air and skin contact with cleaning products as the main exposure. It is listed as a toxic substance under the Canadian Environmental Protection Act and is limited to a concentration of five - six percent in household cleaners but some products such as laundry stain removers may contain as much as 22%.


So what should we do? It is difficult to find a label that actually lists full ingredients; the laws surrounding label claims such as "green" or "environmentally friendly" and "non toxic" are as toothless as hens. What do we do? My solution has been to make my own cleaners.

Most modern cleaners are based on recipes that utilized natural ingredients. In order to develop markets, companies began to try and isolate the properties of these natural ingredients and synthesize cheap chemical ingredients with the same "properties"’. Going back to the original ingredients you can make effective products which don't pollute your home or the surrounding environment and are much cheaper than the commercial options.

The basic ingredients needed to make your own cleaners are probably already in your cupboards my stock includes:

White Vinegar. Vinegar is a mild acid, natural deodorizer and grease cutter. Vinegar will remove mildew, wax buildup and scale from hard water.

Lemon Juice. Lemon juice does similar things as vinegar, however it has a slightly lower ph and is therefore slightly stronger. It also has a pleasing scent.

Baking Soda Baking soda is a base. It is useful for softening water, deodorizing, cleaning and as a mechanical scouring agent.

Soap. You are looking for a plain, unscented biodegradable soap. It can be liquid, flakes or bar. I make my own so I can make flakes or liquid as needed. Washing soda. Washing soda is a mineral, powdered sodium carbonate decahydrate to be exact. It is also one of the strongest ingredients in my cleaning supplies. It is a water softener, removes many stains and is a fabulous grease cutter. I use washing soda in my bathroom cleaner and as a laundry additive for loads that are particularly nasty from homesteading activities. Matthew uses grease pencils at his day job right now and sometimes they get in the laundry. Washing soda paste will take out the results.

Rubbing alcohol. Isopropyl alcohol is  the technical name. As one would assume it is an excellent disinfectant. Use common sense, or as a friend is fond of saying, good sense as it is not common anymore. If you are using rubbing alcohol to disinfect around the kitchen rinse afterwards.

Borax. Of late, there has been talk of how environmentally friendly borax really is. I have looked at most of the talk and I still continue to use borax. Most of the concern seems to focus on boric acid, however borax is not boric acid,. Boric acid is formed when borax is added to any acid. Borax on it's own, is a moderately strong alkaline with a pH of 9 -9.5 range. I have looked at most of the studies and find issues with many of them. I cannot tell you to use it or not use it, all I can say is I still use it. I don't spread it willy nilly around the house, but then again I never did. Bottom line borax is not absorbed through the skin, it is non carcinogenic, (as far as we know) and it does not bio-accumulate.

Essential Oils. I use tea tree, lavender, and orange essential oils in my cleaning recipes. I don't use them all the time, only when needed. They are great for extra disinfecting, grease cutting and aromatherapy.

So those are the raw materials. Tomorrow I will share my recipes with you and some tips and tricks I have learned over the years. Have a great day everyone!
0 Comments

What's In Your Cleaning Supply Cupboard?

15/10/2014

0 Comments

 
Canadians spend roughly $300 million dollars a year on household cleaners. Most of these contain highly toxic chemicals that harm the environment, threaten the health of our pets, our children and us.

Current regulations do not require companies which produce and market these products to list the ingredients. Under the current regulations companies insist that this is proprietary information and would be detrimental to their corporations, read bottom line, to do so. So not only are we paying to poison ourselves and those we love, we are not even allowed to know what compounds we are doing it with. Some companies are now offering up ingredient lists, mostly buried deep on their websites, but it is worth having a look.

We have all seen the hazardous warning labels on cleaners, but think about the last time you actually had a good look at the array of bottles in your cleaning supplies cupboard. If you have not yet made the switch to natural cleaners I challenge you to open up your cupboard. Send the kids out to play and take all your stuff out of the cupboard and lay it out on your table. Have a good look at the labels, how many different warnings are there? How often do you use these products? Do you wear gloves or masks when you use them? How many say to use only in a well ventilated environment? How many list the ingredients?

Those hazard labels are for short term acute exposures, there is no requirement for companies marketing these products to tell you what kind of effects low level long term exposure will do to you or what effect this might have on the development of your young children. Since they do not have to report this most companies do not even test for this. Nor are they required to report, and therefore test, the cumulative effects of these products.

It is entirely possible to have exposure to a dozen hazardous chemicals between getting up and leaving the house in the morning. There is very little testing being done as to the health effects of this continuous low level exposure. When we use these products in our homes they "off -gas". This is due to a nasty little group of chemicals known collectively as VOC's. Volatile organic compounds.

According to the United States Geological Survey, 2005: "Many VOC's are human - made chemicals... They are often compounds of fuels, solvents, hydraulic fluids, paint thinners, and dry-cleaning agents commonly used in urban settings. VOC contamination of drinking water supplies is a human.-health concern because many are toxic and are known or suspected human carcinogens"

VOC's form particulate matter and react with nitrogen oxides to form smog. In our homes these compounds linger in the air and we breathe them in. If your product has a fragrance you are breathing in VOC's. New car smell, new carpet, plastics, fresh paint and my personal pet peeve: air fresheners? All of these are off gassing VOC's. Research into VOC's has found an increase in leukemia and lymphoma rates linked to prolonged exposure of VOC's in the indoor environment.

If this blog does nothing but make you ditch those poisonous, toxic fragrances marketing has made you believe you need I will be a happy camper. As far as I am concerned, those behind Febreeze, Air Wick, Glade and anyone who pedals paraffin candles with synthetic fragrances should be taken out and shot.

As I said yesterday, I began actively trying to purge our home of toxic chemicals back in 1993. If you had asked me in 2003 I would have said we had a relatively toxic free house. Then came Gary's accident.

One of the most debilitating long term aspects of his injury is the environmental illness he has. He has no tolerance for VOC's. Just walking into any Canadian Tire store will give him a migraine for a day or two. The man can smell the school bus coming. This has become a major factor in our lives. It dictates where we live, everything that is brought into this house needs to be assessed. VOC's have become such a ubiquitous part of North American life style that even when we think we are culling them they are there.

Unfortunately, VOC's are not the only culprit in this chemical warfare. The chemicals in these products absorbed through the skin and ingested as residues on our dishes and through household dust.

My top three avoid at all costs ingredients are:

Triclosan
This product really pushes my buttons. Triclosan is the antibacterial component in the plethora of antibacterial products on the market today. It is toxic, the European Union lists it as an irritant to the eyes and skin. It is a suspected endocrine disruptor and is very toxic when it enters aquatic environments. It can also react with other compounds in the environment to form dioxins. Dioxins are bio accumulators, meaning they persist and concentrate as they move through the food chain, and are a known carcinogen. They are also suspected in the rise of antibiotic resistant microbes. The Canadian Medical Association has called for a ban on all antibacterial products.

Triclosan is found in dish soaps, disinfectants, sanitizers, deodorants, liquid hand soaps, laundry soap, tissues, mouthwash, toothpaste and antiseptic ointments. It is also impregnated into plastics for garbage bags, children's toys, babies teethers, high chairs, mattresses, toilet seats, clothing and furniture.

Fragrance and Parfume. Such a harmless sounding words. There are currently over 3000 chemicals which come under the heading of fragrance, most of them are petroleum based. Even products labeled as scent free usually contain fragrances, but they also contain parfume. Parfume is a nasty little beast. it's only function is to inhibit our brains ability to detect scent. Think about that for a minute. Most of the compounds included in the fragrance category have little testing. Manufacturers argue that since there is such small amounts in each product they pose no health concerns. Fragrances, and lets be specific, synthetic fragrances, are the most common trigger of asthma and allergic symptoms. A 2002 study on fragrance compounds suggested that exposure to perfumes and colognes can; "exacerbate asthma, and perhaps even contribute to its development in children."There have been several laboratory studies which indicate a link between individual fragrance compounds and cancer as well as neurotoxicity. Environment Canada has categorized several synthetic musks as bioaccumulative, and/or toxic, and persistent and to human health. Measurable amounts of synthetic musk has been found in the fatty tissues of fish in the Great Lakes, amounts of these compounds found in the sediments of the lakes are also rising. Fragrance and Parfume are found in almost everything. Sodium lauryl sulfate (SLS) and sodium laureth sulfate (SLES) These 2 compounds are why I began making my own soap and consequently sent me on the path to becoming a herbalist. There is a lot of things wrong with these compounds, however there is also a lot of erroneous information on the Internet about these compounds. Lets have a look. SLS and SLES are found in anything that makes suds. They are degreasers found in everything form baby wash to floor cleaners marketed to automobile garages, obviously in different concentrations. Both compounds are well known skin irritants. They are damaging to skin and mucous membranes. They have been found to strip the outer layers of skin and mucosa cells. Especially the mucosa of the mouth when SLS and SLES are present in toothpaste and mouthwash. It is important to remember that concentrations in household cleaning products will be higher that in cosmetic/ personal care products. The link to cancer and long term damage is less clear. Most likely because there have been few studies to look at the effects. What is well documented is the presence of known carcinogens 1,4 dioxane and ethylene oxide in SLES, and nitrosamines in SLS 1,4 dioxane and ethylene oxide are a result of of the manufacturing process used to create SLES. As these carcinogenic compounds are byproducts of the chemical reaction, under law they are not ingredients. So even though they are known carcinogens and present in your baby shampoo, they do not need to be listed as ingredients. The Center for Disease Control describes 1,4 Dioxane as"probably carcinogenic to humans," toxic to the brain and central nervous system, kidneys, and liver. It is also a leading groundwater contaminant." Nitrosamines are carcinogens which cause your body to absorb nitrates, which are known to be carcinogenic. The nitrosamines are a result of contamination of the SLS during manufacture. The contamination can be one or many of multiple of chemicals. Given the vast number of products containing SLS there are literally millions of possible combinations of chemicals which could result in the presence of nitrosamines. The manufacturers will tell you that the amounts are so small they do not pose a health risk, however we have to consider the cumulative effects of all the products our bodies are exposed to on a daily basis. Ultimately, if there are alternatives, why would you choose to play chemical roulette with the health of your family? I know this has been a long post and somewhat of an information overload scenario. This is a subject I am passionate about, and I tend to get a little 'preachy' when I stand on my virtual soapbox. Take some time to read, or re-read the information I hope it is a jumping off point for you to do your own research. As always the comments and my email are open for questions. I don't know if I will have a post tomorrow. I had one written but it is lost in this ancient computer of mine. I have to decorate the hall for the Digby County 4H awards dinner tomorrow. I think I also have to take Miss Avril to visit the breeding buck tomorrow and I believe it is the day to go and pick up feed. I will make every attempt to get the post out for you! Have a great day everyone!
0 Comments

De-tox Your Cleaning Supplies

14/10/2014

1 Comment

 
Hey everybody! Well, Thanksgiving is over, all of my boys made it home for the day. We missed our daughter, but she couldn't make it. We had 10 at the table with the significant others and Rieley's friend Riley, ( yes that does get confusing!) The two Reileys probably did best this weekend, by inviting each other to their respective dinners they managed to stuff down full turkey dinners: one Sunday and one yesterday.
I managed to convince everyone that we needed to take an almost family portrait, minus Bethany. This will be the last picture without grandchildren as Matt and Sheena are expecting their first in February. Yep, I'm going to be a Nanna to a little girl. I am quite excited!

Now the holiday is over and it is time to get back to work. For today's How-to Tuesday I am starting a series on detoxifying your cleaning supplies. I went on a rampage many, many years ago to get toxic chemicals out of my home. It has been over 20 years now since I first started realizing that companies, advertisers and the government who was supposed to make sure products were safe for my family really didn't care about making sure we were safe. No, I'm not a paid-up member of the tin hat society; but when government-speak starts saying things like "balancing the health of Canadians against the need to protect jobs". and "industry self-regulation, works to protect everyone". Well, the little hairs on the back of my neck start to twitch. (Well, back then my hairs started to twitch, now it produces a gag reflex!)

So back then I started making my own soap and basic household cleaners. Searching old books and some of the magazines available allowed me to cobble together recipes and tips. Speaking with elderly ladies in the neighbourhood was a great source of information and searching what was the internet then allowed me to connect people who were looking for the same information. It was a slow process, but over the years I replaced the toxic goo with healthier products. Trial and error have helped me fine-tune the recipes and now my house functions on healthier and effective cleaning products. The products I make today are very different from the ones I started out with. I have learned to utilize the properties of the different ingredients and this allows me to make cleaners for every day as well as for specific issues. Over the next few days, I will show you how to make basic cleaners and also show you which chemicals to avoid, and why. I will also look at which ingredients to use for specific problems.
Today we are going to start with my favourite general purpose cleaner. This is a liquid cleaner, meant to replace items such as Mr. Clean, Lysol, and Pine-Sol. It is great for cleaning the kitchen and bath; the counter-tops, stovetop, sinks, and almost all other surfaces. It is quick and easy to make and costs pennies on the dollar over the toxic commercial cleaners.
  
Picture
You will need: Water as the base for your cleaner, rubbing alcohol to cut through grease, white vinegar as a deodorizer and polishing agent, castile soap for cleaning dirt and Essential Oils (optional) for antimicrobial and grease-cutting properties, a spray bottle, tinted if you are using essential oils and a label. Mix 1 cup of water, 1/2 cup of rubbing alcohol and 1/2 cup of white vinegar in your spray bottle. shake to mix. Next, add 1 tsp of castile soap, you can purchase this in all most any health store and it is readily available in the "green" cleaning supplies aisle in most grocery stores. Be sure to read the label. You can also make your own castile soap, more on that later this week.
This solution is effective to use as is, however, if you prefer to add essential oils you can do so now. Roughly 30 drops of essential oil of your choice for this volume of cleaner. I tend to vary the oils I use depending upon what and when I am cleaning. Especially when dealing with those situations that arise out of homesteading 'activities'. For instance, last week we finished butchering the last of this year's meat birds; when we were done for the day, I mixed up a batch of cleaner and added 15 drops of Rosemary and 15 drops of Tea Tree oil for the antimicrobial properties. I used this to clean the entire kitchen.

I am not meticulous about over cleaning, I have always believed that we do our loved ones a disservice by cleaning everything with antibiotic cleansers. I think the key to a healthy robust immune system is to let it get exposed to *gasp* germs. This said, I am also not an idiot, and if you are butchering animals there will be bacteria that you do not mess around with, therefore I cleaned the kitchen with a cleaner containing tea tree and rosemary. If I were cleaning up a greasy mess in the kitchen I would add orange oil as it is great for cutting through grease. It is great for washing up greasy hands and sinks when the menfolk are working with machinery. Once you are done mixing your cleaner apply a label and it is ready to use.
  
Picture
Easy-Peasy! A great basic cleaner to start with. Tomorrow I am going to look at the chemicals to avoid and why. Have a great day everybody!
1 Comment

Calendula

9/10/2014

0 Comments

 
Picture
Calendula officinalis, also known as pot marigold, has been used for centuries to heal wounds and skin irritations. Calendula has strong anti-inflammatory, antimicrobial, astringent, antifungal and antiviral properties making it useful for treating minor wounds, conjunctivitis, cuts, scrapes, chapped or chafed  skin, burns, acne, yeast infections, bee stings, diaper rashes, and other minor skin irritations and infections.

Calendula is also known to stimulate the production of collagen at wound sites. This explains calendulas powerful ability to  minimize scarring and assist with stretch marks.

I will admit I have a soft spot for Calendula. It is one of the first herbs I began using when I first started making my 'potions'. The first creams and salves I made were for treating my son's excema and calendula featured prominently in these recipes. I felt comfortable using this herb in the early days of my herbal journey as it is as gentle as it is versatile. All the research I did back in those early, pre-internet, days left me feeling reassured that calendula was safe for me to use with my young family. Since those early days I think I have used calendula in almost every medium imaginable. The versatile herb can can be infused in oil and water lending itself to creams, salves, compresses, washes, massage oils, baths, facial steams, tinctures, and teas.
Picture
It is still one of the first remedies I suggest for most skin conditions and I have learned over the years not to underestimate it's ability to heal. Even when I think something is too far advanced for gentle calendula it continues to work it's magic. This gentle herb continues to be my first choice for babies, children and my animals.

The final wonderful gift of calendula is how easy it is to grow and the pest fighting abilities of this plant. As a member of the marigold family it is a useful companion plant for tomatoes, potatoes, lettuce, peas and beans. It repels  aphids, asparagus beetles, and tomato horn worms to name just a few.  The fresh vibrant petals are beautiful and cheery in the garden and they are edible! They can be added as food colourant, and make a great addition to fresh salads; besides they just look so pretty in the garden.

It is the petals of the plant that contain the active compounds we are looking for. Harvesting the flowers at full bloom they can be immediately infused or dried and stored until needed. I have not had a problem with dried calendula loosing potency. I use it both fresh and dried and it has been my experience that both are equally effective. As with any dried herb be sure to store in a cool dark place as UV light will break down the components. The only caveat to that would be tinctures. I have this thing about tinctures and I try to use only fresh herbs for tinctures.

Think about growing calendula next year, even if it is just for its pest repelling properties. If you want to try a calendula herbal product, harvest the petals when they are in full bloom, you can use it to make a tea that can be used cold as a toner for acne prone skin. Or infuse the petals in some olive oil and apply to cuts or skin lacerations. It is a forgiving herb to experiment with you will be surprised by the powerful punch it packs!
Have a great day everyone.

*As always, this post is not intended to diagnose or treat any illness. Please seek the help of your medical practitioner for medical conditions*

0 Comments

How to Tuesday: Using Your Tomato Preserves

7/10/2014

0 Comments

 
​A little over a week ago Rosz posted a comment on my post regarding pressure canning tomatoes. She commented that she prefers to have ready-made sauce rather than just canned tomatoes. Thinking it would be easier. It is easy to have ready-made sauce, and I put up lots of it. I also like to have simple crushed or diced tomatoes on hand as it gives me more versatility, and allows me to add fresh herbs from my winter windowsill garden. We are having pasta tonight so I thought I would share with you how I turn canned tomatoes into sauce. First you need to decide if you want to use crushed or diced tomatoes. Reiley prefers the crushed tomato sauce with fettuccine so I just grab a couple of 500 ml jars of crushed tomatoes and we are ready to go.  
Picture
​First, you need to decide if you want to use crushed or diced tomatoes. Reiley prefers the crushed tomato sauce with fettuccine so I just grab a couple of 500 ml jars of crushed tomatoes and we are ready to go. Now if I had been a little more organized today, I would have done this early this morning and had it simmering in the crockpot all day. Life intervened early today and I didn't get to it. So we are going to use the saucepan method. Pour your preserves into the pot, add whatever herbs you prefer, I am adding some fresh basil and thyme. A generous tablespoon of brown sugar, some salt and pepper, and caramelized onions and garlic round out the sauce.  
Picture
Stir everything in and simmer on the stove for about 30 minutes. As I said it will taste better if you have it simmering in a crockpot all day but this is good too. You can add this sauce to meat if you like or just use the sauce. I am going to add it to ground pork, if I was just using the sauce on pasta I would probably use diced tomatoes.
Picture
​I'm not trying to say that you shouldn't preserve ready-made sauce, I make and preserve lots of it. I don't want you to feel that it is your only option for quick meals. This sauce took me about 35 minutes to make. I mixed it up and had it simmering first, so by the time I had the ground pork and pasta ready the sauce was good to go. If I had remembered to put it in the crockpot on warm before I left this morning it would have been ready when I came home. The best part is that I find it does taste better with the fresh herbs and caramelized onions and garlic, especially in the middle of winter when we really need a taste of summer! So give it a try, add your favourite fresh ingredients and savor!. After all, that is what good food is all about. 
​Have a great day everyone.  
0 Comments
<<Previous
    Picture
    A  4-H Family
    Lives Here

    Receive inspiration and information for your homestead several times a week

    * indicates required

    Author

    Hi! I'm Shelli Killen,
    a homesteading, homeschooling, wife and mother of five. 

    I am a student  herbalist with a passion for learning and a  habit of bringing home strays.

    I love music, and the power of creating things with my hands.
     
    I tend to do best when life around me is organized chaos
    .

    RSS Feed

    Categories

    All
    Bees
    Canning
    Chickens
    Economy
    Gardening Vegetables
    Goats
    Herbs
    Hobby Farming
    Homesteading
    Homesteading Skills
    House Management
    Lifestyle Planning
    Pigs
    Self Reilance
    Self Sufficiency

    Archives

    December 2014
    November 2014
    October 2014
    September 2014
    August 2014
    July 2014
    June 2014
    May 2014

Powered by Create your own unique website with customizable templates.