
Well, we are back in the kitchen today, making a fresh chevre with our goats' milk. I am not a big cheese eater, I will never be one of those people who start making amazing gourmet cheese from their kitchen. I do, however, like fresh chevre, especially as a dessert with cranberries and almond slivers or with some honey drizzled over pear slices and chevre. Yum!
So I received my goat cheese making kit from Glengarry cheese making supplies a few weeks ago. It was a good deal, giving me a variety of cultures a lifetimes supply of rennet and molds. I was disappointed with the literature, it had been advertised as coming with recipes, however, the recipes were for what I would consider a person with basic cheese making experience. Also, there was no recipe for making a fresh chevre. So I researched and found a recipe, I tried it twice with mixed results. I have done more research and I think I figured out where I went wrong, so through much trial and error, I am comfortable enough to share the process with you.
This is one of the things I love about this lifestyle, you are constantly learning new things. I also make sure that our kids get to see us screw things up, pick up the pieces analyze what happened and then give it another go. Too many kids these days never experience failure; they get participation medals for simply showing up, they get passed on in school all because we don't want to damage their fragile little egos by telling them they weren't quite good enough. Well, guess what, that is not how life works. We are doing our kids a huge disservice by "protecting" them. By covering them in bubble wrap we raise young adults who have no idea how to assess the risk in a situation, they never realize the thrill of figuring out a difficult problem after they spent a lot of time not figuring out the problem. They are ill-prepared to deal with the everyday failures that come about in the workplace and just living day to day life. But again, I digress. Back to cheese making.
So, as I said, I am making a fresh chevre with our goats' milk. I do not pasteurize our milk; if you wish to pasteurize your milk I will give directions for that. You can use pasteurized store-bought milk for this recipe, just make sure you purchase whole milk not 2% or skim.
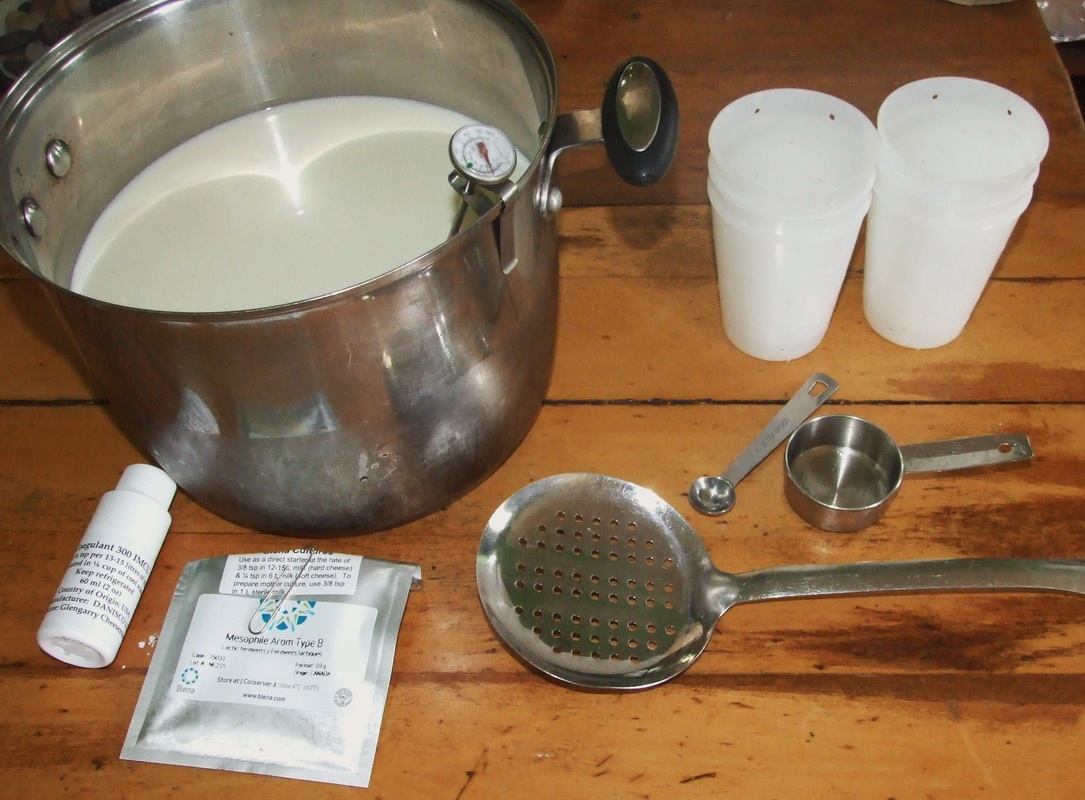
You will need:
4 litres, (1 gallon) of goats milk
calf rennet
culture, I use Mesophile Aroma Type B
a large stainless steel pot
measuring spoon (1/8th teaspoon)
1/4 cup measuring cup
large slotted spoon
thermometer
cheese molds or muslin cloth
something to catch the whey in
So I received my goat cheese making kit from Glengarry cheese making supplies a few weeks ago. It was a good deal, giving me a variety of cultures a lifetimes supply of rennet and molds. I was disappointed with the literature, it had been advertised as coming with recipes, however, the recipes were for what I would consider a person with basic cheese making experience. Also, there was no recipe for making a fresh chevre. So I researched and found a recipe, I tried it twice with mixed results. I have done more research and I think I figured out where I went wrong, so through much trial and error, I am comfortable enough to share the process with you.
This is one of the things I love about this lifestyle, you are constantly learning new things. I also make sure that our kids get to see us screw things up, pick up the pieces analyze what happened and then give it another go. Too many kids these days never experience failure; they get participation medals for simply showing up, they get passed on in school all because we don't want to damage their fragile little egos by telling them they weren't quite good enough. Well, guess what, that is not how life works. We are doing our kids a huge disservice by "protecting" them. By covering them in bubble wrap we raise young adults who have no idea how to assess the risk in a situation, they never realize the thrill of figuring out a difficult problem after they spent a lot of time not figuring out the problem. They are ill-prepared to deal with the everyday failures that come about in the workplace and just living day to day life. But again, I digress. Back to cheese making.
So, as I said, I am making a fresh chevre with our goats' milk. I do not pasteurize our milk; if you wish to pasteurize your milk I will give directions for that. You can use pasteurized store-bought milk for this recipe, just make sure you purchase whole milk not 2% or skim.
You will need:
4 litres, (1 gallon) of goats milk
calf rennet
culture, I use Mesophile Aroma Type B
a large stainless steel pot
measuring spoon (1/8th teaspoon)
1/4 cup measuring cup
large slotted spoon
thermometer
cheese molds or muslin cloth
something to catch the whey in
If you want to pasteurize raw milk: heat milk in a heavy-bottomed
steel pot or double boiler until it reaches 145° F, stirring frequently to
prevent scalding. Hold the temperature at 145° F for 30 minutes. Remove from
heat and allow to cool.
A note about timing, as you will see there is a lot of waiting with cheese making, I have found that heating the milk and adding culture and then rennet just before I go to bed works the best for me. That way I am up and around the kitchen during the time the cheese is in the molds. This allows me to check the texture and remove the cheese when it is just right. (Truth be told it also keeps me from compulsively checking on the set of the cheese when ideally it should just be left alone!)
To make Chevre:
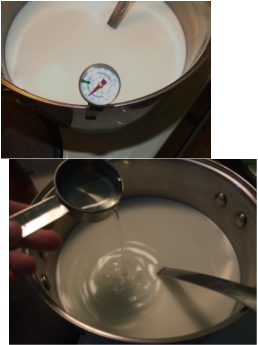
1. Heat, or cool, your milk to 75° F remove from heat, then sprinkle your culture over the top of the milk. Allow it to sit for 2-3 minutes.
2. While waiting, add 1 drop of rennet to 1/4 cup of cool water. Set aside.
3. Using a slotted spoon, gently move the milk up and down to distribute the culture evenly through the milk. Do not stir.
4. Pour in the water - rennet mixture. Mix the rennet through the milk as you did with the culture. Do not over mix!
steel pot or double boiler until it reaches 145° F, stirring frequently to
prevent scalding. Hold the temperature at 145° F for 30 minutes. Remove from
heat and allow to cool.
A note about timing, as you will see there is a lot of waiting with cheese making, I have found that heating the milk and adding culture and then rennet just before I go to bed works the best for me. That way I am up and around the kitchen during the time the cheese is in the molds. This allows me to check the texture and remove the cheese when it is just right. (Truth be told it also keeps me from compulsively checking on the set of the cheese when ideally it should just be left alone!)
To make Chevre:
1. Heat, or cool, your milk to 75° F remove from heat, then sprinkle your culture over the top of the milk. Allow it to sit for 2-3 minutes.
2. While waiting, add 1 drop of rennet to 1/4 cup of cool water. Set aside.
3. Using a slotted spoon, gently move the milk up and down to distribute the culture evenly through the milk. Do not stir.
4. Pour in the water - rennet mixture. Mix the rennet through the milk as you did with the culture. Do not over mix!
5. Place the lid on the pot and set aside. The culture mix needs to set at approximately 72° for 8 - 10 hours. The 'cheese' should be left alone at this stage, don't move it around and try not to take the lid off to check every 20 minutes as I do.
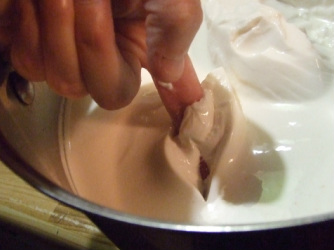
6. After 8 - 10 hours, check for a clean break. To do this wash your hands and insert a finger into the cheese. When the tip of your finger breaks through the bottom of the solids, hook your fingertip and draw your finger out. If the solids break cleanly and don't stick to your finger the cheese is ready to drain.
6. After 8 - 10 hours, check for a clean break. To do this wash your hands and insert a finger into the cheese. When the tip of your finger breaks through the bottom of the solids, hook your fingertip and draw your finger out. If the solids break cleanly and don't stick to your finger the cheese is ready to drain.
You can use molds or muslin cloth to drain the cheese. Regular cheesecloth is too open to work with chevre, but if it is all you have, try making 4-5 layers
Decide if you want to keep the whey if you do you need to figure out what you are going to catch it in. If you aren't going to keep it then you can just drain everything over the sink. I keep the whey and it goes to the pigs.
If you are using muslin:
Lay the cloth inside a colander. If you are keeping the whey, set the colander over something to catch it.
Using your slotted spoon, GENTLY lift the curds out of the pot and place in the colander.
Once all of the curds are in the cloth, gather the corners of the cloth and tie together. Hang the cloth over the container for the whey or sink depending on your preference. I have found a wooden spoon under the knot in the cloth works. You can then place the spoon over a cupboard door handle, or tie some string around the knot and hang that way.
If you are using molds:
Place the molds on a rack over the container to catch whey.
Gently scoop the curds from the pot and place in the molds.
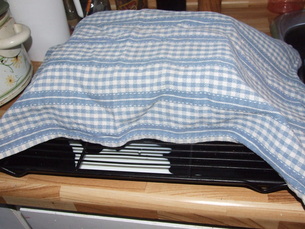
When you have used all the curds, place the molds together on the rack and cover with a clean dish towel.
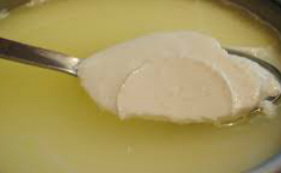
Allow the curds to drain for 4 - 12 hours. Four hours will give you a very soft spreadable cheese; 12 hours will give you a texture closer to cream cheese. start checking the texture at four hours and unmold when it reaches your preferred texture. After a couple of batches, you will have a good idea of the time frame for your cheese.
Once you reach your desired texture you can add herbs if you wish, either
by stirring herbs through or rolling the cheese in a herb mix. (Think cracked peppercorn).
Your cheese is now ready to eat. It will store for a week in the fridge or can be frozen. If you are going to freeze it, add salt to taste after it is done draining.
by stirring herbs through or rolling the cheese in a herb mix. (Think cracked peppercorn).
Your cheese is now ready to eat. It will store for a week in the fridge or can be frozen. If you are going to freeze it, add salt to taste after it is done draining.
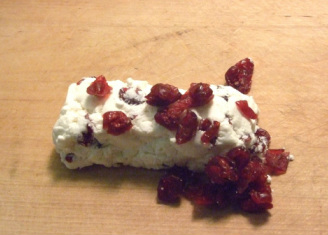
Yum! A slightly crumbly, yet still spreadable cheese. Mixed with some dried cranberries add some slivered almonds on top and you have a yummy dessert.

 RSS Feed
