Hand-Forged Farm
  • About Us / Contact

How to Tuesday: Dealing With a Sick Goat

4/11/2014

1 Comment

 
 So I had a plan for today, the guys were going to trim the goat's hooves and I was going to shoot some video and go through hoof trimming on the how-to Tuesday blog post. Great plan!
Never make a cast in iron plan as a homesteader. Plans are like a poke in kidneys to mother nature, goddess of all things homesteads. This morning mother nature decided that I would not be shooting video of goat hoof trimming, instead, we have been dealing with a goat in shock with a mostly shut down rumen. As I mentioned on facebook yesterday, Miss Avril was in heat, so around four pm yesterday Reiley and I drove Miss Avril for her 'date'. By the time we arrived back home, it was pushing six pm and dark. When Avril is in heat she gets aggressive, (well let's face it she is aggressive most of the time), the best we can determine is that after we brought Avril home she either picked a fight with Pepper or Pepper was caught up in a fight between Avril and Ivan. Whatever happened, when Reiley went up to do chores this morning he found Pepper standing off in the corner in deep shock.
​

Goats in shock exhibit the same symptoms as most animals, even 2 legged ones. They appear dazed or blunted they also tremble or shiver and their temperature, especially in the extremities, is much lower than it should be. They also present with pale mucous membranes, the gums and inner eyelids, and rapid shallow respiration and rapid irregular pulse.

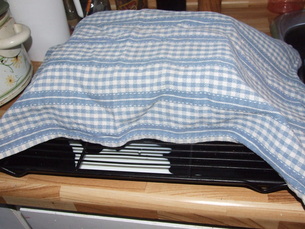
Pepper had all of these in spades this morning, my guess is that she was like this most of the night. We brought her into the house, wrapped her into her little coat that I had made her for pro-show, and set about assessing her and warming her. She has no obvious injuries, she is tender in a few spots but nothing major, she can walk and has no signs of internal bleeding. This is good, she needs supportive care. So strap on your boots it's going to be a LONG day. 
Picture
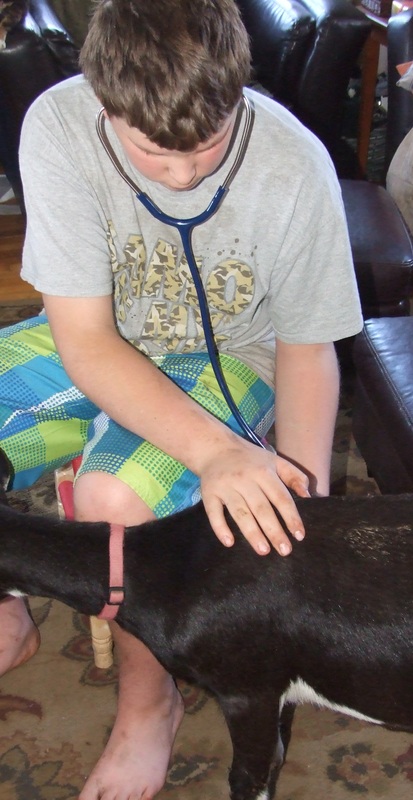
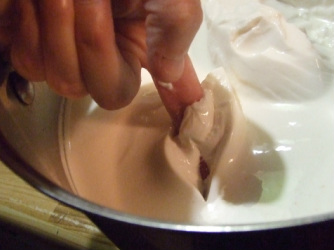
Once she was warmed and more responsive Reiley began to check her temperature, pulse, and respiration. The most critical thing to watch for in sick or injured goats, well all ruminants really, is that the gut does not shut down. If the rumen shuts down it can easily kill the animal. The easiest way to check is to listen to the gut with a stethoscope. I highly recommend having even a basic stethoscope around the homestead, it makes diagnosing things so much easier.

Unfortunately, Pepper's rumen was very quiet, you should be able to hear a goat's rumen working even without a stethoscope. Pepper's was barely audible with a stethoscope. Once the rumen starts to shut down you need to withdraw all grain and offer only good hay and water. Unfortunately, the animals have usually stopped eating and drinking by this point. The danger comes when routinely produced bacteria in the gut become trapped in the digestive system and lead to enterotoxemia. You need to get the gut functioning again.

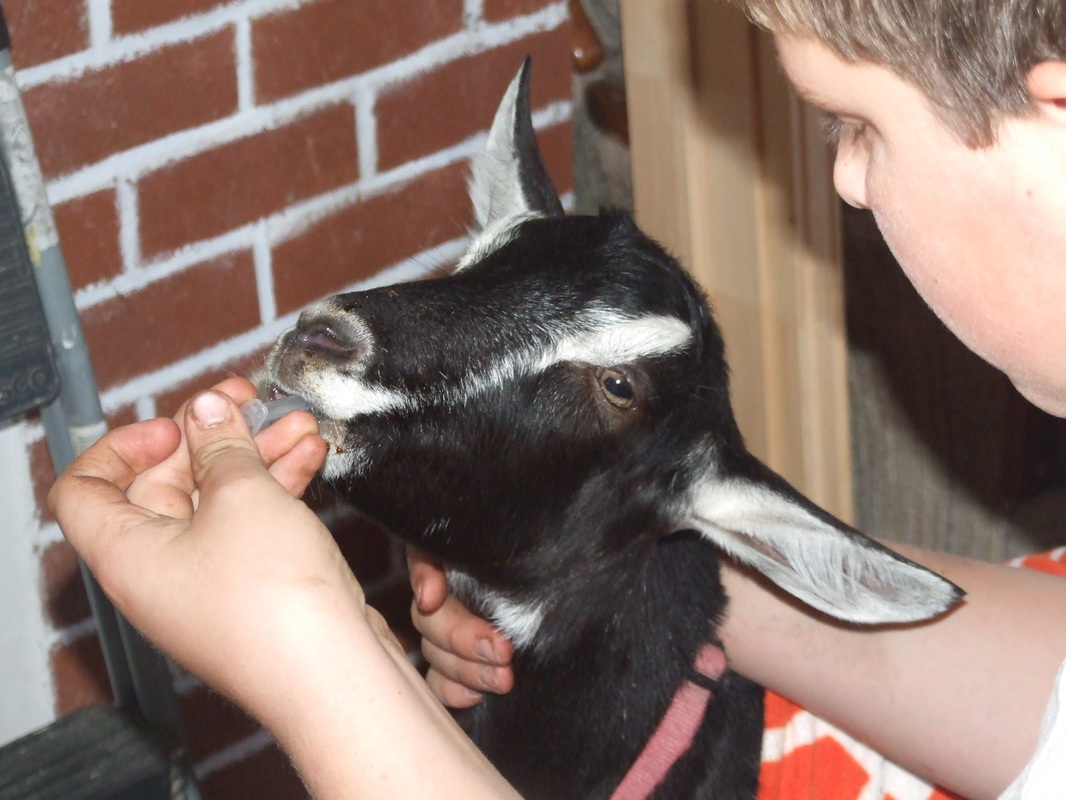
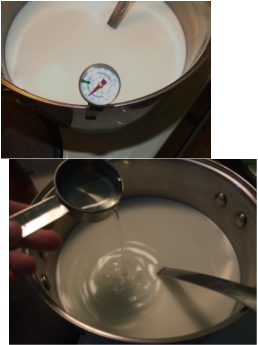
If the goat is refusing food and water but is not yet dehydrated, you can give fluids via a large syringe, I recommend having a few 60cc syringes on hand; you don't need a needle on it, just the syringe. Use the syringe to give water, if the goat is reluctant to take straight water, try putting little molasses in, the energy won't hurt them and it may encourage them to drink.

Pepper passed stool and urine within the first hour of being in the house, so we were not in any danger of severe dehydration yet. I should note that anytime you are not comfortable handling and treating a sick animal call your vet. Gary and I have over thirty years of experience working with animals and treating them. I trained as an RN and am very comfortable dealing with medications calculating dosages etc., but even we have our limits. We are comfortable stitching wounds, lancing abscesses, pulling babies and a host of other things but we know when we need to call a vet and everyone should recognize their limits and follow their gut instincts. The more experience you get the more comfortable you will be. It is better to acquire experience watching and talking with a good vet than by trial and error.
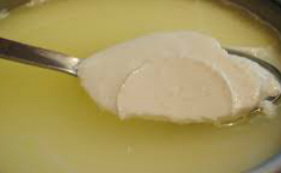
Picture
S​o we have spent the entire day coaxing fluids into Pepper. She is not well yet. We have been giving children's aspirin for inflammation and pain, she is getting fluid syringed every hour, she has not developed a fever so we are confident that we are not dealing with anything other than a bruised and sore goat. We have given her about a quarter cup of probiotic yogurt, this is helpful in keeping the gut populated with good bacteria. It really is remarkable how fragile goats are when something goes wrong. The same slow digestive system that allows them to digest sticks and bark rapidly becomes a hindrance when a problem occurs.

So, for now, she is holding her own, she is continuing to nibble hay, pass urine and stool. We will keep her in the house overnight and continue supportive care. If she is no better in the morning we will have her seen by the vet.

Ahhhhh, self-reliant homesteading at least you can't say it's boring.....

Have a great day everyone.
1 Comment

Heating With Wood

28/10/2014

0 Comments


Hi everybody, well I am back! Last week is officially one of the worst in recent memory; in fact, the last few weeks have been rough. If I look back things started to go off the rails around the last week of September which happened to coincide with the last new moon,  so I was really pleased to see the cycle end late last week.

To give you an idea of how bad last week was Monday morning started off when Jason, (child number 4), called and began the conversation by saying " I'm out of the hospital, and I'm OK...." fellow parents breathe deeply. He was working on his girlfriend's car late Sunday when he was removing the blocks the jack slipped and he was pinned by the partial weight of the car. He is going to be OK. He has torn cartilage in his ribcage and lots of inflammation around his spine. I wasn't able to see him until Saturday so no matter what I tried to do last week I just couldn't focus. I couldn't sleep every time I tried to think I just kept seeing him trapped. Sometimes being a very creative visual person just doesn't work! Add to that continuing computer issues, front axle car trouble and a weather system that turned the homestead into a post-apocalyptic landscape and I have never been so happy to welcome Monday. 

That's enough whining, on with the week.

Today is Tuesday and in the spirit of How to Tuesdays, I thought I would talk about heating with wood. It was cool and damp here last week and that meant time to fire up the wood furnace. We do have a wood furnace in the basement, it heats via a hot air system. Not my first choice and the long term plan is to install a wood cookstove which will heat the house and our hot water, but this will not happen until next fall at the earliest. We do use the wood furnace exclusively.

There has been a lot of talk about wood heat not being sustainable and about the carbon effects of burning wood for heat. My position is that if you manage your woodlot properly, then wood heat is carbon neutral. It is certainly better than oil, natural gas or coal. (Coal being burned to supply you with electric heat.) There is also a lot of misinformation on the safety and efficiency of wood heat; but again if you do it properly, wood heat is safe, efficient and cheaper than most other fuels available.
Picture
So, what is the "proper" way? Well there are as many opinions on that as there are people who have ever attempted to make a fire. We have used wood either partially or exclusively for heat for the almost 30 years that we have been together, and there are five questions that always come up when we talk about heating with wood: how much wood will I need, what is the proper way to start a fire, what kind of stove do I need, what about insurance and what type of wood is best?  While most of the answers start with "it depends", I'll try and make a dent in them today.

First insurance, it annoys me to no end that if wood is your only source of heat you are going to have trouble getting insurance. This explains the pattern we see around here of new houses equipped with electric baseboard heaters. They are cheap to put in and cover your backside for insurance purposes. Unfortunately, when people buy these houses and don't want to heat with wood they end up selling their souls to Nova Scotia Power in order to keep warm. For those who aren't blessed with that particular entity in their lives, my most recent power bill tells me I am paying a base charge of $10.83 a month and $0.14251 per every kilowatt hour I use; and don't forget to add the 15% harmonized sales tax. You can understand my desire to get off the grid. So if you have an existing heat source other than wood, don't remove it. I have a friend who bought a house that had an old oil furnace in the basement, the tank had been removed but because the furnace sat in the basement they were able to install a beautiful Pacific Energy stove and use it to heat their 1200 square foot home with wood and keep their insurance. I am sure individual cases will vary but if you are building or renovating it is worth it to check with your insurance broker.

The next question is what size and type of stove do I need? This will depend upon the size of your house, how much insulation it has, what your climate is like and why you want a stove in the first place. There are many types of stoves and other ways to heat with wood. If I was building from scratch, and had a sizable budget I would build my house around a masonry heater. Masonry heaters work on the principle of heating a large thermal mass and then allowing that heat to radiate back into the living space. This is the same principle behind rocket mass stoves, just on a larger scale. They tend to be the most efficient way to heat with wood and certainly give off the most even heat from wood. Most masonry heaters are extremely heavy and require beefing up of foundations. If you are looking for supplemental heat and emergency heat in case of a power outage then an airtight wood stove is probably the best option. There are multiple brands on the market, my personal preference is for the Pacific Energy brand. That said, it has been a few years since I did any research into this type of stove so there may be better ones out there.

Do your research, manufacturers list the stats for each model including btu's and square footage recommendations. These should be treated as fuel milage ratings on new cars, they represent the optimum when the unit is operating at peak efficiency; and for wood stoves this means burning at full draft with dry hardwood. This is not how most people use wood stoves.
Picture
Photo credit http://www.inspirationgreen.com/masonry-heaters.html
​We have decided to install a wood cookstove. We want the stove to be our main source of heat and to use for cooking as well as hot water, a cookstove will allow us to do all of these things. Just a note on buying a used stove, you can get great deals on stoves but be warned, if you want to install it in your house, it will need a CSA tag on it. I'm not sure about US regulations. If you are looking at a used stove and have determined that it does have a CSA tag, you need to be most concerned with checking for cracks in the firebox. Things like dirty or broken glass and missing or bad door gaskets are easily rectified. In fact, if you are going to have a wood stove you should be prepared to replace the door gaskets every year at least.

So you have the stove and the chimney installed, what to burn? If you are purchasing firewood, ask friends and acquaintances for recommendations. There are many great people selling firewood but there are also not so great people selling firewood.  Know what you are buying. Most firewood is sold by the cord. A full cord of firewood, when stacked, will measure 8 ft X 4 ft X 4 ft. I have found that the closer you get to suburbia the more likely you are to find people selling "face cords", face cords are 1/4 of full cords when you stack it will measure 8X4X1.

If you are handy with a power saw ask about getting eight-foot lengths; suppliers will usually give you a deal if they don't have to cut and split the wood. Ask if the wood will be cut and split, this is not a given.

You are looking for hardwood, species like maple, oak, birch, and ash. The denser the wood fibers the longer and hotter the wood will burn. Hardwoods also burn cleaner. Softwoods like spruce, fir, and pine, especially if not properly dried, will have resins or sap. When this sap burns it gives off black smoke. This smoke is full of creosote, creosote sticks to the inside of your chimney and will catch fire. Wood that has not been properly dried, is referred to as greenwood. It is to be avoided at all costs. It has high moisture content and therefore does not burn well. You will get much better heat, efficiency, and safety from dried hardwood. Wood you will be burning this winter should have been cut last winter, older is fine. We cut firewood in the early spring and let it dry until early fall. If you moved to your homestead in the summer and plan to harvest your firewood from your own land, look for standing deadwood, trees that have died but remained standing or deadfalls, trees that have died but were caught in branches of other trees as they fell, keeping them from hitting the ground. Both of these will be suitable for burning. It will put you much farther ahead to start with dry wood, even if you have to buy your wood for the first year.  
Picture
Picture
When harvesting wood from your land, learn about coppicing trees. When you cut a hardwood tree during its dormant phase, it will send up 'shoots' the next spring. These shoots will grow into great firewood in a few years, by learning to tend and manage your woodland you will provide yourself with a completely renewable energy resource that will keep you warm for years to come.


How much wood do I need? The answer to this is impossible for me to say. Even if we had identical houses on the same road it would be impossible to say. Square footage is a place to start, you must also take into consideration how well your house is insulated, how warm you like your home to be as well as the design of your house. A sprawling ranch style house will never be as easy to heat with wood as a compact Cape Cod-style house. How does the air move around your house? Will you be home during the day to tend the stove or do you need supplemental heat for when you are at work. If you have bought your property, you should be able to get a ballpark figure from the previous owners, it pays to err on the side of caution, having too much wood is better than having not enough, and it's not going to go bad, you can burn it next year. One other point, unless your house consists of one room directly over another, you will need a fan(s) to move the heat around the house. It is worth the investment to look at convection fans like the Ecofan.  

The final question I want to tackle seems somewhat silly to some people, but I have seen grown men argue forever about the proper way to start a fire! I have found it is usually men who have the view that the only way to start a fire 'properly' is their way. As if a fire started any other way will not burn as well??? There are many methods of starting a fire: grid and teepee, paper, no paper, it can go on for hours. The basic principles are all the same: you need a dry, easily combustible material such as wood chips, paper, thin bark, etc. You need a small stack of kindling, thinly split pieces of very dry hardwood, and they need to be arranged so that air will move around the individual pieces, yet touching so that the flames can spread. That is really all there is to it. Find a configuration that works for you and that is all you need. So while everyone else is arguing about how to start a fire, you can just go ahead and do it.

For the last word, I will refer you to woodheat.org  this site will answer any and all questions you might ever have concerning heating with wood.
​

Have a great day everyone, and stay warm!  
0 Comments

Toxic Cleaners and Non-Toxic Alternatives

20/10/2014

0 Comments

 
Hi Everybody, well we survived the 4H awards banquet. I was a little nervous when I found out that Reiley and the Jr hostess Kiera, were going to MC the evening. You can never be too sure when you hand over the stage and a microphone to a 13 year old boy and girl, but they did a great job! Everyone had a great time, great food and now  the cycle begins again.

We have been working to get things completed as the weather has continued to hold. After a rather rocky start, October has turned into a beautiful month. Warm days and mild nights with a mix of sun and steady rains have allowed us to finish up those few projects we had left. The guys are in the garden today finishing the work on the soil and planting the last of the garlic.

Inside, I have been making soaps for the Christmas orders and for the craft fair I am attending next month. I haven't done a market or craft fair since before my first shoulder surgery almost three years ago. Reiley will be coming with me to help. So we shall see. We are continuing to chip away at the renovations inside, but the heavy work inside won't begin until everything is frozen outside. We are under a tighter deadline this winter as there will have to be a forced break in the work once the baby arrives in late February or early March.

Back to the matter at hand! I had a couple of posts written on cleaners and chemicals to avoid for post on Thursday and Friday, but they were lost in this computer and are lost for all time. So today you are going to get the coles notes version of both posts rolled into one.....

If you feel that you just aren't ready to ditch the commercial cleaners you are used to; and that is fine, I am not here to judge just inform. Try to find a list of the ingredients contained in your products and look for ones that are less harmful. Here are the nasty chemicals and what they do.

Powdered Silica. This is the staple ingredient in the abrasive cleansers, like Comet. Powdered silica is recognised as a known human carcinogen by the International Agency for Research on Cancer. It is made from finely ground quartz and is hazardous if inhaled. Unfortunately it also becomes a carrier for the other dangerous chemicals contained in the cleaners.

Ammonia. A staple in glass and stainless steel cleaners / polish. Ammonia vapours can irritate the the skin and mucous membranes of the eyes, throat and lungs. People with asthma and C.O.P.D. are susceptible to small concentrations of ammonia. The real problem with ammonia in cleaning products, and this is one that sends people to the Emergency room all over North America every year, is the accidental mixing of products containing ammonia and products containing chlorine bleach. When these two chemicals combine they form chloramine gas, Chloramine gas was used as a chemical weapon during WWI. Enough said. Ammonia is also found in drain cleaners, all purpose cleaners, car polish, toilet cleaners and oven cleaner.

2-Butoxyethanol (2-BE, also known as butyl cellosolve)

This nasty little ingredient is a known eye and skin irritant and has been shown in laboratory experiments to cause reproductive issues. Health Canada has listed indoor air and skin contact with cleaning products as the main exposure. It is listed as a toxic substance under the Canadian Environmental Protection Act and is limited to a concentration of five - six percent in household cleaners but some products such as laundry stain removers may contain as much as 22%.


So what should we do? It is difficult to find a label that actually lists full ingredients; the laws surrounding label claims such as "green" or "environmentally friendly" and "non toxic" are as toothless as hens. What do we do? My solution has been to make my own cleaners.

Most modern cleaners are based on recipes that utilized natural ingredients. In order to develop markets, companies began to try and isolate the properties of these natural ingredients and synthesize cheap chemical ingredients with the same "properties"’. Going back to the original ingredients you can make effective products which don't pollute your home or the surrounding environment and are much cheaper than the commercial options.

The basic ingredients needed to make your own cleaners are probably already in your cupboards my stock includes:

White Vinegar. Vinegar is a mild acid, natural deodorizer and grease cutter. Vinegar will remove mildew, wax buildup and scale from hard water.

Lemon Juice. Lemon juice does similar things as vinegar, however it has a slightly lower ph and is therefore slightly stronger. It also has a pleasing scent.

Baking Soda Baking soda is a base. It is useful for softening water, deodorizing, cleaning and as a mechanical scouring agent.

Soap. You are looking for a plain, unscented biodegradable soap. It can be liquid, flakes or bar. I make my own so I can make flakes or liquid as needed. Washing soda. Washing soda is a mineral, powdered sodium carbonate decahydrate to be exact. It is also one of the strongest ingredients in my cleaning supplies. It is a water softener, removes many stains and is a fabulous grease cutter. I use washing soda in my bathroom cleaner and as a laundry additive for loads that are particularly nasty from homesteading activities. Matthew uses grease pencils at his day job right now and sometimes they get in the laundry. Washing soda paste will take out the results.

Rubbing alcohol. Isopropyl alcohol is  the technical name. As one would assume it is an excellent disinfectant. Use common sense, or as a friend is fond of saying, good sense as it is not common anymore. If you are using rubbing alcohol to disinfect around the kitchen rinse afterwards.

Borax. Of late, there has been talk of how environmentally friendly borax really is. I have looked at most of the talk and I still continue to use borax. Most of the concern seems to focus on boric acid, however borax is not boric acid,. Boric acid is formed when borax is added to any acid. Borax on it's own, is a moderately strong alkaline with a pH of 9 -9.5 range. I have looked at most of the studies and find issues with many of them. I cannot tell you to use it or not use it, all I can say is I still use it. I don't spread it willy nilly around the house, but then again I never did. Bottom line borax is not absorbed through the skin, it is non carcinogenic, (as far as we know) and it does not bio-accumulate.

Essential Oils. I use tea tree, lavender, and orange essential oils in my cleaning recipes. I don't use them all the time, only when needed. They are great for extra disinfecting, grease cutting and aromatherapy.

So those are the raw materials. Tomorrow I will share my recipes with you and some tips and tricks I have learned over the years. Have a great day everyone!
0 Comments

How to Tuesday: Using Your Tomato Preserves

7/10/2014

0 Comments

 
​A little over a week ago Rosz posted a comment on my post regarding pressure canning tomatoes. She commented that she prefers to have ready-made sauce rather than just canned tomatoes. Thinking it would be easier. It is easy to have ready-made sauce, and I put up lots of it. I also like to have simple crushed or diced tomatoes on hand as it gives me more versatility, and allows me to add fresh herbs from my winter windowsill garden. We are having pasta tonight so I thought I would share with you how I turn canned tomatoes into sauce. First you need to decide if you want to use crushed or diced tomatoes. Reiley prefers the crushed tomato sauce with fettuccine so I just grab a couple of 500 ml jars of crushed tomatoes and we are ready to go.  
Picture
​First, you need to decide if you want to use crushed or diced tomatoes. Reiley prefers the crushed tomato sauce with fettuccine so I just grab a couple of 500 ml jars of crushed tomatoes and we are ready to go. Now if I had been a little more organized today, I would have done this early this morning and had it simmering in the crockpot all day. Life intervened early today and I didn't get to it. So we are going to use the saucepan method. Pour your preserves into the pot, add whatever herbs you prefer, I am adding some fresh basil and thyme. A generous tablespoon of brown sugar, some salt and pepper, and caramelized onions and garlic round out the sauce.  
Picture
Stir everything in and simmer on the stove for about 30 minutes. As I said it will taste better if you have it simmering in a crockpot all day but this is good too. You can add this sauce to meat if you like or just use the sauce. I am going to add it to ground pork, if I was just using the sauce on pasta I would probably use diced tomatoes.
Picture
​I'm not trying to say that you shouldn't preserve ready-made sauce, I make and preserve lots of it. I don't want you to feel that it is your only option for quick meals. This sauce took me about 35 minutes to make. I mixed it up and had it simmering first, so by the time I had the ground pork and pasta ready the sauce was good to go. If I had remembered to put it in the crockpot on warm before I left this morning it would have been ready when I came home. The best part is that I find it does taste better with the fresh herbs and caramelized onions and garlic, especially in the middle of winter when we really need a taste of summer! So give it a try, add your favourite fresh ingredients and savor!. After all, that is what good food is all about. 
​Have a great day everyone.  
0 Comments

Soil Amendments

1/10/2014

0 Comments

 
Picture
Hey everybody
The computer is finally working and it is time to take a look at our garden soil and decide what it needs for next year to keep producing a bounty of healthy food for us.

Fall is my preferred time to add soil amendments, it means that you have several months for the bacteria and microbes to work on and integrate into the amendments. The worms and other beneficial life forms can colonize the "new soil" and by the time planting season comes around again your amendments should be fully integrated into the soil.

So what is a soil amendment? The most basic definition of a soil amendment is any material that is added to soil to alter the structure and pH of the existing conditions. When you ask gardeners why they amend their soil and they will most often talk about altering the way water moves through their soil and increasing the nutrient availability of soil.

Before you can look at amendments you need to know the mineral composition of your soil and the pH value of your soil. You can see the posts on how to check the mineral composition of your soil here and here. Soil pH testing kits are available at most stores that sell gardening supplies or you can order online.
Picture
There are some amendments that are good for all soil types, specifically compost and organic matter. These are not interchangeable terms. The easiest way to describe the difference is all compost is organic matter, but not all organic matter is compost.

We get a lot of questions about adding compost and organic matter, most of these regard timing. There is never a bad time to add compost to your soil, but it is easiest to do so in the spring and fall. Generally because there are not a lot of plants in your way and you can work it into the soil. Space is another consideration. If you have a large area for your compost pile(s), then you can start a fresh pile of compost from all the material you take out of the garden in the fall. If your space is limited, you may have to spread your finished compost before you can start a new pile.

When discussing adding organic matter it gets a little trickier. If you want to add organic matter straight to your garden, the most important thing you need to remember is this: as organic matter decomposes it ties up nitrogen. The more fibrous the organic matter is the more nitrogen it ties up and the longer it takes to decompose. This is not a big deal if you are adding leaves to your garden in the fall. In most cases they will completely decompose before spring. If you chose to chop and drop your garden remnants, tougher, more fibrous material such as corn stalks may not decompose before spring. Never add non-composted organic matter during the growing season, it will tie up your available nitrogen and your plants will suffer.

Full disclosure here, we do not have a "compost pile". Everything from food scraps of all kinds, wasted hay yard waste and garden trimmings goes through the pigs. Yep, if they don't eat it the trample it in their bedding and it ends up in the manure pile. Our compost comes from the manure piles.
Picture
So, what to do if you aren't fortunate to have beautiful black rich loam soil? Depends on what you do have. The two things you don't want to do are try for a quick fix with chemical fertilizers and buy "top soil". The only time I would recommend purchasing topsoil is if you have a home in a newer subdivision. Current practices allow for the rape, pillaging and sale of any nutrient rich fertile soil from these sites before construction begins. You are essentially left with dead subsoil. It would take you years to try and build any kind of decent topsoil. Just do your research and find locally sourced top soil.

If your testing shows you have heavy clay soil, your priorities are going to be adding nutrient rich organic matter to increase the fertility. Something to increase drainage and a way to bulk up the soil thereby increasing aeration.

The best candidates for clay soil amendments are compost, and lots of organic material. Most people will tell you if you have clay soil you need to add sand, My short answer is don't. To alter the drainage of a clay soil with sand, you would have to add half, 50% of the current volume of soil to make an effective soil. This quickly gets expensive. Adding less will give you a soil where the larger pore spaces of the sand are filled in by the smaller clay particles, resulting in a denser, heavier more easily compacted soil that still won't drain!
 
The best thing you can do for your heavy clay soil is to add organic matter that will open the structure of the soil improving drainage and increasing the amount of life in your soil. Wood chips or shavings are very effective. Get in the habit of using these as mulch, and using either on the paths in your garden is a great way to incorporate them into the soil.

Clay soils respond well to green manure, but remember the nitrogen issues. Heavy clay is also an excellent candidate for bio char applications. Ground bark is also an effective amendment for this soil.

Sandy soils  are as difficult to deal with as clay. When looking at amendments for sandy soil your objectives are increasing nutrient, slowing down the flow of water through the soil and adding organic matter to increase the amount of soil micro organisms and bacteria.

Compost is still the best way to add available nutrients to the soil. It packs a powerful punch of nutrient that is available to your plants from day 1. Peat moss is my preferred additive for quickly increasing the absorption rate of sandy soils. It is quite acidic so you need to monitor your pH levels carefully . For the long term, adding organic matter is the best way to increased the absorption rate of sandy soils. By adding organic matter, you increase the amount of microorganisms and bacteria which feed on the decaying matter. The excretions and ultimately the decomposing bodies of these organisms combine to form humus, and humus is the 'glue' that holds soil together. So ground bark, and wood chips are again excellent forms of organic matter to add to sandy soils.

A note about ph. Generally, most vegetables prefer a pH that is slightly acidic to neutral. In the range of 5.5 to 7. A comprehensive list can be found here. If you soil is too acidic, the best amendment to sweeten the soil is still ground lime. It is available almost everywhere that sells nursery supplies. It is relatively inexpensive and usually contains clear directions for application rates. If your soil tests out in the alkaline range you will need to add a compound to sour it a little. Gypsum or ground sulfur are the usual candidates. It has been my experience that the availability of these vary from region to region, but one or the other is usually available locally. Again follow directions for application rates.

Hopefully I haven't given you information overload with this topic. Soil building is not going to happen over a single season. It takes time and patience, not my strongest trait. At first it will seem that everything you are doing hasn't made any difference and then one day, you will be out digging in the garden and it will strike you that you have the beautiful, rich black soil you have longed for. so the sooner you start, the sooner you will get there; test your soil composition, know where you need to make changes and get started. This is where your food is coming from..... you need to make it the healthiest it can be!

Have a great day everyone.


Picture
0 Comments

Cranberry, More Than a Side Dish...

18/9/2014

0 Comments

 
Picture
For most of us it is relegated to a side dish for Thanksgiving and Christmas dinner, from a herbalists perspective it is a powerful antioxidant, anti-inflammatory, and possible cancer prevention tool. The American cranberry,
Vaccinium macrocarpon, is an evergreen shrub growing to 6 ft . It has small leathery leaves and can be found growing in bogs and wetlands from zones 3 through 7. The information in this article refers to American cranberry, not the various high bush cranberry, a vibernum, also known as crampbark, found in nurseries today.
  
Cranberry has traditionally been used as a treatment for urinary tract infections, (UTI). For many years it was believed that the high acidity of the cranberry lowered the pH of the urine thereby making the bladder a less hospital environment for the bacterium which causes UTI's. In recent years however, scientific studies have shown that the structure of the proanthocyanidins, (flavonoids), actually block the bacterium's ability to attach itself to the lining of the bladder. Researchers are now studying this evidence to see if it could prevent stomach ulcers in the same way.
 
Cranberry has been shown to be a powerful anti-inflammatory, specifically
acting upon the cardiovascular system and digestive tract. The phytonutrients in cranberry that are especially effective in lowering our risk of unwanted inflammation, and virtually all of the phytonutrient categories represented in cranberry are now known to play a role by blocking the cytokines which tell our bodies to start an inflammatory response against against a perceived threat. Dietary consumption of cranberry has also been shown to reduce the risk of chronic, unwanted inflammation in the stomach, large intestine and  blood vessel linings. Therefore, anyone with an auto immune disease should benefit from an increase in cranberries in their diet. This cytokine suppressing ability in
addition to high fibre content  means that a high dietary intake of cranberries
will help lower your risk of atherosclerosis, plaque build up within the vessels
and lower your 'bad' cholesterol levels.
 
Nutritionally, cranberries are high in manganese, vitamin C and E and fibre. A 1 cup measure of cranberries, approximately 100 grams, will supply your body with 18%  of your daily fibre intake requirements. . We are all familiar with the pictures of cranberries floating on the water as farmers flood the bogs containing the plants. For years this harvesting method was done simply for convenience, it is much easier to use a boom to gather floating berries than
it is to try and pick berries from plants in soft boggy ground. Recent studies
have shown that anthocyanin, the phytonutrients that give the berries their amazing red color, increases  in direct proportion to the amount of natural sunlight striking the berry. So having berries floating on top of the water will actually increase the concentration of anthocyanins, making this humble berry even better for you.
 
So look for ways to incorporate cranberries into your diet, cranberry sauce
is easy to make from scratch: 3 cups of cranberries, 1 cup of water, 1 cup of
sugar and a dash of lemon or lime juice. Boil until the cranberries 'pop'. This can be eaten fresh or canned in a waterbath canner for 15 minutes.
Cranberries make a wonderful addition to pork dishes ad well as some of the
stronger fish dishes. Try some dried cranberries instead of raisins in your
snack foods and baking. As I mentioned in my post from Tuesday, dried
cranberries mixed in chevre cheese with slivered almonds sprinkled
on top is a favourite dessert around here. Cranberries freeze really well, I
always buy pounds and pounds of cranberries when they go on sale after Christmas and store them in the freezer. If you are lucky enough to live near a cranberry grower, find out if they have public tours, they are harvesting now and it makes a great day out with the kids!
 

Picture
**Please note. I am not a doctor. This post is not intended to diagnose, treat
or cure any disease. The information presented here has not been verified by
Health Canada.**
0 Comments

How To Tuesday: Making Fresh Chevre

16/9/2014

0 Comments

 
​Well, we are back in the kitchen today, making a fresh chevre with our goats' milk. I am not a big cheese eater, I will never be one of those people who start making amazing gourmet cheese from their kitchen. I do, however, like fresh chevre, especially as a dessert with cranberries and almond slivers or with some honey drizzled over pear slices and chevre. Yum!

So I received my goat cheese making kit from Glengarry cheese making supplies a few weeks ago.  It was a good deal, giving me a variety of cultures a lifetimes supply of rennet and molds. I was disappointed with the literature, it had been advertised as coming with recipes, however, the recipes were for what I would consider a person with basic cheese making experience. Also, there was no recipe for making a fresh chevre. So I researched and found a recipe, I tried it twice with mixed results. I have done more research and I think I  figured out where I went wrong, so through much trial and error, I am comfortable enough to share the process with you.

This is one of the things I love about this lifestyle, you are constantly learning new things. I also make sure that our kids get to see us screw things up, pick up the pieces analyze what happened and then give it another go. Too many kids these days never experience failure; they get participation medals for simply showing up, they get passed on in school all because we don't want to damage their fragile little egos by telling them they weren't quite good enough. Well, guess what, that is not how life works. We are doing our kids a huge disservice by "protecting" them. By covering them in bubble wrap we raise young adults who have no idea how to assess the risk in a situation, they never realize the thrill of figuring out a difficult problem after they spent a lot of time not figuring out the problem. They are ill-prepared to deal with the everyday failures that come about in the workplace and just living day to day life. But again, I digress. Back to cheese making.

So, as I said, I am making a fresh chevre with our goats' milk. I do not pasteurize our milk; if you wish to pasteurize your milk I will give directions for that. You can use pasteurized store-bought milk for this recipe, just make sure you purchase whole milk not 2% or skim.
 
You will need:

4 litres, (1 gallon) of goats milk
calf rennet
culture, I use Mesophile Aroma Type B
a large stainless steel pot
measuring spoon (1/8th teaspoon)
1/4 cup measuring cup
large slotted spoon
thermometer
cheese molds or muslin cloth
something to catch the whey in  
Picture
​If you want to pasteurize raw milk:  heat milk in a heavy-bottomed
steel pot or double boiler until it reaches 145° F, stirring frequently to
prevent scalding. Hold the temperature at 145° F for 30 minutes. Remove from
heat and allow to cool.

A note about timing, as you will see there is a lot of waiting with cheese making, I have found that heating the milk and adding culture and then rennet just before I go to bed works the best for me. That way I am up and around the kitchen during the time the cheese is in the molds. This allows me to check the texture and remove the cheese when it is just right. (Truth be told it also keeps me from compulsively checking on the set of the cheese when ideally it should just be left alone!)

To make Chevre:

 1. Heat, or cool,  your milk to 75° F remove from heat,  then sprinkle your culture over the top of the milk. Allow it to sit for 2-3 minutes.

2. While waiting, add 1 drop of rennet to 1/4 cup of cool water. Set aside.

3.  Using a slotted spoon, gently move the milk up and down to distribute the culture evenly through the milk. Do not stir.
 
4. Pour in the water - rennet mixture. Mix the rennet through the milk as you did with the culture. Do not over mix!  
Picture
5. Place the lid on the pot and set aside. The culture mix needs to set at approximately 72° for 8 - 10 hours. The 'cheese' should be left alone at this stage, don't move it around and try not to take the lid off to check every 20 minutes as I do.

6.  After 8 - 10 hours, check for a clean break. To do this wash your hands and insert a finger into the cheese. When the tip of your finger breaks through the bottom of the solids, hook your fingertip and draw your finger out. If the solids break cleanly and don't stick to your finger the cheese is ready to drain.

   
Picture

 You can use molds or muslin cloth to drain the cheese. Regular cheesecloth is too open to work with chevre, but if it is all you have, try making 4-5 layers
Decide if you want to keep the whey if you do you need to figure out what you are going to catch it in. If you aren't going to keep it then you can just drain everything over the sink. I keep the whey and it goes to the pigs.

If you are using muslin:
            Lay the cloth inside a colander. If you are keeping the whey, set the colander over something to catch it. 
           Using your slotted spoon,  GENTLY lift the curds out of the pot and place in the colander.
          Once all of the curds are in the cloth, gather the corners of the cloth and tie together. Hang the cloth over the container for the whey or sink depending on your preference. I have found a wooden spoon under the knot in the cloth works. You can then place the spoon over a cupboard door handle, or tie some string around the knot and hang that way.

If you are using molds: 
            Place the molds on a rack over the container to catch whey.
            Gently scoop the curds from the pot and place in the molds.
            When you have used all the curds, place the molds together on the rack and cover with a clean dish towel. 
Picture
Allow the curds to drain for 4 - 12 hours.  Four hours will give you a very soft spreadable cheese; 12 hours will give you a texture closer to cream cheese. start checking the texture at four hours and unmold when it reaches your preferred texture. After a couple of batches, you will have a good idea of the time frame for your cheese.
Picture
Once you reach your desired texture you can add herbs if you wish, either
by stirring herbs through or rolling the cheese in a herb mix. (Think cracked peppercorn).

Your cheese is now ready to eat.  It will store for a week in the fridge or can be frozen. If you are going to freeze it, add salt to taste after it is done draining.
Picture
Yum! A slightly crumbly, yet still spreadable cheese. Mixed with some dried cranberries add some slivered almonds on top and you have a yummy dessert.
0 Comments

Our Plans For the Farm

10/9/2014

0 Comments

 
It occurred to me today that while I have spoken often of parts of our plan for Hand-Forged Farm I have never really laid out the entire plan for you. Today you get the full vision!

We first and foremost are a working homestead / farm. We will continue to produce fresh healthy food for ourselves and the community. The structure for the market garden is being put in place this fall, so that we will begin selling produce starting in the spring of 2015. The first greenhouse will be completed late this fall. We will be offering a limited amount of CSA memberships next year and expanding as we bring the garden to full size the following year.

The garden also serves as a valuable teaching tool for those who want to learn the skills required to produce their own food. From WOOFER,s who stay for the season, or part of the season; to workshop participants who come for a weekend to learn a specific set of skills. There a few more plans that will revolve around the garden, but those details will need to wait for now.

The barn will grow also, to start with Gary wants to run 2 sows and a boar. We are on the hunt for a Tamworth gilt, he might also consider a Duroc. The pigs will continue to feed our family and local community. We will continue to sell weaner pigs but will also be raising more of our pork for sale. Gary is finally happy with the system he has worked out for growing sprouts as fodder and is now producing well over 100 lbs a day summer and winter. The animals are all doing very well on them and we are ready to expand. Keeping more pigs will also allow more hands on experience for those who want to work with pigs.

I want to build up the goat herd to six milking does, This will provide enough milk for our family's needs and my soap making. Again, the expansion will allow for more hands on workshops and teaching opportunities.

There are no concrete plans for cattle at the moment, but I have a feeling one or more of the boys may have plans in that area. This would be at least 3 years out right now.

Herbs are also an integral part of the plans. There is going to be a large herb garden which I will use for our medicinal herbs. I plan to use our homestead as a venue for herb walks and wellness retreats and workshops. We plan to bring in other teachers and leaders to give workshops; herbal weekends are a great place to start.

A new orchard of apples, pears, peaches and cherries is going to be planted next spring. Between the garden and the orchard, we will need a few more bee hives. I am planning at least 1 workshop next year for introductory beekeeping.

We have a food forest planned for an area close to the ridge line on the property, and I am working hard to bring a permaculture design course here in late next year or early the following year. Accommodations for WOOFERs round out the plans on the drawing board for now.

Whew!  When I write it all out it sounds almost impossible; but when I look back at what we have done in the past year I know we will bring it all together. It is what we have always wanted to do. We could just build up our property and become almost self sufficient, but we have always wanted to share our knowledge as well as learn from others. For us that is the only way to really become self sufficient... by being part of a self sufficient community.

Humans were not meant to function in isolation, a strong community of people with varying skills and abilities is the basis of any healthy society. We have, for the most part, lost sight of that fact. It is our intention to work with as many like minded people as possible to change that. The oft quoted "be the change you want to see", message is alive and well here at Hand - Forged Farm, and thank you for being along for the journey.
0 Comments

How To Tuesday: Blueberry Pie Filling

9/9/2014

0 Comments

 
We are back in the kitchen today, I am so far behind! Today I'm going to be
making a supply of blueberry pie filling for all the men in my family. I am not
a huge fan of blueberries but all my guys LOVE them, so I make blueberry pies. We only use wild blueberries around here, but I have friends who have used this recipe with highbush blueberries and it translates very well.

Ingredients:
5 cups blueberries.                    '  1 1/2  Tablespoons lemon Juice
3/4 cup of sugar.                          1/2 teaspoon cinnamon
1/4 cup clear jel thickener * .         1/4 teaspoon nutmeg
1 cup water 
Picture
It is helpfull to have your jars sterilized and ready to go before you start making this pie filling, it doesn't take long to cook and it needs your undivided attention while it is heating.

Just a note on the clear jel product, I tried it last year and have been pleased with the results. I use it only on pie fillings I am canning, if I am making pie from fresh product I don't use it at all. I especially like it for apple pie fillings. Last year was the first time I canned apple pie filling, we used to just procees the apples and measure out enough for a pie and then freeze the apples. In the interest of decreasing our reliance on the deep freeze, I am canning pie fillings. If you do not have the clear jel product, you can use a mixture of 4 Tablespoons of water and 4 Tablespoons of cornstarch for this recipe and omit the 1 cup of water

1. Wash your blueberries and set aside.
2. Place the sugar, water and clear jel in a pot, make sure you have the cooking version of clear jel, not the instant.
3. Slowly bring the mixture to a boil, stirring constantly.
4. Once the mixture begins to thicken, add your blueberries, spices and lemon   juice.
5. Continue heating until mixture begins to simmer.
6. Allow mixture to simmer for two minutes, then pour into sterilized jars, leaving 1/2 inch of headspace.
7. Place lids on jars and process in a hot water bath process for 15 minutes.
8. Remove jars and allow to cool, check seals and label including year.

This recipe will make 2 - 500ml jars of pie filling and you can easliy double or triple it.  Around here the guys eat it on cheesecake, and ice cream in addition to pies and tarts. It should keep for two years, but I have never been able to put it to the test!
Picture
Enjoy your blueberries everyone!
0 Comments

Comfrey, Beyond The Medicinal

8/9/2014

0 Comments

 
Picture
I'm back! I don't know what I picked up but it was a nasty little bug that
has made me more ill than I have been for a few years. It is still hanging
around, but I am able to function today. Thanks to everyone who sent emails and left comments, they made me smile! Now lets get back to work!

You know I love comfrey for it's amazing medicinal properties. I have comfrey salve, comfrey infused oil, dried comfrey and comfrey tea in my house at all times. I use it on myself, my children and my animals. I think comfrey has erroneously been labeled as dangerous by well intentioned people who are basing their decisions on fairly sketchy data.involving high quantities of comfrey and comfrey root taken internally. When I speak of comfrey being safe I am speaking of using it externally. There are times when comfrey works very  well internally but this should be done only under the  direct supervision of a naturalpath  or skilled herbalist. Unfortunately, comfrey has been labeled as dangerous in all forms and this frustrates me as there is little to no data that has proven the topical use of comfrey causes liver problems or cancer. 

Comfrey can be dangerous, it contains pyrrolizidine alkaloids, they
will damage / destroy your liver. You would have to eat several pounds of
comfrey leaf or drink litres of comfrey tea everyday to reach the levels used in
the studies that are quoted when the powers that be decided to ban comfrey. Used topically and responsibly, comfrey is a valuable medicinal herb. If you want more information on this you may wish to read this article by herbalist
Henriette Kress

www.henriettes-herb.com/faqs/medi-2-15-comfrey.html,

Today I what to share the other uses of comfrey with you. Anyone
who has studied permaculture has heard this all before and hopefully is
utilizing comfrey to its absolute maximum on the homestead. Today I want to look at comfrey's role as a fertilizer, a soil aerator, nutrient buffer and livestock feed supplement. Lets get started!
 
First of all the basics, comfrey is a herbaceous perennial herb which originated in Europe. It is a large plant, over four feet if left untrimmed is not unusual in my garden. It has large rough, hairy leaves. The stems are also hairy and become tough and fibrous if they grow through the season without trimming. The plant is hardy from zone 4 to 9 and will go dormant during the cold weather. Comfrey has a large taproot which supports a large network of smaller roots. The plant will grow in full shade to almost full sun. In my personal experience it does best in dappled shade, but I have grown it in all conditions. Comfrey prefers a moist soil, but it  will make do with most conditions.
 
Comfrey is fast growing and I can usually have the first harvest of leaves in mid spring before my tulips have finished blooming. The last harvest will be well into October. These large leaves make excellent fertilizer. You can chop and drop the entire plant, cutting approximately 2 inches above the soil, or harvest the leaves and move them to the area you wish to fertilize. With it's large tap root, comfrey is a dynamic accumulator, pulling nutrients and minerals from deep in the soil and making them available through the top parts of the plant. To access this nutrient store you can use the  leaves and stems as simple mulch or they can be chopped in pieces and incorporated into the soil. Plant parts can also be soaked in water to make a liquid concentrate fertilizer. I like to take that first harvest of plant top in mid spring to make this concentrate. That way it is ready just when I want to start fertilizing the garden in early June.
 
To make this concentrate, harvest a quantity of plant top, leaves and or stems, roughly chop and place it in a water proof container. This can be a 5 gallon bucket or a 45 gallon barrel, depends upon how much you have and how much
you need. Place a weight on top of the plant material to keep it submerged, and cover with water. Place a lid or cover on top of your container and set it in
the sun for three or four or more weeks. Check on it after three to four weeks;
be prepared: IT STINKS!  I mean putrid something crawled in there and died
stinks. (don't say you weren't warned)  You will know it is done when it is a
dark, thick liquid. This is your liquid concentrate fertilizer. Mix this with
water at a ratio of 1:12 Twelve parts water to one part concentrate. Use
gloves, that smell likes to linger. This can be applied to plants as you would
any other liquid fertilizer.
 
Using comfrey as a soil aerator is very effective due to that substantive taproot but can be a tricky process. Tricky because comfrey propagates from root cuttings. Any piece of root left in the ground can grow into a new plant. If you choose to use comfrey in this manner, I recommend planting smaller plants and leaving them in place for only one season max. This is best used if there is an area you want to turn into garden but it is extremely compacted, the best example I can think of is a consult we did for a couple who needed to remediate a piece of land that had been used as a driveway by the former owner of the property. In that  particular case we recommended comfrey be left in place for two years. It did a remarkable job on that particular piece of land. They did have several plants appear over the first two seasons after the plants had been dug  up but they were easily removed as they started coming up.
 
When designing farms, especially small farms and homesteads, nutrient
runoff is always an issue. It has taken up a great deal of planning time here on
our own homestead as all of our gardens pastures and barns are uphill of the
house and well. Comfrey is in our plan to help with any possibility of runoff here This involves planting a double row of comfrey plants, on a slightly raised bed, on contour, below the barns. We have placed manure storage area on the other side of the property from the well, and any runoff from here will drain to the swale we put in this spring. By planting the double row of comfrey on the slightly raised bed we should be able to negate any nutrient contamination of our drinking water, and be able to return that nutrient back to the fertility cycle of the homestead by using the comfrey for fertilizer.
 
The final use of comfrey I want to talk about today is as an animal feed. Only feed the above ground parts of the plant. The PA's are in highest concentration in the roots.  Dried comfrey regularly tests out between 24 - 31% protein. This is higher than soybean and alfalfa. The leaves are also high in Vitamins A,C, and B12. Comfrey makes a high mineral, high protein low fibre feed: as
such it should be considered a feed supplement as opposed to a feed in itself.
Our rule of thumb here is no more than 10% of a total ration is to be
comfrey. The palatablity of comfrey varies from animal to animal. The pigs usually take to it the best, eating both fresh, wilted and dried plant. Chickens tend to only find it attractive when it is dry or near dry. Our goats are all over the map, some like it in any form, some won't touch it unless it is dried and offered in the middle of winter. I am a firm believer in the theory that animals have an intrinsic knowledge of what their bodies need and will actively seek it out;so the goats that only touch the dried comfrey in the winter makes absolute sense to me. There have been multiple studies related to feeding animals comfery. Most were  conducted in the UK, particularly during WWII and the decades after. A  particularly good book which looks at various uses of comfrey and  feeding comfrey to animals is:  Comfrey, Past  Present and Future by Lawrence D. Hills. I recommend it to anyone who really wants to utilise comfrey on their homestead.

So you can see there are numerous ways to make comfrey work for you on your homestead. I hope you will look at ways to utelise it in your system. Do some research, find your application. That is what homesteading is all about!
Have a great day everyone!


0 Comments
<<Previous
    Picture
    A  4-H Family
    Lives Here

    Receive inspiration and information for your homestead several times a week

    * indicates required

    Author

    Hi! I'm Shelli Killen,
    a homesteading, homeschooling, wife and mother of five. 

    I am a student  herbalist with a passion for learning and a  habit of bringing home strays.

    I love music, and the power of creating things with my hands.
     
    I tend to do best when life around me is organized chaos
    .

    RSS Feed

    Categories

    All
    Bees
    Canning
    Chickens
    Economy
    Gardening Vegetables
    Goats
    Herbs
    Hobby Farming
    Homesteading
    Homesteading Skills
    House Management
    Lifestyle Planning
    Pigs
    Self Reilance
    Self Sufficiency

    Archives

    December 2014
    November 2014
    October 2014
    September 2014
    August 2014
    July 2014
    June 2014
    May 2014

Powered by Create your own unique website with customizable templates.