Hand-Forged Farm
  • About Us / Contact

Heating With Wood

28/10/2014

0 Comments


Hi everybody, well I am back! Last week is officially one of the worst in recent memory; in fact, the last few weeks have been rough. If I look back things started to go off the rails around the last week of September which happened to coincide with the last new moon,  so I was really pleased to see the cycle end late last week.

To give you an idea of how bad last week was Monday morning started off when Jason, (child number 4), called and began the conversation by saying " I'm out of the hospital, and I'm OK...." fellow parents breathe deeply. He was working on his girlfriend's car late Sunday when he was removing the blocks the jack slipped and he was pinned by the partial weight of the car. He is going to be OK. He has torn cartilage in his ribcage and lots of inflammation around his spine. I wasn't able to see him until Saturday so no matter what I tried to do last week I just couldn't focus. I couldn't sleep every time I tried to think I just kept seeing him trapped. Sometimes being a very creative visual person just doesn't work! Add to that continuing computer issues, front axle car trouble and a weather system that turned the homestead into a post-apocalyptic landscape and I have never been so happy to welcome Monday. 

That's enough whining, on with the week.

Today is Tuesday and in the spirit of How to Tuesdays, I thought I would talk about heating with wood. It was cool and damp here last week and that meant time to fire up the wood furnace. We do have a wood furnace in the basement, it heats via a hot air system. Not my first choice and the long term plan is to install a wood cookstove which will heat the house and our hot water, but this will not happen until next fall at the earliest. We do use the wood furnace exclusively.

There has been a lot of talk about wood heat not being sustainable and about the carbon effects of burning wood for heat. My position is that if you manage your woodlot properly, then wood heat is carbon neutral. It is certainly better than oil, natural gas or coal. (Coal being burned to supply you with electric heat.) There is also a lot of misinformation on the safety and efficiency of wood heat; but again if you do it properly, wood heat is safe, efficient and cheaper than most other fuels available.
Picture
So, what is the "proper" way? Well there are as many opinions on that as there are people who have ever attempted to make a fire. We have used wood either partially or exclusively for heat for the almost 30 years that we have been together, and there are five questions that always come up when we talk about heating with wood: how much wood will I need, what is the proper way to start a fire, what kind of stove do I need, what about insurance and what type of wood is best?  While most of the answers start with "it depends", I'll try and make a dent in them today.

First insurance, it annoys me to no end that if wood is your only source of heat you are going to have trouble getting insurance. This explains the pattern we see around here of new houses equipped with electric baseboard heaters. They are cheap to put in and cover your backside for insurance purposes. Unfortunately, when people buy these houses and don't want to heat with wood they end up selling their souls to Nova Scotia Power in order to keep warm. For those who aren't blessed with that particular entity in their lives, my most recent power bill tells me I am paying a base charge of $10.83 a month and $0.14251 per every kilowatt hour I use; and don't forget to add the 15% harmonized sales tax. You can understand my desire to get off the grid. So if you have an existing heat source other than wood, don't remove it. I have a friend who bought a house that had an old oil furnace in the basement, the tank had been removed but because the furnace sat in the basement they were able to install a beautiful Pacific Energy stove and use it to heat their 1200 square foot home with wood and keep their insurance. I am sure individual cases will vary but if you are building or renovating it is worth it to check with your insurance broker.

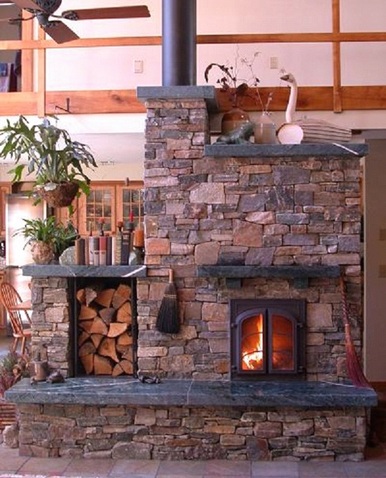
The next question is what size and type of stove do I need? This will depend upon the size of your house, how much insulation it has, what your climate is like and why you want a stove in the first place. There are many types of stoves and other ways to heat with wood. If I was building from scratch, and had a sizable budget I would build my house around a masonry heater. Masonry heaters work on the principle of heating a large thermal mass and then allowing that heat to radiate back into the living space. This is the same principle behind rocket mass stoves, just on a larger scale. They tend to be the most efficient way to heat with wood and certainly give off the most even heat from wood. Most masonry heaters are extremely heavy and require beefing up of foundations. If you are looking for supplemental heat and emergency heat in case of a power outage then an airtight wood stove is probably the best option. There are multiple brands on the market, my personal preference is for the Pacific Energy brand. That said, it has been a few years since I did any research into this type of stove so there may be better ones out there.

Do your research, manufacturers list the stats for each model including btu's and square footage recommendations. These should be treated as fuel milage ratings on new cars, they represent the optimum when the unit is operating at peak efficiency; and for wood stoves this means burning at full draft with dry hardwood. This is not how most people use wood stoves.
Picture
Photo credit http://www.inspirationgreen.com/masonry-heaters.html
​We have decided to install a wood cookstove. We want the stove to be our main source of heat and to use for cooking as well as hot water, a cookstove will allow us to do all of these things. Just a note on buying a used stove, you can get great deals on stoves but be warned, if you want to install it in your house, it will need a CSA tag on it. I'm not sure about US regulations. If you are looking at a used stove and have determined that it does have a CSA tag, you need to be most concerned with checking for cracks in the firebox. Things like dirty or broken glass and missing or bad door gaskets are easily rectified. In fact, if you are going to have a wood stove you should be prepared to replace the door gaskets every year at least.

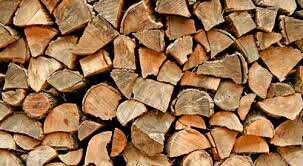
So you have the stove and the chimney installed, what to burn? If you are purchasing firewood, ask friends and acquaintances for recommendations. There are many great people selling firewood but there are also not so great people selling firewood.  Know what you are buying. Most firewood is sold by the cord. A full cord of firewood, when stacked, will measure 8 ft X 4 ft X 4 ft. I have found that the closer you get to suburbia the more likely you are to find people selling "face cords", face cords are 1/4 of full cords when you stack it will measure 8X4X1.

If you are handy with a power saw ask about getting eight-foot lengths; suppliers will usually give you a deal if they don't have to cut and split the wood. Ask if the wood will be cut and split, this is not a given.

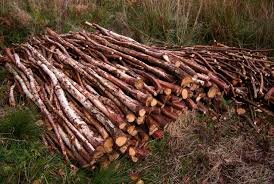
You are looking for hardwood, species like maple, oak, birch, and ash. The denser the wood fibers the longer and hotter the wood will burn. Hardwoods also burn cleaner. Softwoods like spruce, fir, and pine, especially if not properly dried, will have resins or sap. When this sap burns it gives off black smoke. This smoke is full of creosote, creosote sticks to the inside of your chimney and will catch fire. Wood that has not been properly dried, is referred to as greenwood. It is to be avoided at all costs. It has high moisture content and therefore does not burn well. You will get much better heat, efficiency, and safety from dried hardwood. Wood you will be burning this winter should have been cut last winter, older is fine. We cut firewood in the early spring and let it dry until early fall. If you moved to your homestead in the summer and plan to harvest your firewood from your own land, look for standing deadwood, trees that have died but remained standing or deadfalls, trees that have died but were caught in branches of other trees as they fell, keeping them from hitting the ground. Both of these will be suitable for burning. It will put you much farther ahead to start with dry wood, even if you have to buy your wood for the first year.  
Picture
Picture
When harvesting wood from your land, learn about coppicing trees. When you cut a hardwood tree during its dormant phase, it will send up 'shoots' the next spring. These shoots will grow into great firewood in a few years, by learning to tend and manage your woodland you will provide yourself with a completely renewable energy resource that will keep you warm for years to come.


How much wood do I need? The answer to this is impossible for me to say. Even if we had identical houses on the same road it would be impossible to say. Square footage is a place to start, you must also take into consideration how well your house is insulated, how warm you like your home to be as well as the design of your house. A sprawling ranch style house will never be as easy to heat with wood as a compact Cape Cod-style house. How does the air move around your house? Will you be home during the day to tend the stove or do you need supplemental heat for when you are at work. If you have bought your property, you should be able to get a ballpark figure from the previous owners, it pays to err on the side of caution, having too much wood is better than having not enough, and it's not going to go bad, you can burn it next year. One other point, unless your house consists of one room directly over another, you will need a fan(s) to move the heat around the house. It is worth the investment to look at convection fans like the Ecofan.  

The final question I want to tackle seems somewhat silly to some people, but I have seen grown men argue forever about the proper way to start a fire! I have found it is usually men who have the view that the only way to start a fire 'properly' is their way. As if a fire started any other way will not burn as well??? There are many methods of starting a fire: grid and teepee, paper, no paper, it can go on for hours. The basic principles are all the same: you need a dry, easily combustible material such as wood chips, paper, thin bark, etc. You need a small stack of kindling, thinly split pieces of very dry hardwood, and they need to be arranged so that air will move around the individual pieces, yet touching so that the flames can spread. That is really all there is to it. Find a configuration that works for you and that is all you need. So while everyone else is arguing about how to start a fire, you can just go ahead and do it.

For the last word, I will refer you to woodheat.org  this site will answer any and all questions you might ever have concerning heating with wood.
​

Have a great day everyone, and stay warm!  
0 Comments

What's In Your Cleaning Supply Cupboard?

15/10/2014

0 Comments

 
Canadians spend roughly $300 million dollars a year on household cleaners. Most of these contain highly toxic chemicals that harm the environment, threaten the health of our pets, our children and us.

Current regulations do not require companies which produce and market these products to list the ingredients. Under the current regulations companies insist that this is proprietary information and would be detrimental to their corporations, read bottom line, to do so. So not only are we paying to poison ourselves and those we love, we are not even allowed to know what compounds we are doing it with. Some companies are now offering up ingredient lists, mostly buried deep on their websites, but it is worth having a look.

We have all seen the hazardous warning labels on cleaners, but think about the last time you actually had a good look at the array of bottles in your cleaning supplies cupboard. If you have not yet made the switch to natural cleaners I challenge you to open up your cupboard. Send the kids out to play and take all your stuff out of the cupboard and lay it out on your table. Have a good look at the labels, how many different warnings are there? How often do you use these products? Do you wear gloves or masks when you use them? How many say to use only in a well ventilated environment? How many list the ingredients?

Those hazard labels are for short term acute exposures, there is no requirement for companies marketing these products to tell you what kind of effects low level long term exposure will do to you or what effect this might have on the development of your young children. Since they do not have to report this most companies do not even test for this. Nor are they required to report, and therefore test, the cumulative effects of these products.

It is entirely possible to have exposure to a dozen hazardous chemicals between getting up and leaving the house in the morning. There is very little testing being done as to the health effects of this continuous low level exposure. When we use these products in our homes they "off -gas". This is due to a nasty little group of chemicals known collectively as VOC's. Volatile organic compounds.

According to the United States Geological Survey, 2005: "Many VOC's are human - made chemicals... They are often compounds of fuels, solvents, hydraulic fluids, paint thinners, and dry-cleaning agents commonly used in urban settings. VOC contamination of drinking water supplies is a human.-health concern because many are toxic and are known or suspected human carcinogens"

VOC's form particulate matter and react with nitrogen oxides to form smog. In our homes these compounds linger in the air and we breathe them in. If your product has a fragrance you are breathing in VOC's. New car smell, new carpet, plastics, fresh paint and my personal pet peeve: air fresheners? All of these are off gassing VOC's. Research into VOC's has found an increase in leukemia and lymphoma rates linked to prolonged exposure of VOC's in the indoor environment.

If this blog does nothing but make you ditch those poisonous, toxic fragrances marketing has made you believe you need I will be a happy camper. As far as I am concerned, those behind Febreeze, Air Wick, Glade and anyone who pedals paraffin candles with synthetic fragrances should be taken out and shot.

As I said yesterday, I began actively trying to purge our home of toxic chemicals back in 1993. If you had asked me in 2003 I would have said we had a relatively toxic free house. Then came Gary's accident.

One of the most debilitating long term aspects of his injury is the environmental illness he has. He has no tolerance for VOC's. Just walking into any Canadian Tire store will give him a migraine for a day or two. The man can smell the school bus coming. This has become a major factor in our lives. It dictates where we live, everything that is brought into this house needs to be assessed. VOC's have become such a ubiquitous part of North American life style that even when we think we are culling them they are there.

Unfortunately, VOC's are not the only culprit in this chemical warfare. The chemicals in these products absorbed through the skin and ingested as residues on our dishes and through household dust.

My top three avoid at all costs ingredients are:

Triclosan
This product really pushes my buttons. Triclosan is the antibacterial component in the plethora of antibacterial products on the market today. It is toxic, the European Union lists it as an irritant to the eyes and skin. It is a suspected endocrine disruptor and is very toxic when it enters aquatic environments. It can also react with other compounds in the environment to form dioxins. Dioxins are bio accumulators, meaning they persist and concentrate as they move through the food chain, and are a known carcinogen. They are also suspected in the rise of antibiotic resistant microbes. The Canadian Medical Association has called for a ban on all antibacterial products.

Triclosan is found in dish soaps, disinfectants, sanitizers, deodorants, liquid hand soaps, laundry soap, tissues, mouthwash, toothpaste and antiseptic ointments. It is also impregnated into plastics for garbage bags, children's toys, babies teethers, high chairs, mattresses, toilet seats, clothing and furniture.

Fragrance and Parfume. Such a harmless sounding words. There are currently over 3000 chemicals which come under the heading of fragrance, most of them are petroleum based. Even products labeled as scent free usually contain fragrances, but they also contain parfume. Parfume is a nasty little beast. it's only function is to inhibit our brains ability to detect scent. Think about that for a minute. Most of the compounds included in the fragrance category have little testing. Manufacturers argue that since there is such small amounts in each product they pose no health concerns. Fragrances, and lets be specific, synthetic fragrances, are the most common trigger of asthma and allergic symptoms. A 2002 study on fragrance compounds suggested that exposure to perfumes and colognes can; "exacerbate asthma, and perhaps even contribute to its development in children."There have been several laboratory studies which indicate a link between individual fragrance compounds and cancer as well as neurotoxicity. Environment Canada has categorized several synthetic musks as bioaccumulative, and/or toxic, and persistent and to human health. Measurable amounts of synthetic musk has been found in the fatty tissues of fish in the Great Lakes, amounts of these compounds found in the sediments of the lakes are also rising. Fragrance and Parfume are found in almost everything. Sodium lauryl sulfate (SLS) and sodium laureth sulfate (SLES) These 2 compounds are why I began making my own soap and consequently sent me on the path to becoming a herbalist. There is a lot of things wrong with these compounds, however there is also a lot of erroneous information on the Internet about these compounds. Lets have a look. SLS and SLES are found in anything that makes suds. They are degreasers found in everything form baby wash to floor cleaners marketed to automobile garages, obviously in different concentrations. Both compounds are well known skin irritants. They are damaging to skin and mucous membranes. They have been found to strip the outer layers of skin and mucosa cells. Especially the mucosa of the mouth when SLS and SLES are present in toothpaste and mouthwash. It is important to remember that concentrations in household cleaning products will be higher that in cosmetic/ personal care products. The link to cancer and long term damage is less clear. Most likely because there have been few studies to look at the effects. What is well documented is the presence of known carcinogens 1,4 dioxane and ethylene oxide in SLES, and nitrosamines in SLS 1,4 dioxane and ethylene oxide are a result of of the manufacturing process used to create SLES. As these carcinogenic compounds are byproducts of the chemical reaction, under law they are not ingredients. So even though they are known carcinogens and present in your baby shampoo, they do not need to be listed as ingredients. The Center for Disease Control describes 1,4 Dioxane as"probably carcinogenic to humans," toxic to the brain and central nervous system, kidneys, and liver. It is also a leading groundwater contaminant." Nitrosamines are carcinogens which cause your body to absorb nitrates, which are known to be carcinogenic. The nitrosamines are a result of contamination of the SLS during manufacture. The contamination can be one or many of multiple of chemicals. Given the vast number of products containing SLS there are literally millions of possible combinations of chemicals which could result in the presence of nitrosamines. The manufacturers will tell you that the amounts are so small they do not pose a health risk, however we have to consider the cumulative effects of all the products our bodies are exposed to on a daily basis. Ultimately, if there are alternatives, why would you choose to play chemical roulette with the health of your family? I know this has been a long post and somewhat of an information overload scenario. This is a subject I am passionate about, and I tend to get a little 'preachy' when I stand on my virtual soapbox. Take some time to read, or re-read the information I hope it is a jumping off point for you to do your own research. As always the comments and my email are open for questions. I don't know if I will have a post tomorrow. I had one written but it is lost in this ancient computer of mine. I have to decorate the hall for the Digby County 4H awards dinner tomorrow. I think I also have to take Miss Avril to visit the breeding buck tomorrow and I believe it is the day to go and pick up feed. I will make every attempt to get the post out for you! Have a great day everyone!
0 Comments

A Case For Homesteading Day...

23/9/2014

1 Comment

 
Picture
Happy First Day of Fall! I know not everyone welcomes fall like I do; you know who you are, those of you who see fall as a harbinger of winter. Cold long Canadian winter. Now I am not a huge fan of winter. I enjoy it probably up until late January and then it starts to wear on me. Thankfully that is just  about the time the seed catalogues start to arrive; so sanity saved.

Fall, or autumn as one of my grade school teachers tried to drum into me, fall is my favourite season. It is the time when all our hard work on the homestead surrounds us, the jars of canned food and medicine, the freshly butchered chickens and pig in the freezer the root cellar brimming with squash, turnip, carrots, apples and potatoes. The weather is amazing, warm days and cool crisp evenings, the first aromas of woodsmoke in the air. Mother nature's beautiful colour display, snuggling into cozy sweaters, having time to think as the workload slows down to a mangable 70 hours a week.  Fall is time to sit back and enjoy your family friends, all your hard work and most importantly, the beauty surrounding you everywhere you turn.


I think we should turn the first day of fall into Homesteading Day. Doesn't matter if your entire harvest is three bottles of jam in your closet! You are a homesteader at heart and you are well on your way simply because you have done something! There are many people out there who share your dream of the house / farm in the country  who haven't done much but dream: but you actually did something, You canned three bottles of jam, you took the time and money to purchase your supplies, you read up on how to make and safely can your jam, then you did it! That hot, humid Saturday while the other people took a drive in the country in their air conditioned cars dreaming about which property they will have "someday", you stayed home canning jam and becomming a homesteader.
So for you and everyone else who is living the homesteading life, Today is our Day! 
 
Join me in celebrating the first International Homesteading Day!

We will be celebrating by butchering 15 chickens, how will you celebrate?

1 Comment

The Last Full Week of September...

20/9/2014

0 Comments

 
Hey Everybody, well it has been another crazy week here at the homestead! The push is on to get everything done as we feel fall closing in. It really is a weird September, we have had frost for the past two nights now, we were lucky to escape the snowfall they had out west,  but the cold mornings are a hurry up and get it done kick in the pants; and the forecast for tomorrow is calling for close to 2 inches of rain.

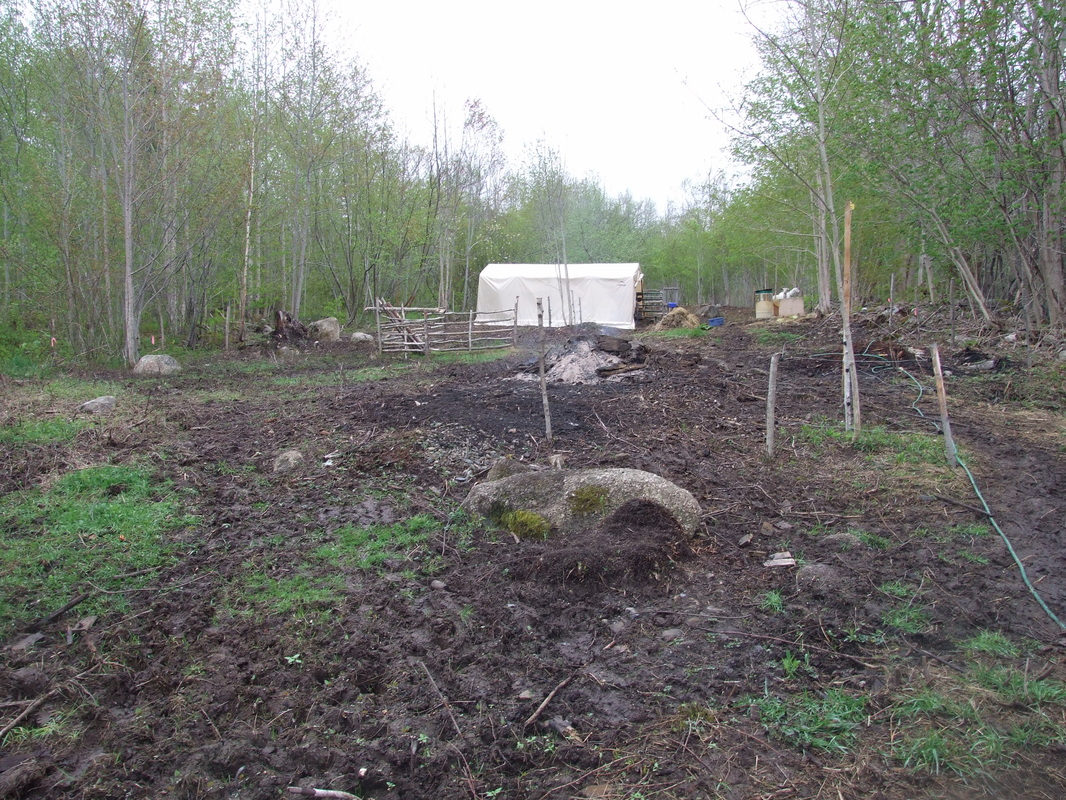
 The guys have been busy getting the garden ready, they have moved close to half a ton of rock, by hand, away from the new garden. There was an old  foundation smack dab in the middle of where the garden needs to be, the pigs did  a great job of rooting up the rocks so they were close to the surface. KillWilly in particular loves tossing rocks around. The lower bed is leveled and Gary will be taking the rototiller, aka the beast, in there within a day or two to incorporate the manure from the pig yard. Then we will be planting garlic next week. We haven't received the Siberian variety I ordered from Vesseys yet, but it should be here soon and we have our own saved seed to plant. I was hoping to be able to plant a covered crop of buckwheat in the garden that we could till under come spring, but with  the cooler weather coming early I think we are going to end up just mulching heavily with old straw or hay. This is what the pasture looked like on May 20th of this year:
Picture
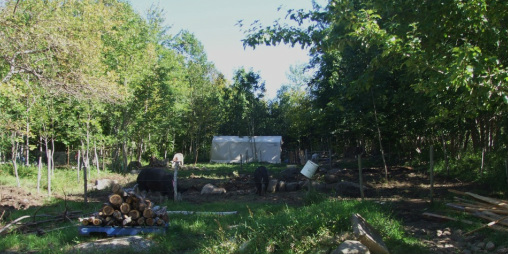
Then on Labour Day weekend after the pigs had been there for a few days:
Picture
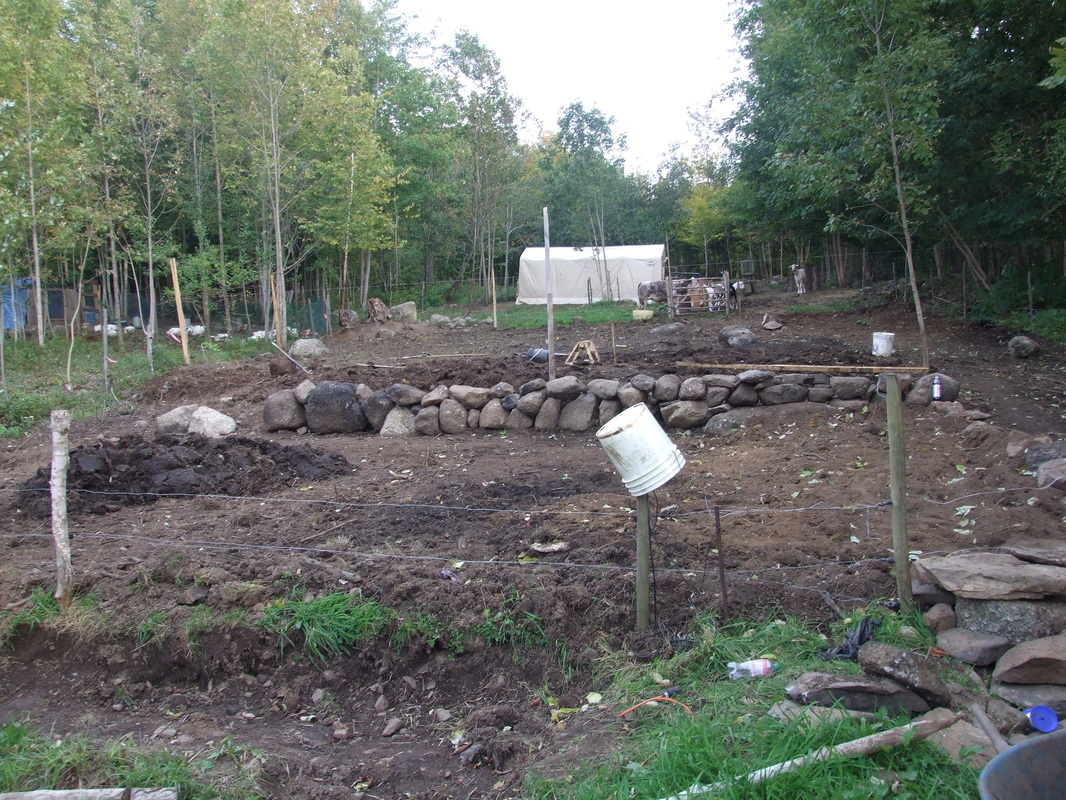
Now today, the first terrace, closest to the camera, is leveled and just waiting for the manure to be worked in.
Picture
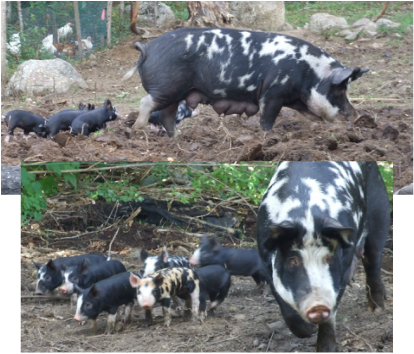
Speaking of the pigs, Patches has been bringing her latest litter out foraging
this week. They were born on the first, so she is keeping to the same schedule
she always has. They are starting to eat from the creep feeder, but had a great
time running around and pushing up dirt with their snouts! There is nothing that
is as hysterical to watch as a little piglet trying to catch a grasshopper. I
could watch them all day!
Picture
The doorframe for the new basement door arrived yesterday, so we should get that in next week. Then we can start closing up the basement at the back of the
house. That is going to make a huge difference in the amount of wood we burn
this winter, it is also going to make it easier to keep the basement at a steady
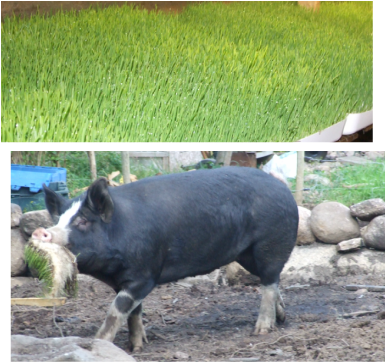
temperature for sprout production. After a year of experimenting Gari is producing well over 100 pounds of fodder a day and we want to double that for the winter! I have been busy putting together a guide to growing fodder, we are producing all this feed, winter and summer, on a set up which cost less than $150.00 to put in place. And it saves us somewhere around $300 a month in feed costs!  The animals love to get their fodder everyday.
Picture
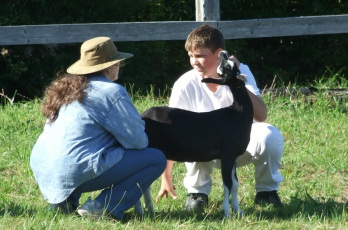
The other preoccupation around here this week is getting ready for 4H Pro-show. This is the huge provincial show for all the top qualifiers for kids from 4H  clubs all over Nova Scotia, Reiley is showing both Ivan and Pepper next weekend. He was supposed to show both animals in conformation and showmanship but there was an overlap in the schedule so he had to choose between beef and goat for showmanship and has decided to show beef. So pepper will only be shown in conformation class. Reiley is also taking one of his wood working projects, and  will be competing in the beef and goat judging classes also. It is always a  crazy busy weekend with kids running on too much sugar and caffeine with too  little sleep, (barns open at 5:30 Saturday morning) and we wouldn't miss it for the world.
Picture
So, next week is garlic planting time, I may set up a couple of cold frames in the new garden and plant some greens just to give us a bit of an extended season. The tomatoes have all succumbed to late season blight so they
need to be hauled out and burnt, the heavy frost last night has finished most of
everything else off so a clean up in the garden is necessary. It is also time to
get the bees ready for winter. I will be opening up the hive and checking on the
amount of honey they have, insulating the unused portion of the hive and the
top. I am hoping to be able to remove those two plastic frames from the original
nuc which gave us such a headache in July. I don't anticipate harvesting any
more honey this fall. I would rather leave the honey there for winter stores
than have to start feeding them in March.  I am also going to be testing the soil in the new garden beds and  figuring out what amendments need to be done. It is easiest to do these in the fall and  I will  have a post next week about this topic.

 So the final full week of September, chores in the garden as we take most of the last of the harvest from the garden, there is still a lot of canning and preserves to put up, apples to can for applesauce and pie filling, pumpkin and some squash the rutabagas will need to be canned and I need to put up some more blueberry. On the herbal side I am drying sage, thyme and basil. I will be
potting up the cuttings I have for the herb "window" in the kitchen; rosemary,
basil and chives. The mint, lemon balm and othe tea ingredients are drying nicely. I will be attending the Christmas Craft Sale at the Digby Elementary School the last weekend in November. I will have a wide assortment of soaps and herbal products there as well as some of my silver wirework jewelry. Lots of fiddley things to get ready for a craft show.
I am also in charge of decorating the rental hall for Digby County 4H awards night on the 17th of October, (how do I get myself into these things?). I want to join the Exhibition Committee so the first meeting there is October 1st and I have just started working to try and resurrect the Digby Farmers Market for next year. On top of that Reiley needs to start schoolwork, There is painting to be done inside, the pantry and 1/2 bath to gut and build new, the regular 4h meeting schedule to start up again..... I think I need to lie down now.

I have always been uber organized, you have to be with five kids all going in different directions. This past year being here with just Gary and Reiley I have kind of let things slide, time to pull up my socks and get things running again. Honestly the busier I am, the more I can get done. Firstly I have to get the house running on it's schedule again. If you have a set schedule for your house, monthly meal plans, who cleans what and when; it frees up so much time. It was how I went back to school with four kids aged 4 - 10yrs. Not only went back to school full time, but  took a part time job as tutor and lab instructor in the nursing program, maintained a 3.95 GPA and kept the kids going to Girl Guides, gymnastics, karate, soccer and public school all while Gary was working 70+ hours a week and managed to meet the target of family meals at the table a minimum of 5 days a week. Yes I had a lot of support from Gary but the organization I had built into our routine made it possible. I have let it slide, time to get it back! Have a great day everybody! ( Remember to breathe!!)

0 Comments

Cranberry, More Than a Side Dish...

18/9/2014

0 Comments

 
Picture
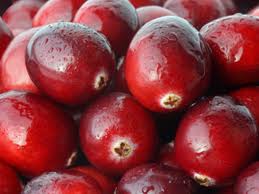
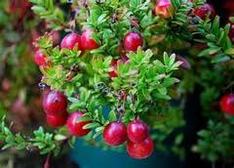
For most of us it is relegated to a side dish for Thanksgiving and Christmas dinner, from a herbalists perspective it is a powerful antioxidant, anti-inflammatory, and possible cancer prevention tool. The American cranberry,
Vaccinium macrocarpon, is an evergreen shrub growing to 6 ft . It has small leathery leaves and can be found growing in bogs and wetlands from zones 3 through 7. The information in this article refers to American cranberry, not the various high bush cranberry, a vibernum, also known as crampbark, found in nurseries today.
  
Cranberry has traditionally been used as a treatment for urinary tract infections, (UTI). For many years it was believed that the high acidity of the cranberry lowered the pH of the urine thereby making the bladder a less hospital environment for the bacterium which causes UTI's. In recent years however, scientific studies have shown that the structure of the proanthocyanidins, (flavonoids), actually block the bacterium's ability to attach itself to the lining of the bladder. Researchers are now studying this evidence to see if it could prevent stomach ulcers in the same way.
 
Cranberry has been shown to be a powerful anti-inflammatory, specifically
acting upon the cardiovascular system and digestive tract. The phytonutrients in cranberry that are especially effective in lowering our risk of unwanted inflammation, and virtually all of the phytonutrient categories represented in cranberry are now known to play a role by blocking the cytokines which tell our bodies to start an inflammatory response against against a perceived threat. Dietary consumption of cranberry has also been shown to reduce the risk of chronic, unwanted inflammation in the stomach, large intestine and  blood vessel linings. Therefore, anyone with an auto immune disease should benefit from an increase in cranberries in their diet. This cytokine suppressing ability in
addition to high fibre content  means that a high dietary intake of cranberries
will help lower your risk of atherosclerosis, plaque build up within the vessels
and lower your 'bad' cholesterol levels.
 
Nutritionally, cranberries are high in manganese, vitamin C and E and fibre. A 1 cup measure of cranberries, approximately 100 grams, will supply your body with 18%  of your daily fibre intake requirements. . We are all familiar with the pictures of cranberries floating on the water as farmers flood the bogs containing the plants. For years this harvesting method was done simply for convenience, it is much easier to use a boom to gather floating berries than
it is to try and pick berries from plants in soft boggy ground. Recent studies
have shown that anthocyanin, the phytonutrients that give the berries their amazing red color, increases  in direct proportion to the amount of natural sunlight striking the berry. So having berries floating on top of the water will actually increase the concentration of anthocyanins, making this humble berry even better for you.
 
So look for ways to incorporate cranberries into your diet, cranberry sauce
is easy to make from scratch: 3 cups of cranberries, 1 cup of water, 1 cup of
sugar and a dash of lemon or lime juice. Boil until the cranberries 'pop'. This can be eaten fresh or canned in a waterbath canner for 15 minutes.
Cranberries make a wonderful addition to pork dishes ad well as some of the
stronger fish dishes. Try some dried cranberries instead of raisins in your
snack foods and baking. As I mentioned in my post from Tuesday, dried
cranberries mixed in chevre cheese with slivered almonds sprinkled
on top is a favourite dessert around here. Cranberries freeze really well, I
always buy pounds and pounds of cranberries when they go on sale after Christmas and store them in the freezer. If you are lucky enough to live near a cranberry grower, find out if they have public tours, they are harvesting now and it makes a great day out with the kids!
 

Picture
**Please note. I am not a doctor. This post is not intended to diagnose, treat
or cure any disease. The information presented here has not been verified by
Health Canada.**
0 Comments

A little Sunday Op-Ed

14/9/2014

0 Comments

 
I just posted a little op-ed piece on the facebook page:

There has been a lot of buzz the past few weeks about the rise in beef prices both on the hoof and in the grocery, I have had a couple of clients contact me to ask what we thought about putting on some calves to background. I posted this on the farming in the maritimes group but I thought it needed repeating here:

  " Jumping into the cattle market now is ill advised. Especially with the glut of pork and chicken that is about to hit...

Read More...
0 Comments

Our Plans For the Farm

10/9/2014

0 Comments

 
It occurred to me today that while I have spoken often of parts of our plan for Hand-Forged Farm I have never really laid out the entire plan for you. Today you get the full vision!

We first and foremost are a working homestead / farm. We will continue to produce fresh healthy food for ourselves and the community. The structure for the market garden is being put in place this fall, so that we will begin selling produce starting in the spring of 2015. The first greenhouse will be completed late this fall. We will be offering a limited amount of CSA memberships next year and expanding as we bring the garden to full size the following year.

The garden also serves as a valuable teaching tool for those who want to learn the skills required to produce their own food. From WOOFER,s who stay for the season, or part of the season; to workshop participants who come for a weekend to learn a specific set of skills. There a few more plans that will revolve around the garden, but those details will need to wait for now.

The barn will grow also, to start with Gary wants to run 2 sows and a boar. We are on the hunt for a Tamworth gilt, he might also consider a Duroc. The pigs will continue to feed our family and local community. We will continue to sell weaner pigs but will also be raising more of our pork for sale. Gary is finally happy with the system he has worked out for growing sprouts as fodder and is now producing well over 100 lbs a day summer and winter. The animals are all doing very well on them and we are ready to expand. Keeping more pigs will also allow more hands on experience for those who want to work with pigs.

I want to build up the goat herd to six milking does, This will provide enough milk for our family's needs and my soap making. Again, the expansion will allow for more hands on workshops and teaching opportunities.

There are no concrete plans for cattle at the moment, but I have a feeling one or more of the boys may have plans in that area. This would be at least 3 years out right now.

Herbs are also an integral part of the plans. There is going to be a large herb garden which I will use for our medicinal herbs. I plan to use our homestead as a venue for herb walks and wellness retreats and workshops. We plan to bring in other teachers and leaders to give workshops; herbal weekends are a great place to start.

A new orchard of apples, pears, peaches and cherries is going to be planted next spring. Between the garden and the orchard, we will need a few more bee hives. I am planning at least 1 workshop next year for introductory beekeeping.

We have a food forest planned for an area close to the ridge line on the property, and I am working hard to bring a permaculture design course here in late next year or early the following year. Accommodations for WOOFERs round out the plans on the drawing board for now.

Whew!  When I write it all out it sounds almost impossible; but when I look back at what we have done in the past year I know we will bring it all together. It is what we have always wanted to do. We could just build up our property and become almost self sufficient, but we have always wanted to share our knowledge as well as learn from others. For us that is the only way to really become self sufficient... by being part of a self sufficient community.

Humans were not meant to function in isolation, a strong community of people with varying skills and abilities is the basis of any healthy society. We have, for the most part, lost sight of that fact. It is our intention to work with as many like minded people as possible to change that. The oft quoted "be the change you want to see", message is alive and well here at Hand - Forged Farm, and thank you for being along for the journey.
0 Comments

Comfrey, Beyond The Medicinal

8/9/2014

0 Comments

 
Picture
I'm back! I don't know what I picked up but it was a nasty little bug that
has made me more ill than I have been for a few years. It is still hanging
around, but I am able to function today. Thanks to everyone who sent emails and left comments, they made me smile! Now lets get back to work!

You know I love comfrey for it's amazing medicinal properties. I have comfrey salve, comfrey infused oil, dried comfrey and comfrey tea in my house at all times. I use it on myself, my children and my animals. I think comfrey has erroneously been labeled as dangerous by well intentioned people who are basing their decisions on fairly sketchy data.involving high quantities of comfrey and comfrey root taken internally. When I speak of comfrey being safe I am speaking of using it externally. There are times when comfrey works very  well internally but this should be done only under the  direct supervision of a naturalpath  or skilled herbalist. Unfortunately, comfrey has been labeled as dangerous in all forms and this frustrates me as there is little to no data that has proven the topical use of comfrey causes liver problems or cancer. 

Comfrey can be dangerous, it contains pyrrolizidine alkaloids, they
will damage / destroy your liver. You would have to eat several pounds of
comfrey leaf or drink litres of comfrey tea everyday to reach the levels used in
the studies that are quoted when the powers that be decided to ban comfrey. Used topically and responsibly, comfrey is a valuable medicinal herb. If you want more information on this you may wish to read this article by herbalist
Henriette Kress

www.henriettes-herb.com/faqs/medi-2-15-comfrey.html,

Today I what to share the other uses of comfrey with you. Anyone
who has studied permaculture has heard this all before and hopefully is
utilizing comfrey to its absolute maximum on the homestead. Today I want to look at comfrey's role as a fertilizer, a soil aerator, nutrient buffer and livestock feed supplement. Lets get started!
 
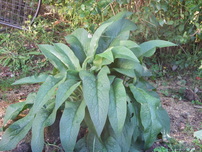
First of all the basics, comfrey is a herbaceous perennial herb which originated in Europe. It is a large plant, over four feet if left untrimmed is not unusual in my garden. It has large rough, hairy leaves. The stems are also hairy and become tough and fibrous if they grow through the season without trimming. The plant is hardy from zone 4 to 9 and will go dormant during the cold weather. Comfrey has a large taproot which supports a large network of smaller roots. The plant will grow in full shade to almost full sun. In my personal experience it does best in dappled shade, but I have grown it in all conditions. Comfrey prefers a moist soil, but it  will make do with most conditions.
 
Comfrey is fast growing and I can usually have the first harvest of leaves in mid spring before my tulips have finished blooming. The last harvest will be well into October. These large leaves make excellent fertilizer. You can chop and drop the entire plant, cutting approximately 2 inches above the soil, or harvest the leaves and move them to the area you wish to fertilize. With it's large tap root, comfrey is a dynamic accumulator, pulling nutrients and minerals from deep in the soil and making them available through the top parts of the plant. To access this nutrient store you can use the  leaves and stems as simple mulch or they can be chopped in pieces and incorporated into the soil. Plant parts can also be soaked in water to make a liquid concentrate fertilizer. I like to take that first harvest of plant top in mid spring to make this concentrate. That way it is ready just when I want to start fertilizing the garden in early June.
 
To make this concentrate, harvest a quantity of plant top, leaves and or stems, roughly chop and place it in a water proof container. This can be a 5 gallon bucket or a 45 gallon barrel, depends upon how much you have and how much
you need. Place a weight on top of the plant material to keep it submerged, and cover with water. Place a lid or cover on top of your container and set it in
the sun for three or four or more weeks. Check on it after three to four weeks;
be prepared: IT STINKS!  I mean putrid something crawled in there and died
stinks. (don't say you weren't warned)  You will know it is done when it is a
dark, thick liquid. This is your liquid concentrate fertilizer. Mix this with
water at a ratio of 1:12 Twelve parts water to one part concentrate. Use
gloves, that smell likes to linger. This can be applied to plants as you would
any other liquid fertilizer.
 
Using comfrey as a soil aerator is very effective due to that substantive taproot but can be a tricky process. Tricky because comfrey propagates from root cuttings. Any piece of root left in the ground can grow into a new plant. If you choose to use comfrey in this manner, I recommend planting smaller plants and leaving them in place for only one season max. This is best used if there is an area you want to turn into garden but it is extremely compacted, the best example I can think of is a consult we did for a couple who needed to remediate a piece of land that had been used as a driveway by the former owner of the property. In that  particular case we recommended comfrey be left in place for two years. It did a remarkable job on that particular piece of land. They did have several plants appear over the first two seasons after the plants had been dug  up but they were easily removed as they started coming up.
 
When designing farms, especially small farms and homesteads, nutrient
runoff is always an issue. It has taken up a great deal of planning time here on
our own homestead as all of our gardens pastures and barns are uphill of the
house and well. Comfrey is in our plan to help with any possibility of runoff here This involves planting a double row of comfrey plants, on a slightly raised bed, on contour, below the barns. We have placed manure storage area on the other side of the property from the well, and any runoff from here will drain to the swale we put in this spring. By planting the double row of comfrey on the slightly raised bed we should be able to negate any nutrient contamination of our drinking water, and be able to return that nutrient back to the fertility cycle of the homestead by using the comfrey for fertilizer.
 
The final use of comfrey I want to talk about today is as an animal feed. Only feed the above ground parts of the plant. The PA's are in highest concentration in the roots.  Dried comfrey regularly tests out between 24 - 31% protein. This is higher than soybean and alfalfa. The leaves are also high in Vitamins A,C, and B12. Comfrey makes a high mineral, high protein low fibre feed: as
such it should be considered a feed supplement as opposed to a feed in itself.
Our rule of thumb here is no more than 10% of a total ration is to be
comfrey. The palatablity of comfrey varies from animal to animal. The pigs usually take to it the best, eating both fresh, wilted and dried plant. Chickens tend to only find it attractive when it is dry or near dry. Our goats are all over the map, some like it in any form, some won't touch it unless it is dried and offered in the middle of winter. I am a firm believer in the theory that animals have an intrinsic knowledge of what their bodies need and will actively seek it out;so the goats that only touch the dried comfrey in the winter makes absolute sense to me. There have been multiple studies related to feeding animals comfery. Most were  conducted in the UK, particularly during WWII and the decades after. A  particularly good book which looks at various uses of comfrey and  feeding comfrey to animals is:  Comfrey, Past  Present and Future by Lawrence D. Hills. I recommend it to anyone who really wants to utilise comfrey on their homestead.

So you can see there are numerous ways to make comfrey work for you on your homestead. I hope you will look at ways to utelise it in your system. Do some research, find your application. That is what homesteading is all about!
Have a great day everyone!


0 Comments

The Last Harvest... part 1

3/9/2014

0 Comments

 
First off today I want to say a huge Thank You to everyone who responded to the request for feedback on the workshop question. We have had lots of feedback, some great ideas and now have a much clearer vision of what we will be doing next summer. We are determined to build a learning centre where anyone who wants to learn the skills to become more self reliant and self sufficient can come and learn. Each bit of feed back we get takes us closer to that centre, so again thank you!

Today is September first, most of us are watching the slow wind down of or gardens right now. Hopefully mother nature will give us all a nice slow wind down with no nasty hard frosts before their time. There is still a major harvest left though and it is probably the most vital, I am talking about the harvest of seeds for your garden next year.

Farmers and plant growers have been saving seed for as long as they have been growing plants. The number one reason most of us grow open pollinated heirloom varieties of vegetables is  because they taste like real food.  The second reason is because we can save our seeds.  At it's most basic seed saving is just waiting until the seeds are mature, harvesting or collecting, drying and storing them. What also comes from storing seeds is financial savings, empowerment, and a  more in depth knowledge of the plants you grow. All of which may lead to new found confidence and the joys of selective cross breeding different varieties.

Before we consider collecting seeds we need to look at a few things; first, is the plant annual, biennial or perennial.  We then need to determine if the plants are self pollinated or cross pollinated.

 Self pollinated plants are those which pollinate from flower to flower either from the same plant or different plants. There are male and female on the same plant, most often within the flower. These plants generally run true, which means that plants grown from seeds produced on these plants will exhibit the same characteristics as the parent plants.

 Cross pollinated plants are those plants which are pollinated from flower to flower from different plants. Certain plants within this category can cross pollinate with different varieties meaning that seeds from these plants don't always run true to the characteristics of the parent plant. This doesn't mean you shouldn't save seed from these plants, just that there are certain precautions you need to take. We will look at this more closely as we look at individual plant families.

So how to harvest seeds? The good news is that most plants will prepare the seeds for you. It's what they are programmed to do: grow, make seeds and distribute them. The hardest part is learning when the plants are ready to  distribute and intervene at that time. For most plants that requires little more than commonsense. 

For plants which wrap their seeds in or on fruit, the seeds are ready when the fruit is ripe. Think tomatoes or strawberries. In fact a little over ripe is best as slight fermentation will often destroy any bacterial or viral infections before the seed is released.

 For other plants which we usually eat the seed as food, the rule of thumb is to allow the seeds to stay on the plant until dry, think beans or peas.

Finally, most other plants we never see the seeds of. Think lettuce, beets or onions. These plants usually send up flower stalks which produce seed long after we would normally have harvested the plant for food..

 The final element of commonsense for seed saving is don't use any seed from diseased plants or plants which have been poor performers.

Let's look at some popular plants and seed saving tips for each.


 We'll start with the easy ones; self pollinating annuals. This group includes tomatoes, lettuce, peppers and beans. Any one who has a compost pile has had volunteer plants from most of these. Tomatoes seeds are mature when the tomatoes are ripe. If you let them stay on the vine until they are a little past ripe even better. All you need to do is cut open the tomato, scoop out the seeds and allow them to dry. If you want to give your tomato seeds the best start, you should allow the tomatoes to stay on the plant until the tomato is over ripe; when they are almost ready to fall of the vine, gather the tomatoes and place them in a closed container for three days. After three days, pull the fruit from the continue and place it in a screen colander. Use water to rinse the seeds from the pulp and then lay the seeds on a plate covered with paper towel or newspaper. If you have screen drying racks they are great for seeds.

For beans and peas leave them on the plant until the seed pods are dried out and you can hear the beans rattle inside. If you have a predator problem you can bring the entire plant inside to dry. Follow the same procedure as drying herbs.

If anyone has ever had lettuce bolt you have seen flower stalks for lettuce. Most lettuce varieties will produce a small yellow flower. This flowering is followed by seed. Lettuce seed is almost like miniature dandelion seeds. The seed will be either white or black depending upon the variety.  Once the flower stalk rises be sure to check the plant at least once a day as a light breeze will carry your tiny lettuce seeds away!


Peppers, both hot and sweet, are easy. Remove the core from the pepper  and
use a butter knife or your fingers to gently pry the seeds loose. Dry the seeds
and pace them in a paper bag to store.

 As I said, these plants are self pollinating plants so you should have few, if any surprises. One caveat, if you grow many varieties of tomatoes in close proximity you may get cross breed results.

 Cross pollinated annuals, including corn,  spinach, squash, pumpkins, cucumbers and the brassica family. Brassica include cabbage, Brussel  sprouts, kale, collard greens, broccoli, kholrabi and cauliflower to name a few.  All of these plants above will easily cross pollinate between varieties and the brassica will cross pollinate between each other. Therefore, if you have more than one variety, or more than one brassica blooming at the same time you should not trust that the seed will be true to the parent plants.

 If you want to save seed from these plants, you should take precautions to avoid cross pollination. This can be done by isolating the parent plants either geographically or by covering the female flowers before pollination and then manually pollinating them with selected pollen. The female flower will need to remain covered until fruit is set.

 Corn is a slightly different proposition; the rest of the plants in this category are pollinated by insects, usually bees and therefore the pollen grains are large, corn on the other hand is wind pollinated. The pollen grains are small. If you have corn growing with in a quarter mile of yours, it may be cross pollinated. Corns will cross pollinate between varieties, so if you have cow corn growing within a quarter mile of your sweet corn, seed saving may not be a great idea.

 A note about cucumbers,  we tend to take cucumbers before they are mature, leave cuke you want to harvest seeds from on the vine until they turn yellow or white. You can then ferment them as with the tomatoes, cut them lengthwise to harvest the seed. Place the seed in water to remove the pulp.  The heavier seed will sink to the bottom, this is the seed you want to keep. The lighter seed which floats, should be discarded.


I think that is enough for today, I know it is a lot of information to digest. I will look at saving seed from biennials and cloning on Wednesday. Hopefully, you will have a look at saving some seed from your self pollinating annuals. They are the easiest ones to deal with, when you are looking at planting rotations for next years garden, make sure to set aside an area for plants which require some buffer zone for pollinating.

Feel free to ask questions or leave your own seed saving stories in the comments. Have a great day everyone,!


0 Comments

How to Tuesday... Making Herbal Salve

2/9/2014

8 Comments

 
I have been making and selling herbal soaps and skin care products for many many years, in my experience they are better for your overall health, better for your skin, and in most cases cheaper than commercial alternatives, especially if you make them yourself. Today I need to make some comfrey salve so I thought I would share the process with you.

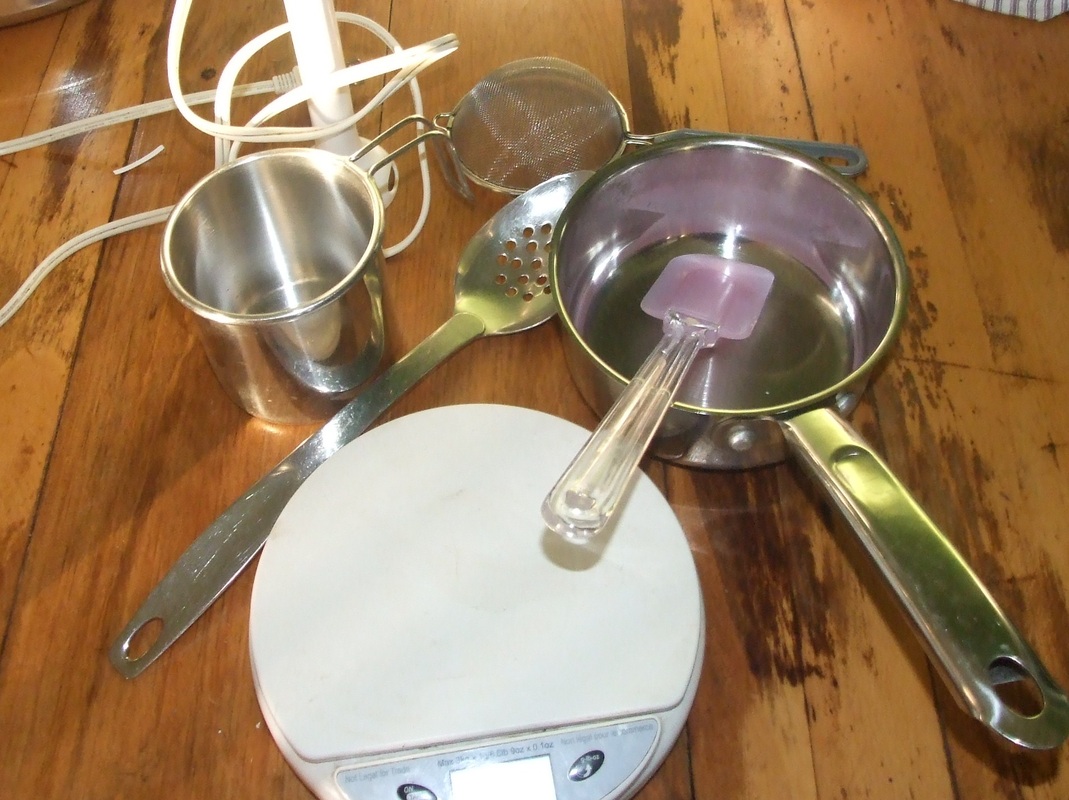
.For equipment you need:
        at least one small pot
        a pyrex measuring cup
        a small digital scale
        a whisk
        a spatula
        a strainer
        Jars to hold your salve. For small quantities you can use baby food jars or small canning jars for larger amounts.
Picture
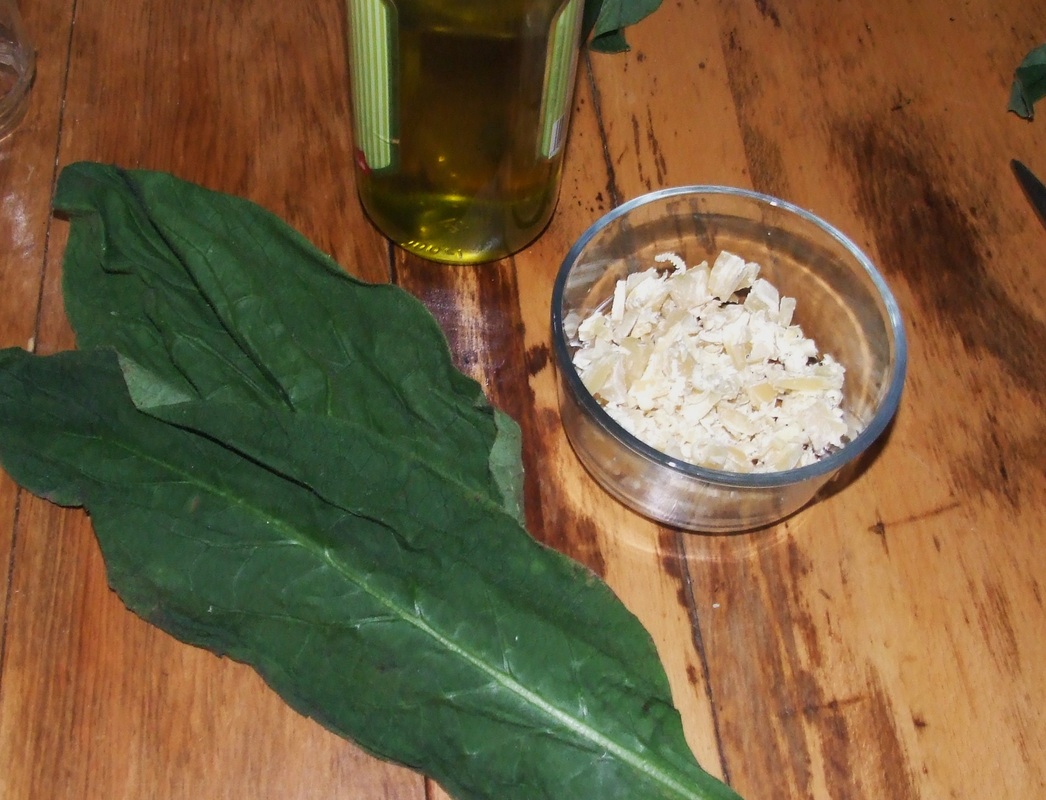
For ingredients you need:
You will need:
some comfrey, one or two leaves will be plenty
Olive or sunflower oil and
beeswax
Vitamin E. (optional)
Essential oils  (optional)
Picture
Please note I always recommend using fresh herbs, but I also know life happens and sometimes that is not an option, if you only have dry comfrey
use that at half the rate for fresh.

 Comfrey salve is always handy to have around a farm. It is great for healing the inevitable cuts and lacerations that happen, both on humans and non human residents. I always make a large batch in the fall as it does a great
job on healing the cracked hands that Gary gets during the winter. What used to be called chill blames. It is also great for healing burns and can be used for
sprains. Right now, I need to make more be cause I have used up my supply
treating a very nasty wound Gary has on his leg.

So, lets get started. A salve is an oil based medicinal ointment. As it has an oil base, it should not be used on burns until all beat has gone from the burn. To make salves you need to infuse the oil(s) with the herbs. This can be accomplished via hot oil infusions or cold oil infusions.

 To make a cold infusion pack a jar with your fresh herbs, if you can chop them before adding, this releases the oils and the components you need from the plants. Fill the jar with oil, I prefer olive or sunflower but any non hydrogenated oil will work. Make sure the oil completely covers the plant material or you will get mold. Place the jar in a window where it will get direct sunlight for part of the day. Shake the jar for a few minutes daily. Leave the jar for 4-6 weeks. When it is done, srain the plant material through a cheese cloth. Wring the residue making sure to get all the oil you can from the plant material. You can also use a potato ricer to press the oil from the plant. Place the depleted plant material in the compost and put your infused oil in jars, label and store in the fridge. I keep my infused oils in this manner for a full year. When the herb becomes available fresh again I discard any oil I may have left and make new.

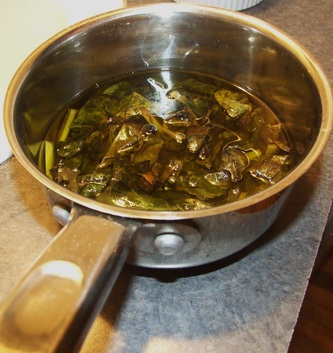
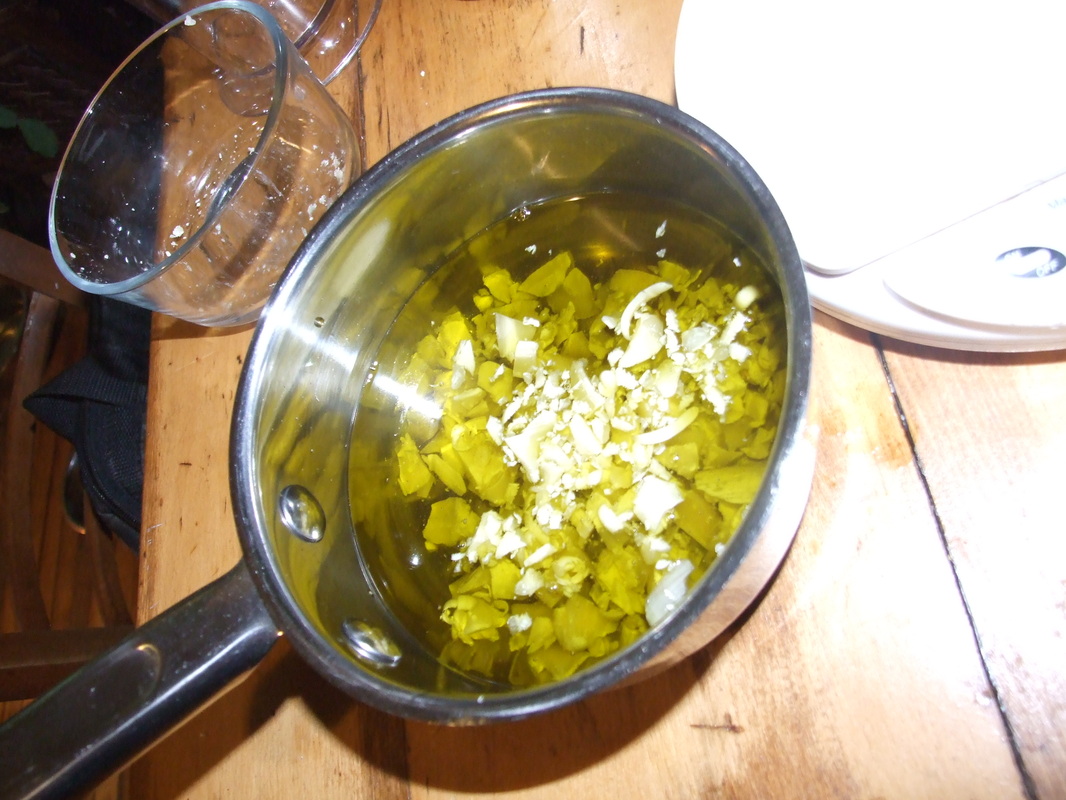
Today we are going to make a hot oil infusion and make our salve from that. To make a hot oil infusion you need to add  heat to the plant oil mixture and hold it for two hours. If you are using fresh comfry use it at a rate of 1:2. One cup of chopped herb for every 2 cups of oil. If you are using dried herb use one half a cup for every 2 cups of oil.

Before you start weigh your pot on the scale, write it down, trust me. Mix the herb and oil in a small pot and place on a low heat. I have a good quality  heavy bottom pot I use for working with herbs, if your pot is a thin bottom type
you may want to make a double boiler to heat your herbs. You must have the heat on a low setting, you do not want to bring the oil to smoking temperature. We need to heat the plant material so that it transfers the oils in the plant to
the oil, not deep fry the plant. Stir occasionally and keep on the heat for  2 or 3 hours.
Picture
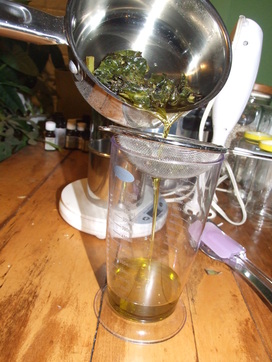
At the end of this time remove the pot from the heat and allow it to come to
room temperature. Strain the plant material from the oil by the same method
listed above. If you want to make all of you infused oil into a salve you can
place it back into the cleaned pot. If you only want to make some into a salve
now, measure the amount you need for salve and put in the pot. Place the
remainder in a jar and label. Store in the fridge. Are you beginning to see why
I hoard Mason jars?
Picture
Now that you have a specific amount of infused oil, you need to weigh the oil and your pot, (ahhh!) Subtract the weight of the pot alone to get the weight of your oil. Now you need to add beeswax to the oil to make it a salve. I am not giving you specific amounts here because the ratio of oil to beeswax is always the same. Five parts oil to one part beeswax.

If you have 100 grams of oil you need  20 grams of beeswax, 150 grams of oil, 30 grams of wax, you get the idea. When making creams, salves and soaps, always go by weight. Use recipes that deal with weight over those that use volume as measurement. It will always be more precise and over the long haul
you will have much better, and more consistent results.

 Weigh the appropriate amount of  beeswax, and add to the pot. Please use beeswax, not  any other type of wax. You will not get good results.
Picture
Heat the oil wax mixture on medium heat, beeswax has a high melting  temperature, but you don't want to heat the oil too high as some of the  compounds you have just infused into your  oils will be damaged by high heat. 
Stir your mix frequently  until the wax is melted. If you have thin shavings of
beeswax or the pelleted form it will melt faster than large chunks. 

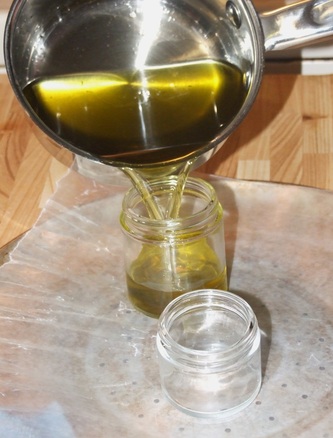
Once all of the wax has melted,  remove the pot from the heat, if you want to add Vitamin E or essential oils now is the time. A couple of drops of vitamin E for every four fluid ounces with make a good natural preservative. Lavender and tea tree essential oils will lend their anti bacterial properties to this healing salve. a couple of drops per 8 fluid ounces is really all you need. Now you are ready to pour it into your containers. The mixture will be hot.  This is why I use glass jars. Once you pour the salve into your jars let them sit out until they start to harden. Do not apply the covers until the salve has set up. You can put the jars in the fridge if you wish but it works just fine if you leave them out. Do be careful when you have small children and pets around. The salve is hot and will remain hot even if the top has set up.
Picture
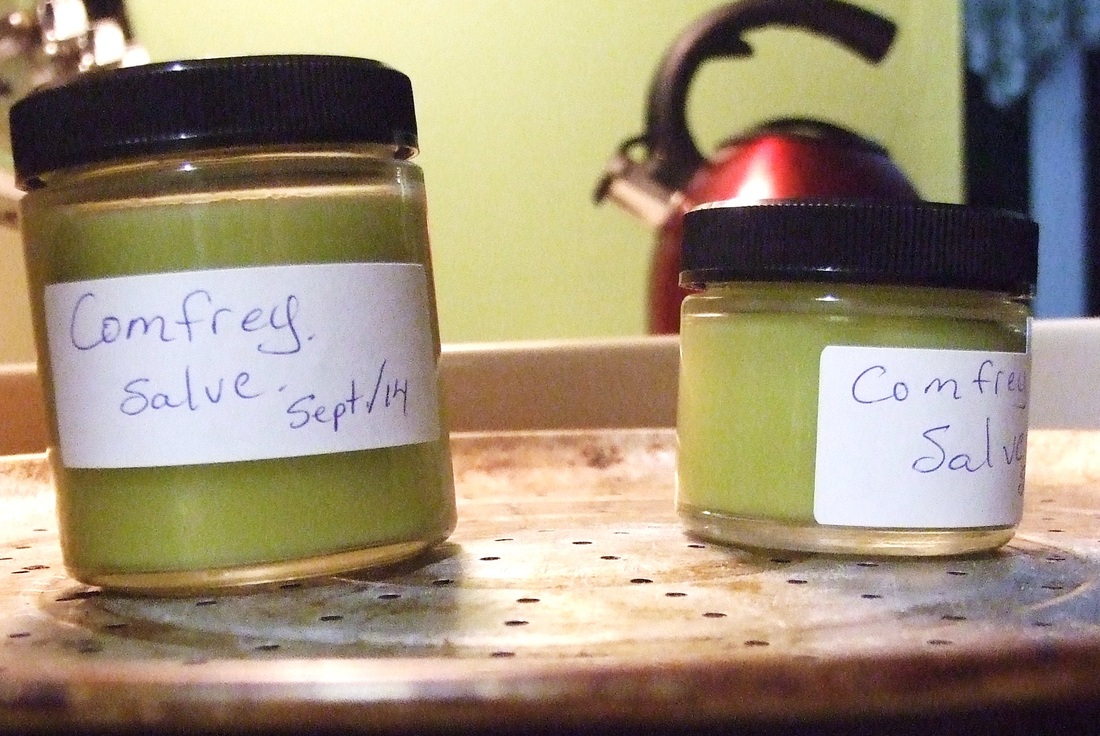
Once the salve has set up, you can put the lid on the jars, label and use as needed. This will keep in the frodge for a good six months. As with all herbal products that do not contain preservatives, the cleaner the salve stays, the longer it lasts.
Picture
Isn't that a beautiful green? Have a great day everyone!
8 Comments
<<Previous
    Picture
    A  4-H Family
    Lives Here

    Receive inspiration and information for your homestead several times a week

    * indicates required

    Author

    Hi! I'm Shelli Killen,
    a homesteading, homeschooling, wife and mother of five. 

    I am a student  herbalist with a passion for learning and a  habit of bringing home strays.

    I love music, and the power of creating things with my hands.
     
    I tend to do best when life around me is organized chaos
    .

    RSS Feed

    Categories

    All
    Bees
    Canning
    Chickens
    Economy
    Gardening Vegetables
    Goats
    Herbs
    Hobby Farming
    Homesteading
    Homesteading Skills
    House Management
    Lifestyle Planning
    Pigs
    Self Reilance
    Self Sufficiency

    Archives

    December 2014
    November 2014
    October 2014
    September 2014
    August 2014
    July 2014
    June 2014
    May 2014

Powered by Create your own unique website with customizable templates.