
Hey everyone. As promised, and especially for you Emily, a tutorial on making goats milk soap.
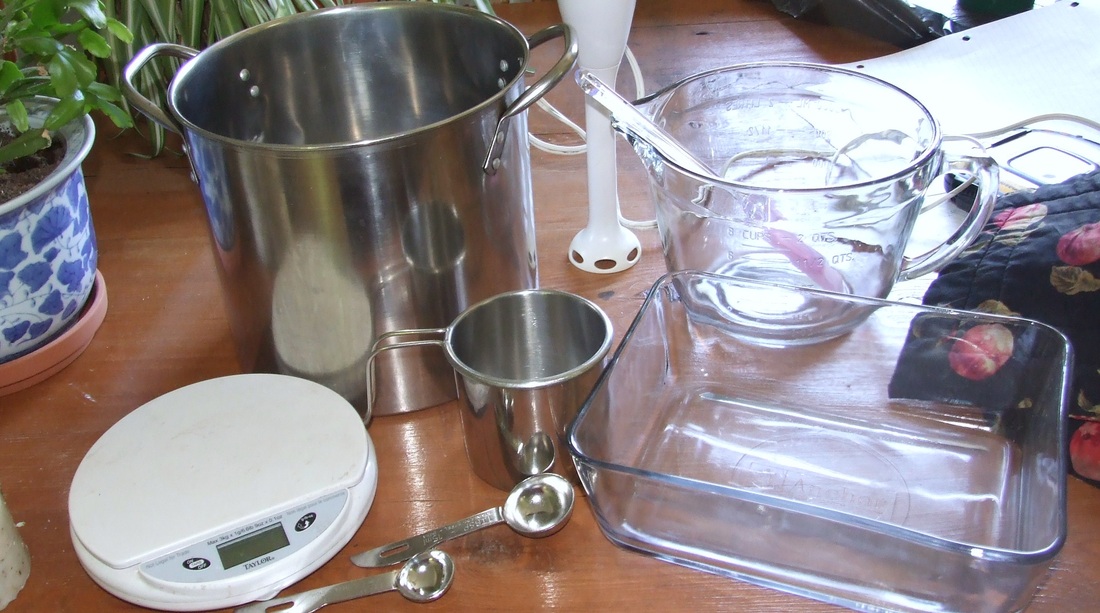
First gather all the tools you will need:
- a pair of rubber gloves
- a scale, preferably digital
- a large Pyrex measuring cup, a glass mixing bowl will work also, must be able to withstand temperatures of 140 degrees F
- a large metal spoon, preferably slotted
- a non- reactive cup to measure the lye in
- a pot to heat your oils in
- a thermometer
- a stick blender or whisk to mix with. If you are using a whisk, it will take A LOT of whisking and you can't take breaks.
- a mold to pour the soap in
- an old towel to wrap the mold in (to insulate it).
If you are going to be making soap on a regular basis you should invest in
some separate utensils used just for soap as you really shouldn't use tools for
soap and food.
Make sure you have enough space to work in. You are going to need to place
things in the sink to cool, so make sure the sink is empty.
So now we need the ingredients for your soap. There are many different soap recipes but each one involves mixing a fat, or oils, with an appropriate amount
of lye. A chemical reaction takes place between the two called saponification.
This is what makes soap. When making soap, a good recipe gives amounts based in weight. You need to weigh your ingredients. A word about lye. Lye is a very dangerous caustic chemical. It will burn you. Not too close to the stove burn you; eat through your skin burn you. Treat it with respect. The mixing of lye crystals and fluids, water and especially milk causes an intense chemical reaction. It gives off a tremendous amount of heat and fumes. Always mix the lye under an open widow that is drawing air or if at all possible outside. Safety glasses are a good idea also.
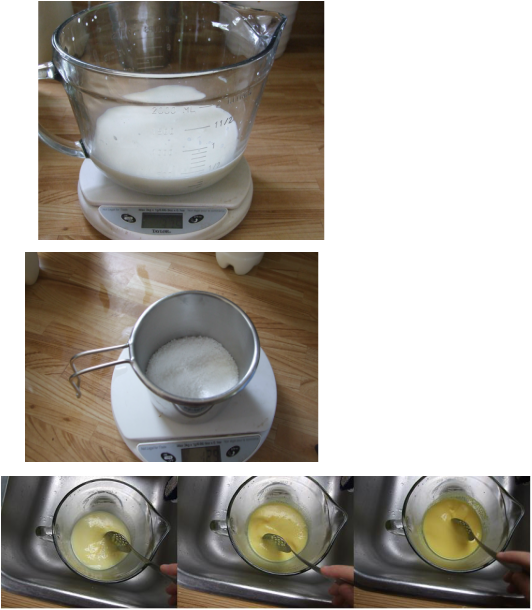
Back to the process. First weigh out your milk. Every kilogram of soap requires 375 grams of fluid. It can be milk or water or a combination of the two. We are making goat milk soap so our fluid will be goat milk. As I said, the reaction between goats milk and lye is a tremendous one. In order to preserve the skin healthy properties of the goats milk you must freeze your goats milk. It can be frozen solid. At the very least, it needs to be the consistency of a slushie.
I weigh my goats milk and place the exact amount I need in a freezer bag and freeze it the night before I plan to make soap. These 'milk bricks' can be placed into the Pyrex measuring cup. You can break up the brick if it doesn't fit
easily into the cup or bowel.
Next weigh your lye. The amount of lye will vary depending upon the amount and type of oils / fats you are using. Once you have weighed the lye, check again you have good ventilation, then slowly pour the lye over the milk. The lye
will almost immediately begin to melt the milk. Use your slotted spoon to slowly stir the mixture. You will begin to feel the heat given off by the reaction, as well as the fumes. Stand slightly to the side of the bowl and do not inhale the fumes. You will notice the solution start to change colour. This is normal when using milk. Continue stirring slowly until you feel all the lye has been dissolved. One of the drawbacks to using milk is that you can't see if the lye is completely dissolved, but you should be able to feel with the spoon if the lye is dissolved.
of lye. A chemical reaction takes place between the two called saponification.
This is what makes soap. When making soap, a good recipe gives amounts based in weight. You need to weigh your ingredients. A word about lye. Lye is a very dangerous caustic chemical. It will burn you. Not too close to the stove burn you; eat through your skin burn you. Treat it with respect. The mixing of lye crystals and fluids, water and especially milk causes an intense chemical reaction. It gives off a tremendous amount of heat and fumes. Always mix the lye under an open widow that is drawing air or if at all possible outside. Safety glasses are a good idea also.
Back to the process. First weigh out your milk. Every kilogram of soap requires 375 grams of fluid. It can be milk or water or a combination of the two. We are making goat milk soap so our fluid will be goat milk. As I said, the reaction between goats milk and lye is a tremendous one. In order to preserve the skin healthy properties of the goats milk you must freeze your goats milk. It can be frozen solid. At the very least, it needs to be the consistency of a slushie.
I weigh my goats milk and place the exact amount I need in a freezer bag and freeze it the night before I plan to make soap. These 'milk bricks' can be placed into the Pyrex measuring cup. You can break up the brick if it doesn't fit
easily into the cup or bowel.
Next weigh your lye. The amount of lye will vary depending upon the amount and type of oils / fats you are using. Once you have weighed the lye, check again you have good ventilation, then slowly pour the lye over the milk. The lye
will almost immediately begin to melt the milk. Use your slotted spoon to slowly stir the mixture. You will begin to feel the heat given off by the reaction, as well as the fumes. Stand slightly to the side of the bowl and do not inhale the fumes. You will notice the solution start to change colour. This is normal when using milk. Continue stirring slowly until you feel all the lye has been dissolved. One of the drawbacks to using milk is that you can't see if the lye is completely dissolved, but you should be able to feel with the spoon if the lye is dissolved.
As you can see I mix my lye in the sink. I leave it set there while I am
heating my oils. If the reaction is too violent, or I think my milk is too warm
to start, I fill the sink with cold water to a level just higher than the level
of lye / milk solution. Just leave the lye sitting for now, you should come back
every few minutes to stir the solution and check the temperature.
Now that the lye is mixed and cooling it is time to heat your oils. Carefully weigh your oils as per the recipe you are using. When you have all the oils weighed in your pot slowly begin to heat the oils. Take care when heating your oils as many of the oils used in soap and skincare products have low smoke points. They burn easily.
While your oils are heating, give the lye solution a stir and check the temperature of the solution. Now is a good time to oil your mold. When the mold is oiled, check the temperature of your lye solution again, then clean the thermometer and check the temperature of your oils.
This is the most difficult part of making soap. The temperature is crucial.
We are aiming for a temperature between 100 and 110 degrees F. The trick is that both the lye solution and the oils must be the SAME temperature. ( within a
degree). This is the key to making good soap. If the temperatures are too far
apart the temperature differential will mess with the chemical reaction and you
may end up with oil or lye leftovers and this will make your soap do all kinds
of weird and not so wonderful things.
So keep an eye on your lye temperature. Let it be your guide. it is easy to
cool and re-heat your oils if necessary, but you don't want to start trying to
reheat a lye solution! If the temperatures are close, within a degree or three,
but are still over 110 F, take your oils off the heat and set them in your other
sink (if you have a double.) You can now start cooling them. Stirring the lye
slowly will help to cool it. If you haven't already, add some cold water to the
sink, not the solution itself. Keep checking the oils and the lye for temperature. Remember you are looking for between 100 and 110 degrees F. If the oils are too hot you can also add cold water to the sink around the pot. Be careful not to let cold water into the hot oils.
Once the two solutions reach that magic temperature it is time to mix!
Place the pot of oil on a flat surface where you can mix it with your stick
blender. Make sure you are wearing your gloves and some eye protection wouldn't hurt also. I can't tell you the number of times I have had fresh soap splash all over my glasses.
So slowly pour the lye solution into the oils. As you are doing this use
the large spoon from the lye to stir the lye and oils. Use the spatula to scrape
all of the lye solution into the oils.
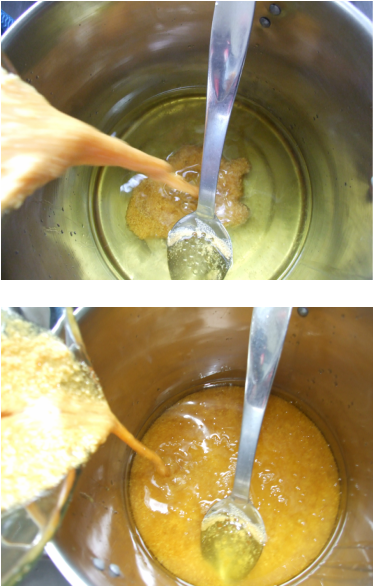
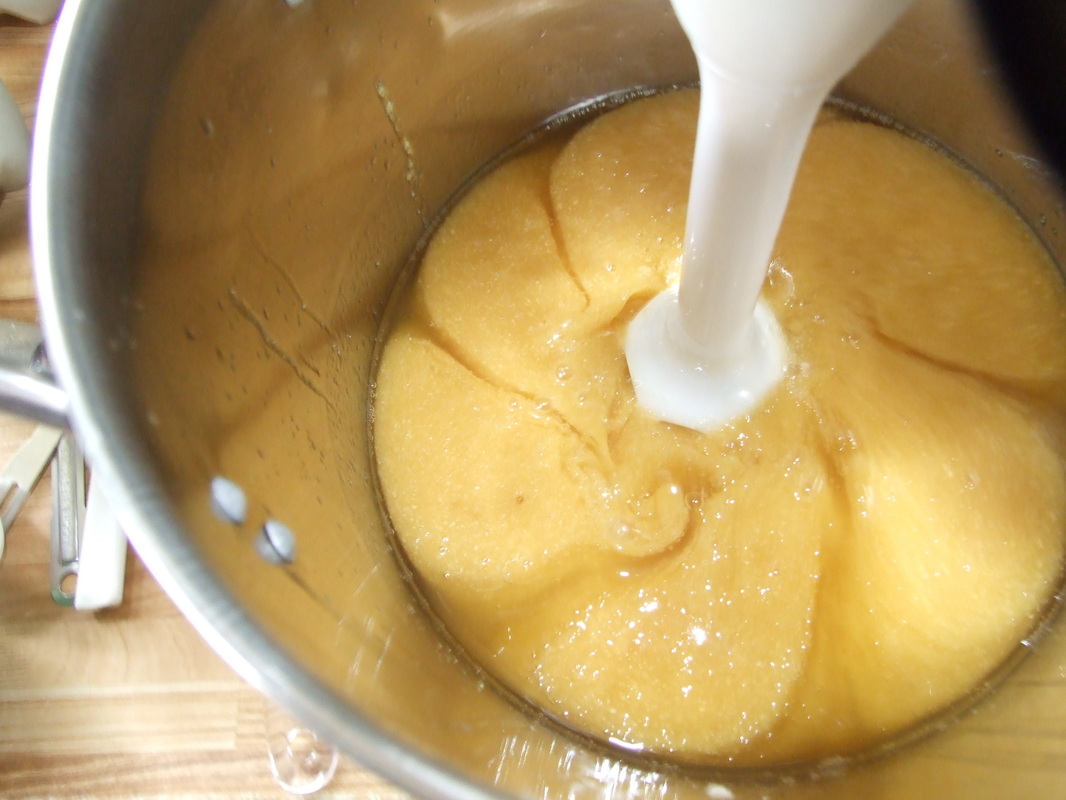
Use your spoon to mix the two liquids together. The lye solution will want to sit at the bottom leaving the oil on top. Just stir them until they start to mix together. You will start to see threads as the saponification begins to occur.
Now you can start using your stick blender.
Now you can start using your stick blender.
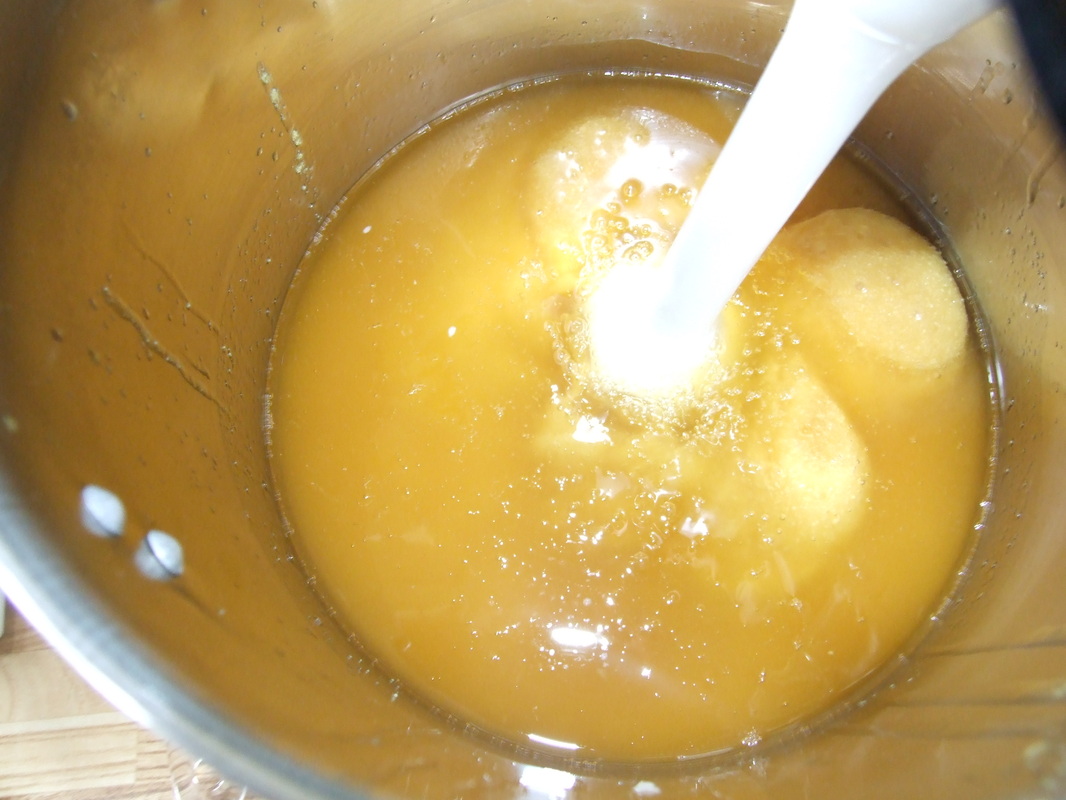
You will start to see beautiful patterns as the blender does it's work. Just remember to keep moving the blender around in the pot an be sure to move it up and down within the mixture.
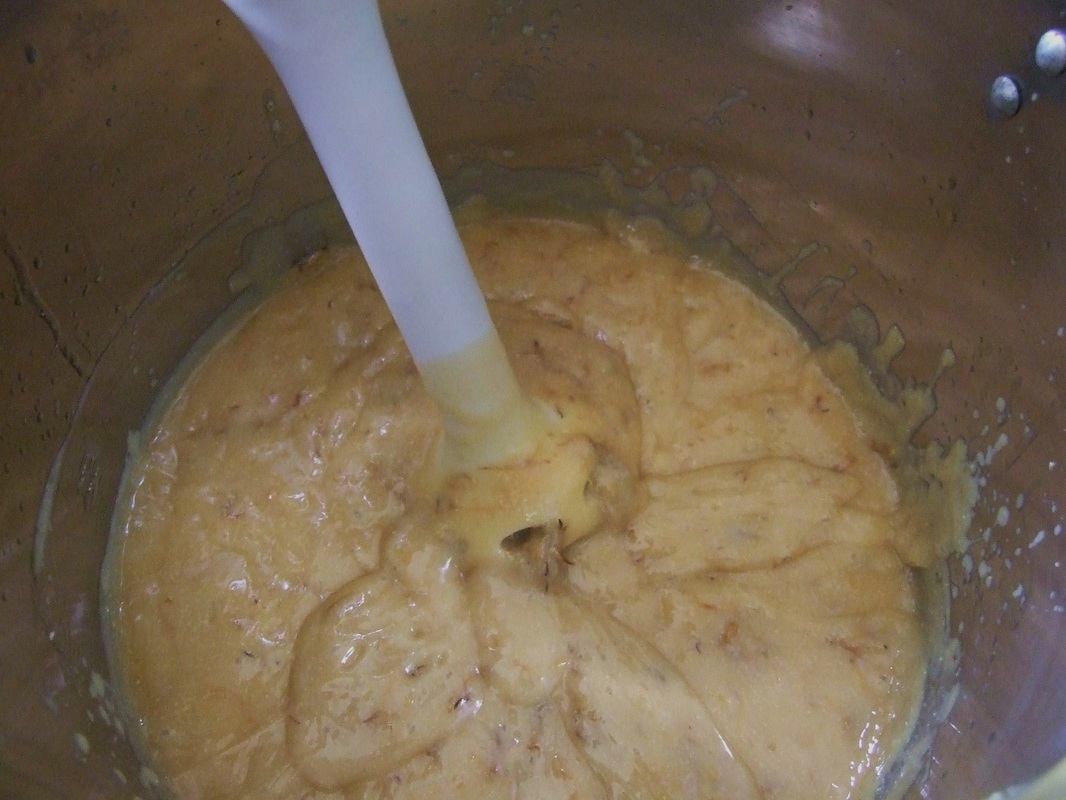
Continue to mix with the blender until the mixture reaches the consistency of
pudding. This is called trace. When you lift the blender from the mixture, it should leave behind the circular pattern from the blender . If your recipe calls
for any botanical, essential oils or fragrance oils to be added to the mixture this is the time to add them. Sometimes it's tempting to add more than the recipe calls for, but stick to the recipe. Too much botanical, and certain essential oils can cause the soap to seize if you add too much. This means that the soap hardens uncontrollably in the pot and batch is basically ruined.
Once you have added any botanical and fragrances that you want to add to the
soap, and have incorporated them evenly into the mixture, it is time to pour. Just take a minute to make sure the mold is evenly coated with oil, and then you can lift your pot and slowly pour your soap into the mold. Keep the pot low and close to the mold. This will help prevent any air pockets getting into your soap.
Use your spatula and make sure all of your soap gets put in the mold then gently tap the mold on a hard surface to release any air pockets that may be trapped within the soap.
Cover the mold, and wrap it in a large towel. The soap should be kept warm for the next few days as the soap begins to cure. Leave in the mold for 5 - 7 days. Depending upon the mold you use, you can choose to line the mold with wax paper to help remove the soap.
Let the soap sit for another day after you take it out of the mold before you try to cut it. You can use a knife to cut your soap, or a drywall mud knife makes a good soap cutter.
After you cut the soap it will take another few weeks to cure completely, I know it is hard to wait, but the longer it cures the longer the bars will last.
So that is how you make goats milk soap. Not really difficult, occasionally tricky, but your skin will thank you for it!

 RSS Feed
