
Today was jam day. The first of a few preserving days of the year as we cycle through strawberries, raspberries, blackberries, apples and grapes. As I mentioned yesterday, I decided that since the wood cook stove was already out... I might as well make jam on that and keep the house cool.
So last night we hulled and mashed 24 quarts of berries and let them sit in the fridge overnight. So this morning I had this
So last night we hulled and mashed 24 quarts of berries and let them sit in the fridge overnight. So this morning I had this
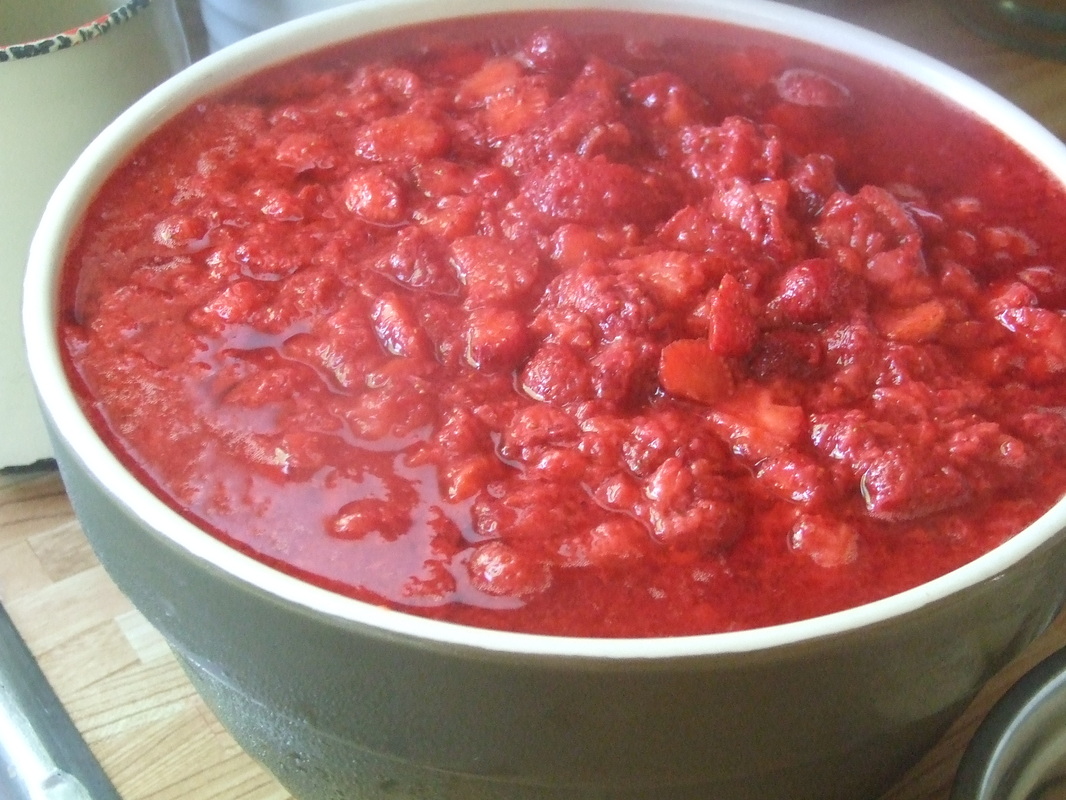
Actually, that was only half of what we had, but you get the idea. While Gary set to work heating up the stove I set to work washing jars and getting everything ready. In short order Gary had the stove heating and it was time to start sterilizing jars.
The hardest part of doing this on the woodstove is timing. This is exacerbated by having the stove outside. It simply doesn't draw the same as it does inside and therefore has more uneven heat. Once we had the canning pot boiling we were ready to start.
The hardest part of doing this on the woodstove is timing. This is exacerbated by having the stove outside. It simply doesn't draw the same as it does inside and therefore has more uneven heat. Once we had the canning pot boiling we were ready to start.
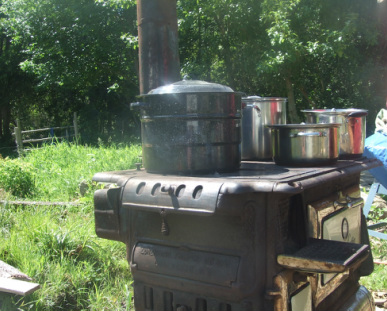
So we have the large, black, canning pot for sterilizing jars and for processing after the jam is bottled. The large stock pot in back is an extra supply of hot water and the two pots in front are a batch of jam each.
As noted, I do not double my jam recipies, I cannot get a good set when I try. On the other hand I have made several wonderful batches of syrup over the years.
We use an old strawberry jam recipe, it is simply 2 quarts of crushed berries and 6 cups of sugar. No pectin or lemon juice. This recipe requires a lot of boiling to thicken the jam but the taste is just like fresh berries. It also uses less sugar than recipes that have pectin. The method is simple as well, but time consuming and requires constant attention.
To make simply bring the berries to a good rolling boil and maintain for 2- 3 minutes.
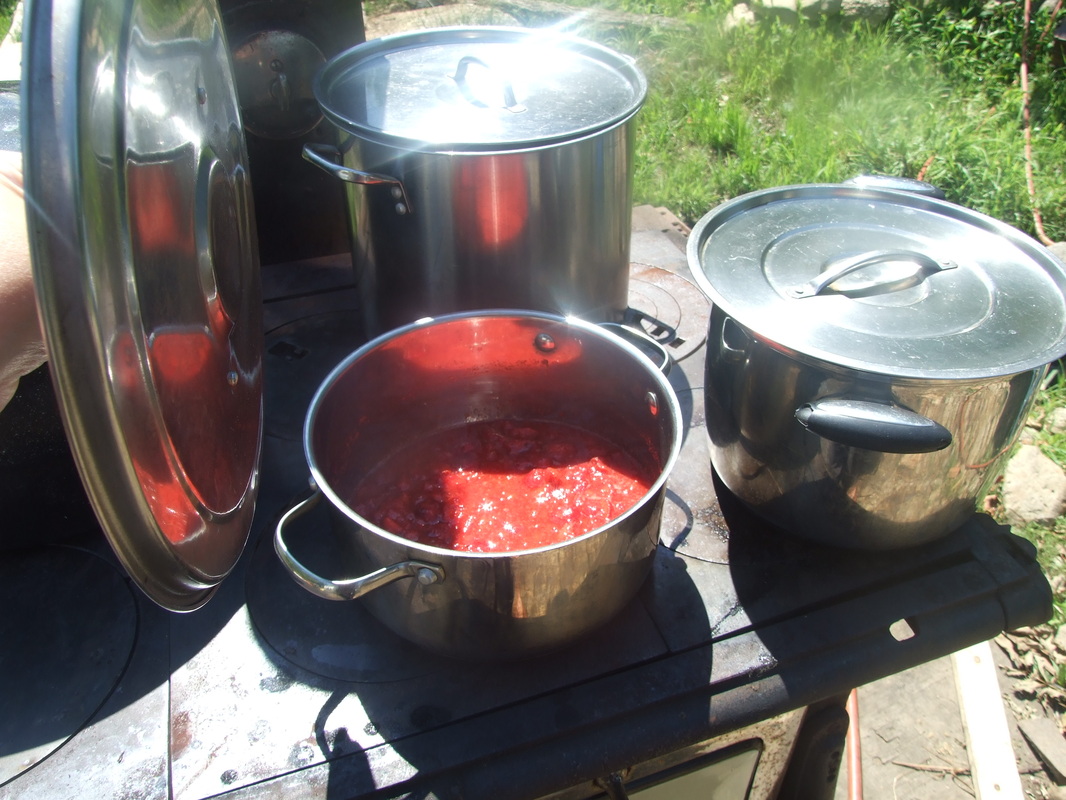
Once it has boiled for 2 - 3 minutes add the sugar and stir until completely dissolved. Now comes the tricky part. You need to bring the mixture back to a good boil and keep it boiling until it starts to thicken. This is usually in the 35 - 40 minute span. You need to stir frequently to prevent scorching. Even a little scorching will taint your entire batch . Not too bad on an electric or gas stove but it can be tricky on a woodstove. We always run two batches at once. I leave a 15 minute gap between to give me time to fill jars with the first batch before the second batch is ready. If this is your first time making jam just stick to one batch at a time as when the jam is ready, it is ready NOW.
You can tell when it is done by using a cooking thermometer. When it reaches 220 F it is usually thickened up enough to pour. You can also use the sheat test. When ready, a spoonful of jam will come off a cool saucer in a sheet, like a smooth wide flow, not runny not globby.
If you have been making 30 - 40 liters of strawberry jam a year for the past 20 odd years, you can tell by stirring.
When the jam reaches this stage, remove from the heat and stir the jam continually for 2- 3 minutes. This prevents the beries from rising to the top of the jars. It is now time time to pour into the jars.
My best advice is to invest in a canning funnel. You will save yourself heartbreak, and it will become an indespensable tool in your kitchen. Even though I purged my kitchen of plastic more than 10 years ago, I can not use a metal canning funnel. I have one, but I have burnt myself so many times that I just don't use it for hot items any more. I did purchase a silicone funnel this year, the same stuff that spatulas are made from. Today was it's first trial and it worked fine.
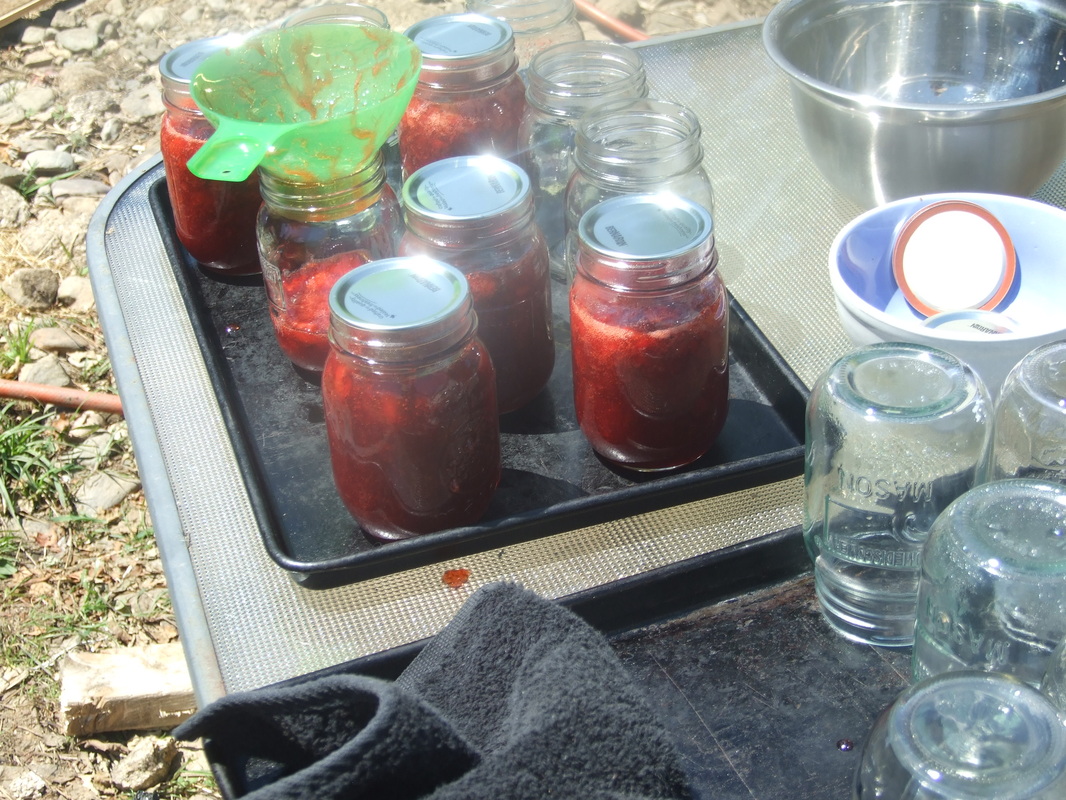
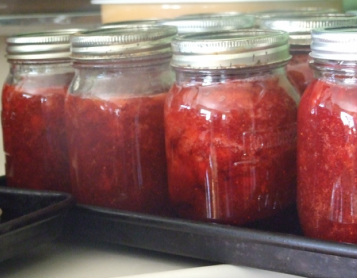
I like to keep everything close when making jam. As soon as the jars are filled I pop the lids on the jars. Make sure that the rims of the jars are clean so the lids can make an airtight seal. You need to use new lids everytime. Once the lids have been sealed you cannot get a reliable seal of the orange rubber coating again. Screw the rings on right away and they are ready to go into the hot water processing bath. The jars need to be processed at a rolling boil for 5 minutes. So start timing after the water returns to a boil after you have added the jars. Be sure that the water covers the entire jar. This is usually not an issue with smaller jars but can be a headache for 1 litre jars.
A note about lids. I am not happy using these lids. They were still coated with bisphenal-A until last year. The makers of the Ball and Kerr brands are advertising a new BPA free lid this year but I am not really sure about the coatings they are using instead. I am in the process of switching over to Weck jars but this will take time and I cannot afford to replace all of my jars at once.
I have friends who are using tattler lids, but I'm still not a fan of plastic in any form. While I am using these lids I make sure that I don't turn the jars so that the food comes into contact with the inside of the lid. It's the best we can do.
My general rule of thumb regarding chemicals is to look to Europe. European countries have stronger lobbying rules than Canada and the US. Consequently there are many chemicals that we use in North America that are banned in Europe. This is readily apparent in the personal care product industry. Large commercial names almost always have North American versions and European versions of their products. It has always seemed ridiculus to me. Like the labelling that reads "carcinogenic in California".??? Really, and it stops being a carcinogen when I cross the Californian border. Bah. But I digress...
Finally, after your jars have been processed, set out to cool. I set mine on a wire cookie rack, this enables air to flow underneath and they cool quicker. Listen for the telltale "POP" sound, and make sure the centre of the lid is depressed before you put your jars away. You can remnove the rings at this point, I don't simply because they are handy to have when you open the jar to start using the product inside. So after all this work, you will have rows of yummy, strawberry jam. You will probably be sick of strawberries by this point, but come those cold, dark February days, it is a fabulous jar of summer you can pull off your shelf and enjoy.
Some of this years jam made pioneer style on the wood stove.
Have a great day everyone.

 RSS Feed
