Hopefully you find this a helpful change. Let me know if you have any trouble with the links! That's all for today, I'll be back tomorrow with a full post. Have a great day everyone.
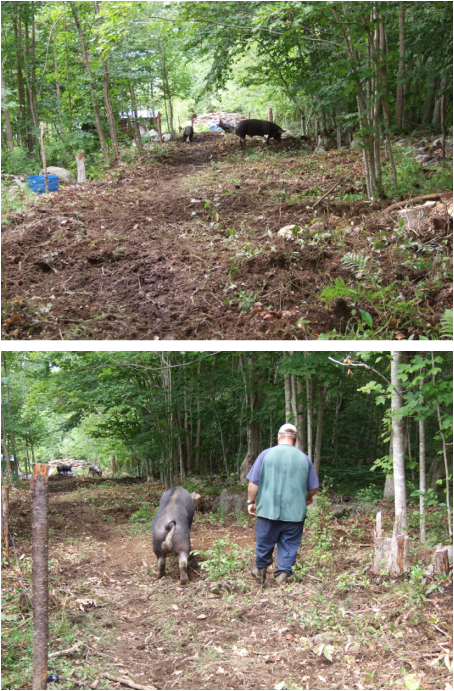
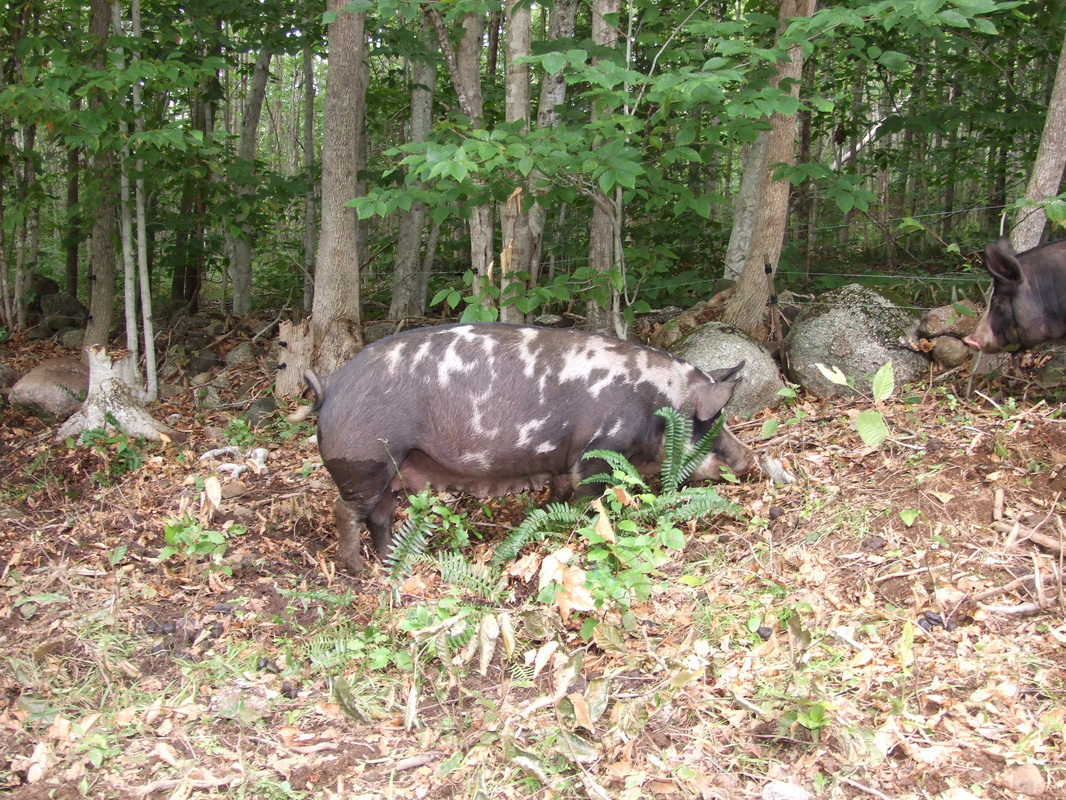
Hi everyone, no real post today, I spent some time cleaning up the site today. Just going through and making sure all the posts are properly tagged. I have also created a directory of sorts; if you look on the bottom third home page, there are now three columns. One will take you to a list of posts on skills; one will take you to a list of posts on animals. I think it will be easier to navigate, there is still the search feature on each page that you can utilise as not all posts will be in an index. Tomorrow I will add a page for gardening posts.
Hopefully you find this a helpful change. Let me know if you have any trouble with the links! That's all for today, I'll be back tomorrow with a full post. Have a great day everyone.
0 Comments
Yes I'll admit it, I intend to lure you to the dark side: the dark side of cooking that is. My goal today is to convince you that cast iron deserves a place in your kitchen. Not that long ago cast iron was the staple in almost every kitchen. Known for it's durability, versatility and strength, it was not limited to frying pans; waffle irons, griddles, kettles, dutch ovens and food grinders all in cast iron were commonplace in most kitchens. While your grandmother may have not had the array of choice we enjoy today, she knew a good thing when she saw it. A properly seasoned cast iron pan is the original nonstick pan. Ahhh there is the catch! "Properly seasoned" . Every time I bring up the topic of cast iron I hear the same two complaints or concerns... "I've tried it but everything sticks!"; or, "isn't cast iron a lot of work to care for?". Neither are true if you have a properly seasoned pan. Even cast iron pans that have been living in someone's basement for the last 30 years can be brought back to life as a useful versatile piece of cookware. Finding a piece of cast iron at a garage or estate sale is like finding buried treasure; especially since I know that getting it back into shape is not a big deal. Once you ascertain that there are no major cracks in the piece, even really badly rusted cast iron pans can be brought back to useful with little effort. The first thing you need to do is to bring the piece back, as close as possible, to base metal. This is easily accomplished by first giving it a good scrub with a wire brush and then coating it with oven cleaner, letting it sit and then applying lots of elbow grease. Or putting the pan in the oven and running the cleaning cycle if you have a self-cleaning oven. This will bring the piece back to base metal. Once you have done this you can begin to season the pan as you would a brand new one. Seasoning a cast iron pan isn't difficult, but it is time consuming to put the first layers of seasoning. You will need access to an oven for a few hours and lard or shortening, I prefer lard as it has a higher smoking temperature, but you can use either. To season a cast iron pan: 1. Preheat oven to 250 degrees F 2. Place pan in the oven for approximately 15 minutes. This time will vary slightly depnding upon the size of the piece, but you're goal is to warm the pan through. 3. Remove the pan from the oven and coat with the fat of your choice. You don't want it dripping in fat, but you want a good and even coating. 4. Place the pan back in the oven and let bake for 30 minutes. 5. Remove from the oven and wipe off excess oil. Wipe, not scrub. Place it back in the oven for another 30 minutes. 6. Remove the pan from the oven and let cool completely. You have now put one layer of seasoning on your pan, I have found putting four layers on a new, or newly conditioned pan to be a good base layer before you begin using the pan. That said some of the pans being produced now, as opposed to a couple of generations ago, tend to have a much more 'open' iron structure. Not sure of the proper term, but the iron seems to have more and / or pigger pores. These pans can take five or six coatings before they reach the fully sealed state that makes cast iron pans non-stick. Caring for your lovely cast iron cookware is not dufficult, but it does tend to be counter intuitive to haw we have been raised to clean things. Most importantly, don't use soap on your pans. The harsh degreasers in dish soap will break down and remove your careful sealing layers. Do not put your pans in the dishwasher. and finally, never put water in your pan and leave it to 'soak'. All of these will remove the seasoning from your pan and you will have problems with food sticking or rust forming. To clean your pans, just wipe with a clean damp cloth when they are cool enough to touch. If you use your pans infrequently, you might consider rubbing a thin coating of shortening or lard into the pan after you have wiped it clean and before you put it away. I would also recommend rubbing in a small amnount of fat the first few times you use your newly seasoned pans. It helps to build up the seasoning lost to foods the first few times you cook. Eventually your pans will develop the typical black patina that we associate with cast iron cookware, and the bottoms of the pans will become smooth as glass as the fat molecules bind with the iron molecules giving you a non-toxic non-stick surface. If you should have a mishap and burn something in the pan or you notice food is sticking to the pan because it was improperly cleaned you can easily bring your pan back to it's non-stick surface. Just clean the burnt material completely from the pan. (Try using a baking soda scrub as opposed to a scouring pad.) then just repeat the seasoning cycle as outlined above. Usually they only need to be baked once and oiled before putting them away to bring back the surface. Some of my cast iron cookware. The two frying pans in the bottom right corner are pans that we bought new 27 years ago when we moved into our first home together. The pans in the upper right corner are two pans Gary found buried in the yard here last fall. I cleaned them with oven cleaner, and put several coats of seasoning on them. The dutch oven in the top left is great for camping and is my prefered pan to bake my apple spice cake in. I really wouldn't be without my cast iron cookware. It can handle high heat, it distributes heat evenly over the surface of the pan, and it is incredibly economical. If properly cared for it will be around long after you are gone. Have a great day everyone, hopefully I've convinced you to at least try the dark side!
Welcome to the second How to Tuesday. Last week I showed you how to make zucchini relish, today I'm going to show you how to make bread and butter pickles. These are wonderful pickles that go well with just about everything and are really easy to make. Please, if you haven't read the post on making relish please do so before making the pickles. There is importanat safety instructions and helpful tips. Lets get started! Ingredients: 16 cups of sliced pickling cucumbers, approximately 11 pounds 8 medium onions sliced, approximately 5 pounds 3 cups apple cider vinegar 4 cups brown sugar 2 Tablespoons of mustard seed 1 1/2 teaspoon celery seed 1 1/2 teaspoon tumeric 1/3 cup pickling salt Ice, about 6 cups You will need a non metallic bowl, large enough to hold the sliced onions and pickles. A pot large enough to hold all the ingredients, a separate pot large enough to hold your jars for sterilizing and processing, measuring cup, measuring spoons, ladle, spoon and colander. A mandolin is very helpful and a time saver. Start by washing the cucumbers and then slicing, as close as you can to 1/8th of an inch. After the cucumbers are done, slice the onions, as close as possible, to the same thickness. Place both onions and cucumbers in your large non metallic bowl, add pickling salt and ice. Mix everything together until the salt and ice are evenly distributed. These now need to sit in the fridge for a minimum of three hours or a maximum of 12 hours. After the allotted time is up, drain the mix, rinse and set aside. Combine the sugar, vinegar and spices in a pot and bring to a rolling boil. Stir frequently to prevent the sugar scorching on the bottom. At the same time, bring the water in your processing pot to a boil in preparation for sterilizing your jars. Try to time the sterilizing so that you are putting your cooked pickles into still warm jars. Once the sugar and vinegar solution is boiling, add the onion and cucumber mixture. Stir thoroughly and bring the mixture back to a boil, stirring frequently. Once the mixture has started to boil remove from heat. Ladle into your sterilized jars. This recipe will not leave any extra liquid, so you may have to play with the levels a little to be sure they are filled to 1/4 of an inch below the rim. Once the jars are full, wipe the rims of the jars with a clean damp cloth to make sure there is nothing on the edges to prevent a full seal. Place the lids on the jars and add the screw bands, do not over tighten. Place the filled jars into the water of your processing pot. The filled jars need to be processed for ten minutes at a rolling boil. Do not start timing until the water returns to a boil after you add the jars. Once the processing is finished, remove the jars from the pot and allow them to cool. You should hear the telltale "POP" sound which tells you that you have a strong seal. Always check the lids before storing your preserves. This recipe will make approximately 8 litres of pickles, and in my experience
they regularly stay crisp for two years. Well! If you have completed either the relish or this pickle recipe, hopefully both, you now have a good working knowledge of basic canning. YAY! I knew you could do it. Next week we are going to step things up a notch and deal with the glut of tomatoes many of us have at this time of year. If you are already innundated with luscious tomatoes don't panic. Wash the fruit and cut off any obvious blemishes. Pop the tomatoes into a freezer bag and put them in the freezer until next week. There you have already started! See you tomorrow, have a great day everyone, I realise this post will not apply to everyone who reads this blog. It doesn't even apply to the majority, but it will apply to some and as it is a subject I am passionate about, I felt a need to write about it. This actually started a week ago, I reached out to a mom who had posted a comment about trying to keep it all together while homesteading and homeschooling five kids. As I feel somewhat qualified to answer this question I shared with her some of the thoughts I have. This includes the things I did wrong and how I would change things if I could do it all over again. This entire exercise has me thinking about the good the bad and the ugly of homeschooling, while it is gaining in acceptance and the doors to post secondary schooling are now wide open for homeschoolers; there are still a lot of misconceptions about what homeschooling is and more importantly what it isn't. While I haven't been really active in larger homeschooling circles for a few years now, some of the concerns and questions I have heard are actually close to the same ones I was asking myself all those years ago when we first started our homeschooling life. So, I have put together a sort of open letter to anyone who feels they would like to homeschool, it is lessons learned from many years experience. It is mix of my proudest moments for my children and some of those times when you just wish you could have the moment over again to do right. The best piece of advice I ever had with regard to homeschooling was to breathe deeply and relax. As a very type A personality, this was difficult for me to learn. Over the years I have realised the more relaxed I am, the more relaxed the kids are. When children are young, <9 years old, do not be too concerned with formal curriculum. Children are hard wired to learn, in fact the only way to keep them from learning is to lock them away. The only thing I would do is to introduce a math curriculum, I prefer Singapore math especially for the primary grades. If you are naturally inclined to math, if you see the patterns easily and know you can pass this on to your kids, then you don't even have to do that. Numbers do not come easily to me, so I wanted to give my children a solid base in math. Essentially, this is the key to successful homeschooling, especially homeschooling younger children. Kids at this age are just so curious that they naturally turn almost everything into learning. Know what you strengths and weaknesses are and utilize curriculum to fill in the gap. This stage takes a lot of time on your part, but you can also help yourself by turning regular chores into learning time. Science behind canning, why weeds grow so quickly, filtering and vacuum pressure while cleaning the house. There are ways you can foster the learning without having the steady stream of questions 12 hours a day. If one of the kids was interested in say frog eggs they found in the pond. I would talk with them about it a little, explain what the mass was etc. If I had a book about the topic we could look at that for a few minutes or more depending on how much time I had. If they were still interested we would find age appropriate books during weekly library trip. Having these books around encouraged the kids to start reading. Magazines for kids are also great. If you speak to your librarian you may be able to get some of the back issues of the magazines as they have to cull back issues on a regular basis. Video resources are now much easier to utilize with things like Netflix and live streaming. Another thing we continue to do is to spread our school year over the entire year. So as the kids get older and started more formal curriculum, we just gave ourselves the entire year to finish the 'grade'. This gives you more time on a daily basis. Instead of trying to fit everything into several weeks you have several months. The curriculum I chose for ages 9- 12 was usually unit study type curriculum. Roughly grades 4-7. I had a list of things they should have covered by that time, I would sit down with each child and together we would choose what they were interested in and wanted to learn about for the coming block of school time. Thankfully most unit studies offer different age ranges within the study guides. From age 13+ we switch to more formal curriculum, science, history etc. By formal I mean curriculum with written reports, tests etc. But we still kept to the year long schedule. These are things that worked for us, it is important to remember there is there is no one size fits all curriculum. Each child will learn differently. Many many children go through life with no curriculum at all. (gasp)! Fuelling their imagination, in my opinion, is key to lifelong learning. One of the most important things we can do as homeschooling parents is to foster a love of learning in our children. Learning is not something that starts and stops with a bell. If a love of learning, the tools to think critically and the skill to find and evaluate information were the only things my kids took away from their homeschooling I would be a very happy Mama indeed! There is also no one size fits all method of homeschooling. Find what works for your family, relax and enjoy the chaos! It goes by much to fast. My 'children' are now 25, 23, 21, 20 and 13; and I honestly don't know how it went by so fast. Homeschooling can be a remarkable way to raise your children. It is not for everyone. If you think it would work for your family, explore it. It is a huge commitment, and I don't know of any homeschooling parent who hasn't had the occasional sleepless night worrying. (Those nights become less frequent as you go along.) The rewards are amazing too, you will be mentoring your children as you go through your daily life. They will see how you conduct yourself, they will learn your values and model them. It allows your children to learn at their own pace, and in the learning style that works best for them. While it is a huge time commitment on the surface, it can actually be easier to schedule in family time and extracurricular activities. It gives you freedom to set your own schedule, and when it comes right down to it isn't that one of the reasons we all chose the homesteading lifestyle? As always, if you have any questions the comments are open. Have a great day everyone! See you tomorrow for another How To Tuesday. I thought it was time for a little update on this summer's projects. Remember these guys? Well, they have grown a little... Aren't they just too cute? They are quite settled in on their little piece of the farm. As I posted about 6 weeks ago, one of the major projects here this summer is building a road to allow us access to the back half of the property where our wood lot is. The guys have been hard at work moving fences and shifting things around so the pigs can start the "plowing" of the road. They finally finished and they moved the pigs onto the new road four days ago. So back on June 24th, the area looked like this: After four days of very happy rooting by the porcine division, our soon to be road looks like this: Speaking of the pigs, Patches is due in less than a month, September 5th to be exact. She is in really good shape and having a grand old time rooting around in her new space... As long as those three strands of barbed wire hold up we'll be in great shape. The goats are also enjoying their digs this summer. Between playing on the stump and the rock and peering in to watch the chickens, days are very full indeed. The knotweed battle has taken a decided turn in our favour. Gary has a new toy! He has hit the big patch of knotweed a couple of times now and it seems to be working; apart from an awful smell and a patch of landscape that looks like a scene from Apocalypse Now. Anything has to be better than knotweed. Everything else on the farm is incredibly green. Even though we thinned out a huge amount of weak, smaller trees There is still a great amount of shade cover and as predicted the undergrowth has grown up with the increase in sun. The blue is the roof of the chicken hut, it is approximately 100 feet from the back of the house. The new road runs up just to the left of the hut.
We are about half way through the working season, aka summer. We are slightly behind where we thought we would be at this point, but all in all we are happy with how things are progressing. This comming week will be all hands to the wheel as Reiley and I will be away from the farm all the following week, August19th through the 23rd for the Digby County Exhibition. Reiley is showing Ivan and Pepper on Tuesday afternoon / evening. Also, hopefully, on Wednesday for the championship classes. I will be judging the crafts and sewing categories for 4H on Wednesday, and Digby county 4H has hired me to be the barn manager for Thursday, Friday and Saturday. So if you are in the area please come down to the exhibition and see us and everything else. It is the 135th anniversary of this exhibition and we are looking forward to showing there. Have a great day everyone! Enjoy the super moon tonight, hopefully cloud won't hide it from us. It was cooler today than it has been of late, downright chilly in Digby early this morning. That got me to thinking about fall, and planting garlic. If you want to grow great garlic in our colder climate I recommend planting one or two varieties of hard neck garlic this fall. Now is the time to order your supply of garlic to use as seed and to start getting the beds ready for planting.Garlic is not hard to grow, but is a little fussy about where it likes to be. Well drained soil is a must, garlic planted in wet soil will rot. Make sure the ground you select for garlic beds drains well in spring as that is the time of year when garlic is most sensitive to excess moisture. A loose, soil with a moderate amount of
organic material is ideal. We prefer a milder garlic at our house, we have been growing and saving bulbs of Legacy and Music varieties for several years now. Legacy is an heirloom variety, brought to Canada by German settlers in the 1800's. It is moderately spicy when first harvested, dries and store well and mellows with storage. I find it particularly good for roasting. The picture at the top of this post is some of our Legacy garlic. The other variety we grow is Music. Music produces big bulbs of white garlic. Although Music is a thin skinned variety, many layers of thin skins, it stores exceptionally well when dried immediately after harvesting. Music is a mellow flavoured variety and I prefer it for flavouring sauces. This year we are going to be trying a new variety, Siberian; It is a a spicier variety at harvest but also grows milder with storage. It is supposed to be very hardy, and has a darker burgundy coloured skin. We are trying it here this year because I am slightly worried about the typical freeze thaw cycle of an average winter in Digby county. Regardless of the variety of hard neck variety you choose, now is the time to select a location for your garlic bed. It must be dry, garlic does not do well in wet. Planting of fall garlic should be done about three weeks before ground freeze up. Now in Nova Scotia this could be anywhere from early November to early January. We usually plant the last week of September; but you need to keep an eye on the long range weather forecast. If it is for a prolonged warm spell delay for a few days, if it is going to turn cold plant earlier. You are trying to achieve a period of good root development but you don't want any green to emerge. Now is the perfect time to till you beds and plant a quick growing cover crop which will germinate in 7 - 14 days. We use buckwheat. This will then be worked in as green manure before planting your garlic. Garlic can be planted in single, double, or multi row beds. Ideally you should have 4 - 8 inches between bulbs on all sides. The larger spacing for the elephant varieties. If you want higher yield per square footage, and smaller bulbs and cloves are acceptable then you can stick to the smaller spacing. You can save a portion of your harvest for planting. When choosing bulbs for seed, save the bulbs with the biggest cloves. Individual clove size is of more importance in determining the resulting bulb size than the size of the bulb it came from. In English: Bigger cloves equal bigger bulbs. Small cloves, even from large overall bulbs, will produce smaller bulbs. So save your seed from bulbs which have big cloves. Dry your garlic as soon as it has been picked. Do not separate the bulbs until you are ready to plant the following year. When planting time has arrived, separate the cloves being careful not to damage the cloves. Roots sprout from the bottom of the clove, the not pointy end. When you separate the cloves they should pull cleanly away from the basal plate, the piece where the roots of that bulb grew from, if part of the basal plate comes off with a clove just gently flick or pull it off of the clove. Plant your cloves pointy side up, with the tip being approximately 2 inches below the soil. We have found anywhere between 2 - 3 inches is fine. After you have planted your cloves, you must mulch. This will help protect the cloves from early frosts and slow down the emergence of green shoots if the weather stays warm. The rule of thumb here is about 4 inches. Garlic is one of those plants which suffer heavily from competition, so weeding is imperative.. One note of caution; if you are having a wet year, do not mulch again as garlic will rot quickly. This should get you through the planning and planting of your garlic crop for this year. Remember: hard neck varieties for fall planting, large cloves with a minimum of 4 inches between bulbs, a minimum of two inches of soil between tip of clove and top of soil, in loose well drained soil, with four inches of mulch on top. Next spring we will talk about caring for the growing garlic, to cut or not to cut the scrapes, pest and disease control, watering and then harvesting and preparing the garlic for storage. As always, I'll be happy to answer any questions, just post them in the comments. Have a great day everybody! This last weekend brought another round of how do I start homesteading questions. My answer to this question used to depend upon where the person lived, and their answers to the questions I would invariably ask. More and more however, my answer is becoming .... just start. People vary in their response to this, anywhere from a blank stare to an angry glare. I even had one person roll their eyes at me.
I realise that on the surface this sounds a little glib but the point I am trying to make is that most of the people who end up asking this question get bogged down in planning and replanning, and re-replanning. They spend YEARS looking for the perfect place, or animal, or time. If this sounds like you, if you have a binder full of information and a head full of indecision .... NOW is the time! There is never the perfect time or place, unless you have just won the lottery, then I'm sure a real estate agent could find it for you. My point is start SOMETHING. If you live in a small apartment grow herbs on your windowsill, learn to preserve food, buy a dehydrator. Learn to knit or sew. What ever homesteading means to you, pick one skill that you could take on right now and learn to do that skill. You don't need to learn everything at once. Choose a skill and learn, get comfortable with that and then add a new one. You did not learn to add, multiply, and solve quadratic equations all at the same time. Take small steps, and before you know it you are miles from where you started. I know a young woman who wanted to grow vegetables. She had been born and raised in the city, but she wanted to have a garden and sell vegetables. She was working in a small town here in Nova Scotia and lived in a small apartment in town. She had met me through work and I happened to mention something about our pigs. That was how the conversation started. This was before we had a market garden but I knew a few vendors at our farmers market so I said if this was something she really wanted to do she might be able to find a way to learn from these farmers. She was in her first job since graduating from university, and was working long hours to pay for her student loans and living expenses, so she wasn't sure how she was going to make this work. I introduced her to three different farmers, she began buying her vegetables from them, she learned that if she came to the market a little later in the morning, things were less busy and the farmers had time to talk. A couple of weeks after I had introduced her, she had figured out a plan. She approached each of the farmers and asked if they would be willing to teach her about growing and running a market garden in exchange for free labour. Two of the farmers agreed. One farmer had trouble finding people to work the markets. Surprisingly people don't like getting up at the crack of dawn on Saturday. So she began getting up bright and early on Saturday, she came to the market and worked at the market stand for a local farmer, she helped set up the stall and display the produce. She talked to customers, learned what people were looking for. She spoke with the farmer about the difficulties he faced in getting product to market and a host of other things. When the market was over for the day, she would help the first farmer break down the stall. She would then load her bicycle into the second farmer's truck. She would drive with him to his farm and spend the rest of the day working on his farm before cycling back home. If the weather was good she would also bike out to the farm on Sunday and work with the crops again. While this may sound exhausting, you will soon find out if market gardening is something you will truly enjoy. This young lady continued this schedule for the rest of that summer. She obviously made an impression as the second farmer drove her back and forth the following spring so she could help in the greenhouse, and learn that side of the business. She continued to work for the second farmer the next summer, trading work for a CSA share and some cash.Last winter she was transferred to another town. She decided she had enough knowledge to begin gardening, so she made some inquiries and rented a garden plot from a local farmer this spring and is now growing her own vegetables. The last time I heard from her was last month, she is thinking about buying a 2 acre piece of land and starting a small market garden. So, as I said, there is never a perfect time to start anything. I am sure plenty of people told Lindsey that she would have to wait until she paid down her student loan or got married or some other well intentioned advise. My point is that sometimes you have to get creative, there may be no obvious avenue to begin your journey, but where other is a will there is a way. The internet has made it possible to have in depth knowledge of every skill you could imagine at your fingertips. It allows you to connect with like minded people from near and far. After all it is how you came to be reading this. Decide on a skill, learn it. Choose another, and repeat. You have now started homesteading. It may not look how you thought it would, but you have started a base to build on. Hope this has some of you thinking. Have a great day everyone. In an effort to start giving this blog a little structure, today I am starting a weekly feature .... presenting ... The first How To Tuesday! Every Tuesday I am going to feature a necessary homesteading skill and break it down for you, step by step, complete with pictures. Since this is preserving season we are going to start with making my amazing zucchini relish. I know, man cannot live on relish alone, even though it is a great relish. I have chosen this recipe for a few reasons, firstly it is a small batch recipe. You don't need a lot of ingredients or even lots of fancy canning equipment. Second, the acidity in this recipe is such that there is very little chance of having an issue with bacteria contamination. Provided you follow the recipe and you get a good seal with your lids. So let's get started. For this recipe you will need: 5 cups of finely chopped zucchini, approximately 5 small zucchini, I like to make this relish colourful so I use green and yellow 1 1/2 cups of finely chopped onions, approximately 2 medium or 3 small, you can use white or red onions 1 1/2 cups finely chopped sweet peppers, approximately 2 medium sized, can be any colour 1/4 cup of pickling or coarse salt cold water 1 3/4 cup of sugar 1 1/2 cups white vinegar 1/4 cup water 1 teaspoon each celery seed and ground tumeric 1/2 teaspoon of mustard seed You will need approximately 6 - 250 ml (half pint) canning jars with fresh, never used, lids and rings. A sharp knife or food processor to chop your vegetables to a fine chop. A measuring cup and a cutting board.. A non-metal bowl large enough to hold all the chopped ingredients, a colander, a pot to cook the relish in and a pot to process the newly filled jars in. A ladle and a canning funnel make the job a bit easier. Note: it is helpful to have a way to keep the full jars directly off the pot bottom during processing, this tends to lesson the chances of jars splitting during processing. You can buy one of those fancy jar holder / lifter racks. (Heck you can buy mine because I never use it) What I generally use is a round wire rack that Gary modified to fit my canning pot. I use this because the fancy lifter rack only allows me to process five jars at a time, while I can do eight with the rack. I will show you a different option today if you don't have either of the above. As always, rinse off your vegetables and cut off any noticable skin blemishes. Cut the ends off of the zucchini. If you are buying zucchinni you can tell if they are fresh by looking at the stem end. A fresh zucchini will have a straight moist end where it was cut from the stem. After a few days this will start to look puckered and leathery. Only cut the ends off of a couple of zucchini at a time, you are looking for 5 cups of chopped so measure as you go. When you are processing vegetables, especially to a fine chop, it is better to chill them first. The structure tends to hold up better, especially for water heavy things like peppers and onions. Remember we are going for a fine dice, not mush. Place the chooped vegetables in your non metal bowl. Now sprinkle your 1/4 cup of pickling or coarse salt over you veg. Now mix thoroughly. When everything is well blended add just enough cold water to cover everything. Now you need to cover your bowl, I just put a plate on top, and let it sit for three hours at room temperature. While you are waiting, it is a good time to measure out your sugar, vinegar and spices. Place them directly in the pot you will be using to cook the relish. Set up your colander in the sink. Now you can relax with a good cup of tea, or carry on with the 500 other things you have to do. Earlier I mentioned that it is better to prevent your full jars from sitting directly on the pot bottom when they are in the processing stage. I use a stainless steel cake rack in my large canning pot You can see it's a perfect fit. However today I don't need the big pot so I will just be using one of my large stock pots/ To keep the jars from sitting on the bottom of the pot I will use some extra Wide mouth jar rings that I have Just place them in the bottom of the pot, flat side up and fill the pot with water. O.K. When there is about 1/2 an hour left for your mix to sit, wash out the jars you will be using, and bring to boil the water you will be using to steralize your jars and process the relish in. When your 3 hour time is up, pour the mix into your colander. Let it drain, and rinse thoroughly with cold water. You will lose some small particles through the colander; don't worry it's fine. Now is when things all start to happen at once. First, turn on the heat for your sugar vinegar mixture. Not too high as you don't want to scorch the sugar. Stir well and frequently to avoid this. You want to bring this mix to a boil, then reduce the heat and simmer for 3 minutes. The steam from this will effectively clear your sinuses from now to Christmas.... don't say I didn't warn you. While you are doing this, add your jars to the boiling water. This is to sterilize the jars. They don't need to stay in long but they can. You want to time this so that the empty jars are out of the water, but still warm when you are ready to add the relish to the jars. So you can put them in now and take them out when you bring the relish to a boil. After the vinegar mixture has simmered for three minutes, add the well drained vegetable mixture to the pot. You now need to stir this well, bring the mix back up to a boil stirring occasionally. Once it has reached a boil, turn down the heat and let simmer for 10 minutes. This is a good time to remove the jars from the steralizing pot. There are various schools of thought on the lids. Some say put them in with the jars, some say just use hot, not boiling water. I fall in the middle. I take each lid individually and dunk it in the hot water after I remove the jars. I hold them in a pair of regular tongs. Ok. We should have relish simmering, jars sitting close to the stove steaming and lids inside up ready to go on the jars. Once the relish has simmered for the required 10 minutes, remove it from the heat, you are ready to start filling jars. I use a canning funnel. It is a wide mouth jar funnel that makes filling the jars so much easier. Fill the jars to 1/4 of an inch from the top. You will have to play with the levels a little here. You are looking for a good mix of liquid and solid. I use a combination of a large ladle and a slotted spoon to make sure there is enough liquid in each jar. Once all the jars are full, take a clean damp cloth and wipe the rims. You want to remove anything from the edge that will prevent the lid from making a good seal. Place the lids seal side down on top of the jars, screw the rings onto the jars. Do not put on really tight. If you screw the rings too tight, air cannot escape from the jar during processing, you will then not get a vacum effect thereby no air tight seal. After you have tightened the lids place the full jars of relish into the pot of water for processing. The jars have to boil for 10 minutes. Do not start timing until after the water returns to a good rolling boil. This is crucial to getting a good seal and therefore a safe product. After 10 minutes, turn off the heat and remove the jars from the water. Place them where they can sit until cool. You should start hearing that distinctive 'POP' sound. Try and keep count, there should be 1 pop per jar. You can also check for a good seal by making the sure lid has a slight depression. This indicates a good seal. TADA! Your relish is is now done. Once the jars have cooled down, store them in a cool dry place. They will keep for at least two years. That said, always inspect the jars before you open them, the lid should be difficult to remove the first time. Once you have used the lids they should not be used again for anything that requires a seal. You can use them to store other things in your jars. So you can keep them or not. The rings are good for many uses. As are the jars, unless you have a chip on the top rim of the jar. If this occurs, you will not be able to get a seal and you should repurpose or toss the jars. I hope you have found this helpful, if there are specific homesteading skills you would like to see on How To Tuesday just let me know in the comments. In the next few weeks I thought about skills like trimming goats hooves, preserving different parts of the harvest planting the fall garlic, putting together a herbal based first aid kit, one for people and one for your four legged people. It will soon be 'pig day' here which is what we call the day we have all hands on deck for butchering our early fall pig. There will be chickens to process in a few weeks time so I could cover that also.
I am really looking for direction from you, if there are skills you want to learn, let me know and we will do our best to feature them for you! Have a great day everyone. Before I get into today's post, I need to make something very clear.
I am not a financial planner. I am not an accountant. I have no professional financial training at all. I am simply going to tell you what we did to become debt free, and another plan that many people I know have used to achieve the same outcome. Like many couples, money was an issue at times, and the less we had the bigger an issue it was. After Gary's accident we had to completely re-evaluate how we thought about money. We tried strict budgets and using cash only. Both helped to a certain extent, but it wasn't until I found a copy of Your Money or Your Life by Joe Domingaz and Vicki Robin, at our local library and began going through the process set down in the book that I began to come to terms with money and why we felt deprived by the loss. After going through this process and talking with friends and family who have been worried about money I have come to realize that getting rid of debt is a process similar to losing weight. In the same way that your weight loss solution will depend upon why you are over weight in the first place, or your relationship to food; your solution to getting out of debt will depend upon your relationship with money. In theory, losing weight is easy. Eat fewer calories than you burn; getting rid of debt is just as simple, spend less than you bring in every month. Yeah, right. Anyone who has ever tried to lose weight or get out of debt will just look at you like you have two heads if you tell them that little tidbit of information. In order to get out of debt, and stay out of debt, you need to know what caused the problem in the first place. Knowing what I know now, I can tell you without a shred of a doubt that even if Gary had not been hurt, if we had just carried on the way we were planning, at some point we would have faced the same trouble. We were on a road to financial disaster even before everything blew up in our face. The problem with strict budgets and weekly cash allowances is that for most people, they leave you feeling deprived. As with such diets, you will save money and pay down some debt but unless you get to the heart of the matter you will find yourself right back where you started at some point. Your Money or Your Life helped us to understand our relationship with money and how we had been using money in our lives. Once we were going through the process as outlined, we began to understand that we were using money to make us feel like we were are part of our community. Money, and the things we purchased with it, in our world was equated with power and pecking order. Social standing as it were. Y.M.O.Y.L helped yes to really clarify what was important to us and what wasn't. We were then able to understand how best to use the resources we did have to shift everything around so we did not feel deprived. I can say to you that getting rid of debt, and understanding how we were using money is the only reason we are here on this property, homesteading and happy. If we had not changed our relationship to money we would have ended up in debt again, and probably divorce court to boot. The program outlined in the book is not difficult, it involves nine exercises and some of them are time consuming but I promise you it will change how you live your life. The other program I referred to has become popular in the past few years. it is called the debt snowball and the term seems to be associated with a fellow named Dave Ramsey. This outlines a debt repayment program based on paying off the smallest debt first and then rolling that payment into the next smallest .. etc. When we were paying our debt off we switched it around a little and paid off the highest interest debt first. Fortunately we had only one credit card so this approach worked quite well for us. I recommend you check both out both resources.. Beware of people trying to sell you things to help get you out of debt, just walk away. If you are in serious trouble and thinking of seeing a CREDIT COUNCILLOR to negotiate a payment plan, make sure you research first. There are hidden fees, and it does almost as much damage to your credit as a bankruptcy. Hopefully I have given you something to think about, and some tools to start the ball rolling. I have seen so many people start homesteads, get into trouble quickly, and then end up losing everything....all because of debt. I know it can be overwhelming, you will want to give up, but stick with it. Just keep yo eye on what you life will be like and how much freedom you will have. I promise you it is worth it! Have a great day everyone! Last week I had a little rant about some of the things I love about homesteading and certain aspects of our 'global economy' which annoy me. We meet a lot of people who want to live the type of life we do. Invariably the questions turn to how can you afford to do this? I have alluded to Gary's health throughout this blog, but I have never actually explained the story behind it, as the details are vital to how we manage to homestead he has given me permission to tell the story.
In the spring of 2002 we were living in Ontario, managing a small hog farm. Reiley was just about to celebrate his first birthday and I had just completed the second year of training for my RN diploma. We were happy, the kids were doing well the only point of discontent was that we missed 'home'. (I have rarely met a Maritimer outside of the maritime who did not continue to refer the maritime as home.) As Gary was one of the best in Canada at what he did, we knew that there were very few farms east of Ontario that could afford to pay him what he was making at our current job, and more importantly for Gary, keep his interest long term. Gary had become known as a fixer; someone who came into a farm that, for various reasons was in trouble. He had a skill set of knowledge, drive and work ethic that allowed him to problem solve, examine the operation and discover why it was no longer profitable. He would formulate the plan to bring the farm back to profitability and also had the work ethic to then set the plan in motion. Sometimes this took a few months sometimes a year or two. Once the farm was running along where Gary thought it should he would get bored. The challenge was gone, it would be time to move on. While this led to a bit of a nomadic lifestyle, it was interesting. While I knew much less about the business when I first met Gary, he taught me the basics and I became his sounding board. We discussed his 'projects' and by the time our daughter Bethany started school I understood the industry as well as Gary. The farm we were running in spring of 2002 had been a startup We had been hired by a businessman from Toronto in 1995 to start a hog farm just outside of Pickering Ontario. We had the farm up and running in that location. Due to urban sprawl, in 1998 we moved the farm to Little Britain, a small community between Port Perry and Lindsay. By this time, the oldest four kids were all in school, and we had decided to stay where we were. The nature of the farm we were running was such that it kept Gary on his toes and held his interest. I had started training as an RN, something I had always wanted to do. Our favourite surprise ever, Reiley, was about to turn 1. We had a great co. unity of friends, things were looking settled. Then on Easter Sunday 2002 Gary had a call from a farm in New Brunswick; could he come for a job interview? It was our chance to come home. We went for the interview, Gary then flew back to New Brunswick a couple of weeks later for a one week trial, he was offered the job. When he flew back home we talked it over, there were many disadvantages to the move. He would be taking a pay cut for the first little while, his salary was dependent upon performance bonuses, it would mean uprooting the kids and I would have to switch from an RN diploma program to a bachelors degree. None of this was insurmountable, We knew meeting the performance targets was possible, kids are resilient, and with a GPA of 3.95 I knew I could complete the degree program easily. All or this was no obstacle in the face of that magic word....'home'. So, on Mother's day weekend 2002 we moved to New Brunswick. Everything progressed as planned for the first year. We settled in, Gary met the targets and in early spring of 2003 negotiated a new contract that with combined salary and benefits put his annual income just in the 6 figures bracket. I had taken the first year off from university to help the kids adjust, but had already been in contact with UNB and transferring my credits would be no problem. We were living the typical upper middle class lifestyle; car loans, gold card, soccer teams, music lessons, gymnastics and pizza night. We had some token nods to our roots, we kept a small vegetable garden, I made some preserves and knit some mittens and sweaters for the kids, but essentially we were fully integrated into the North American consumer lifestyle. Then suddenly, everything changed. On June 19th 2003, just two days before his 36th birthday, while attempting to rescue several weaner pigs which had fallen through a hatch in the floor, Gary suffered a hydrogen sulfide knock down event. I entered the barn several minutes after he lost consciousness, his herdsman, the only other person in the barn, had attempted to remove him but she could not lift him from where he was. I placed the 911 call and kept them informed until the emergency responders arrived. Gary was removed from the manure storage area and was unresponsive but combative. He was rushed to the ER at the local hospital where he was assessed placed in a medically induced coma, intubated, catheterised, given detox kits for hydrogen sulfide, methane, and ammonia. He was stabilized with regard to cardiac function and transported with attending physician and RN accompanying, to the nearest trauma centre 30 miles away. It has been just over 11 years since this occurred, and I still go into nurse brain when I have to recount that day. The ambulance arrived at the trauma centre shortly after I did as I was sent ahead to complete the paperwork. Gary was immediately admitted to the ICU. While his heart was strong, he remained in a medically induced coma, and would not be taken off the drugs until at least the next day. He was given another set of detox kits. I made the decision to go home to the kids and come back early in the morning. I spent the night trying to sleep but I just remember sitting beside the phone waiting for it to ring and planning Gary's funeral. Well, I didn't need to worry about the funeral. Gary was released from the ICU to my care three days later. He spent the next two and a half months recovering before he returned to work. By the end of September he was back to working full time. While he was good at hiding his symptoms from his employer I knew he wasn't right. He could hide the amount of pain he was in, but he couldn't hide his memory problems, his inability to concentrate and the reaction he was having to being in the barn environment every day. We went to see specialists, psychologist, neurologist. He had CT scans and EEG's. For a man who detests hospitals, and has always treated illness as something to be overcome by shear stubbornness, he endured this with little complaint. The verdict was always the same, something was going on but they didn't know what. There was nothing wrong anatomically, but his wiring had been disrupted. They could give him pain killers, which he didn't want, but other than that they offered little hope. As I said he became adept at hiding symptoms. He increasingly began to rely on the boys to help him. When the boys had finished their schoolwork for the day they were allowed to go to the barn. Jason in particular loved being in the barn. He had celebrated his 9th birthday a month before the accident and he knew how to operate every system in that barn, and where each 'room' of pigs was in the growth cycle. We continued this way for almost two years. Then early in 2005 Gary was given a promotion. Until; then he had been in charge of the 10,000 head feeder barn. Now he was being put in charge of the day to day operation of the entire farm. The commercial and purebred breeding program, the finishing operation ....everything. The irony was this is what he had been working for since he graduated from N.S.A.C. in 1998. We talked it over, he wanted to try. At this point he was still not telling me all the trouble he was having, I think that with his short term memory issues even he didn't know how bad everything was. The promotion involved a move to the "home farm" an hour away. We moved over in the summer. What we hadn't counted on was the change in environment. While in his barn, Gary had come to rely on environment triggers to help him. Just his familiarity with the layout had given him cues on what had to be done and an order to his day. Now he had to learn 4 new barns, feeding systems tons of new paperwork and supervise five staff. he started to flail almost immediately. Still he maintained the facade. He had enough knowledge locked up in is head to keep it going. Again, the boys helped, I think I had the only 11 and 12 year old boys around that could breed pigs via A.I.. By Christmas 2005 I had face the fact that Gary was not going to be able to continue, he was starting to face it too. For the first time in his life Gary took vacation time. I began paying down debt like crazy and trying to put together a plan for "after". By March of 2006 it was over, the career Gary had worked so hard to build, the life we had imagined for our kids had just evaporated. Gary had gone through several phases of testing and was put on short term wage replacement through Workers comp. He underwent a grueling two day vocational assessment. Within weeks he was placed on long term disability by NB Workers Comp. We had to move as our house had been included in Gary's salary package. We decided to come back to NS, specifically to the Valley to be close to my dad and we thought it would be an easier adjustment for the kids to remain in a predominately agricultural community. Between May of 2006 and early 2010 things were not great. We managed to avoid bankruptcy, just By the time the dust had settled, and Workers Comp. had finished clawing back the CPP disability benefits our annual income was just over 33% of what it had been before the accident.. For a while I tried to protect Gary.by keeping him away from barns of any kind. Another result of the the injury is a sensitivity to many pollutants. Exhaust gasses, off gassing plastics, paints, varnishes synthetic fragrances of any kind will set him back. He can not go shopping. Fluorescent lights and off gassing fumes make him incredibly ill. Cleaning supplies, laundry detergents; you name it, he is incredibly sensitive to it. So, I reasoned that exposure to manure gas, the very thing had had first triggered this should be avoided at all costs. This was not going to work. In my haste to protect him, I was trying to suppress who he, we were at heart. We are a farm family. We worked in agriculture because we love it, we love animals and taking care of them, we love the independence of growing our food and providing for ourselves. This realization finally came to me in the spring of 2010, I went out and bought Gary a piglet. So began the homesteading journey that has brought us here. To these 20 acres, this blog and to sharing our knowledge and our journey with you. I have shared this with you for one very simple reason; We could not be living this life homesteading unless we had learned to live without debt. Unfortunately the way we have learned to do that was a rather harsh life lesson. We often meet people who want to live this life style, but what we hear most often is, "we can't afford it". I am hear to tell you that you can live on a lot less than you think you can and be a lot happier than you are now. The only debt we carry is our mortgage, and our mortgage is less than many people spend on their monthly car payment. Everything we do here is done on a pay as you go basis. I know this goes against everything advertisers, society and even our government has told you, but debt, especially consumer debt, is neither necessary nor acceptable. We have been sold a myth that taking on debt is normal, why wait for what you want? You can have it now! We can give you low interest, spread the payments out over five years, you can upgrade to leather, it's only an extra $30 a month! One of the most disturbing memories I have surrounding the 9-11 bombings is the image of George Bush telling a still shocked and grieving continent to "go out and shop" ??? Seriously? We have become a society whose economic stability is based on a premise of cheap disposable goods. If you want to homestead and you don't think you can afford to join me tomorrow. I am going to share with you how we got out of debt, and a couple of different strategies that could help you get to this life quicker than you may have ever imagined. Have a great day everyone! |
A 4-H Family
Lives Here
Categories
All
Archives
December 2014
|